Mautic is one of the most popular open source marketing automation solutions on the market.
This guide provides insights into how a basic integration between Mautic and Tape can be leveraged to sync contacts between both systems and leverage the strength of both solutions combined.
We will leverage the powerful Mautic API and webhooks to integrate seamlessly using Tape workflow automations. Basic code snippets are already provided as a head start.
The following preliminary requirements need to be met in order to get started with this guide:
- An existing Mautic instance that is publicly available via URL
- API access to that Mautic instance using Base Auth (needs to be enabled)
- A Tape organization (can be created for free on the fly in the next steps).
1) Get started
Clone our demo workspace via this URL by clicking Duplicate on the top right:
Mautic Showcase Sharelink. The workspace will be added to your Tape organization if you are already signed up, otherwise a new one will be created for you. Simply follow the instructions during signup.
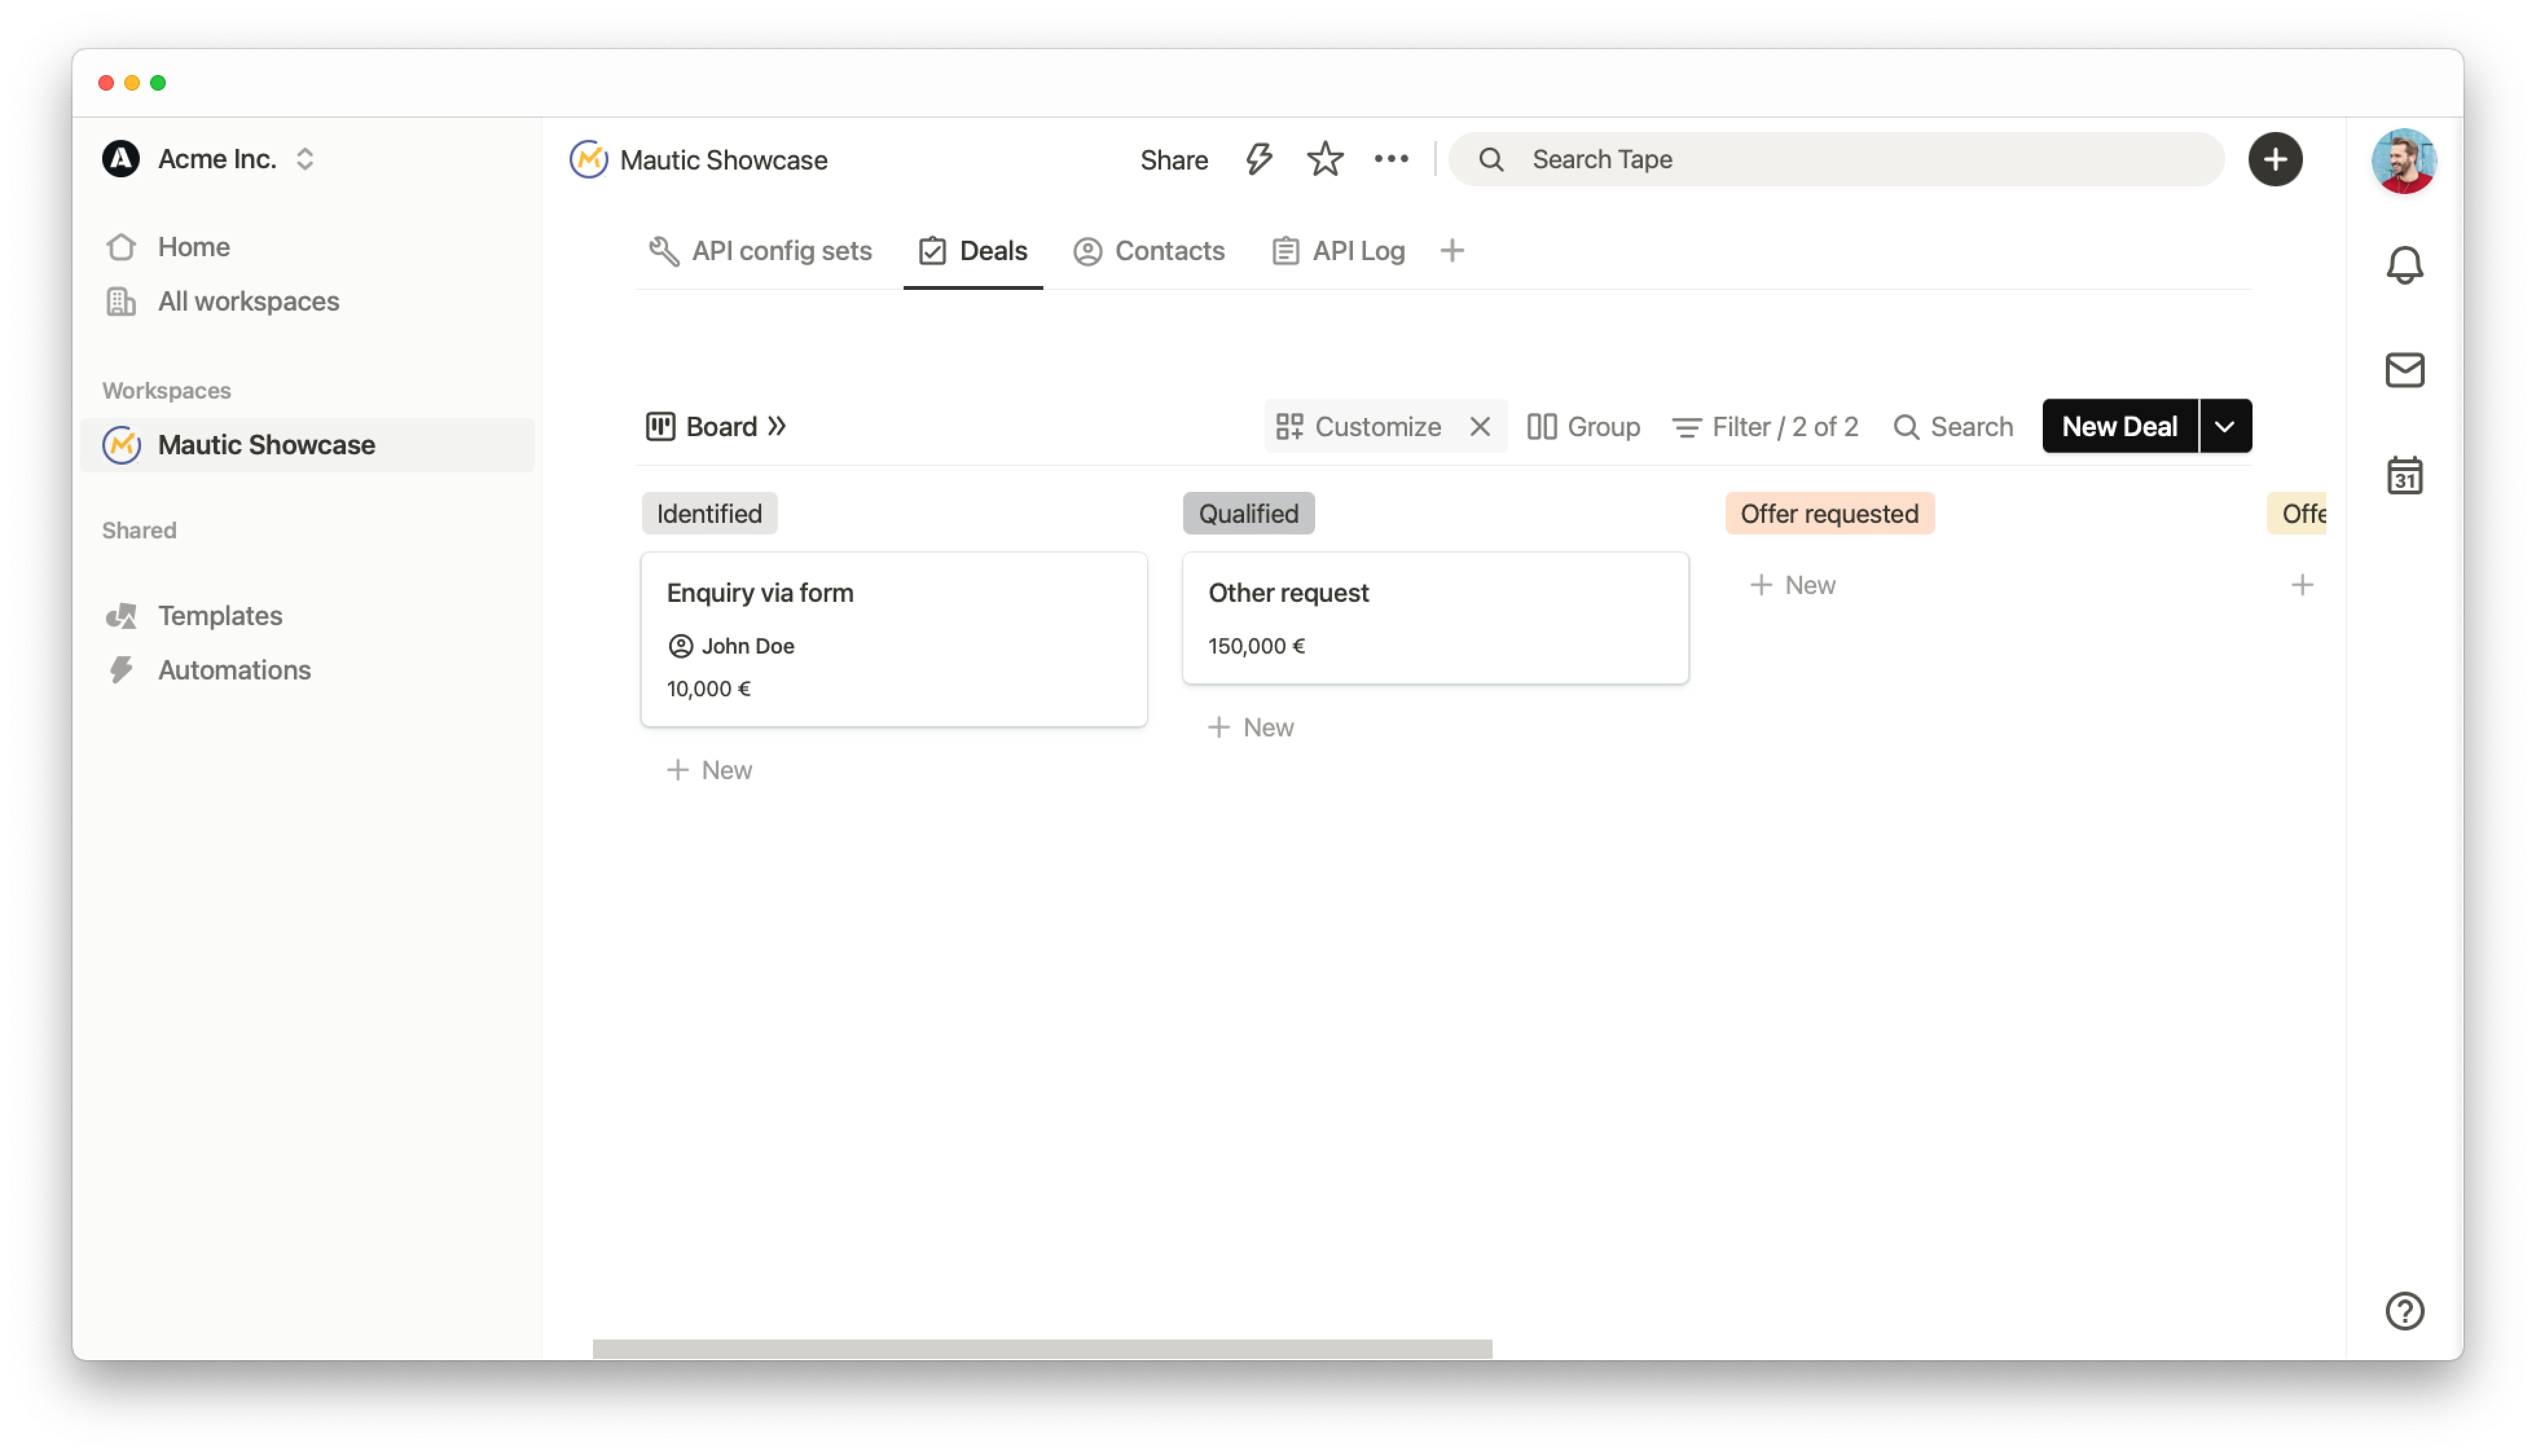
After duplicating, you will be logged into your own Tape organization and see a workspace similar to this one:
2) Sync data from Tape to Mautic
Once this step is done, Tape has the ability to sync data with the API of your Mautic instance. Changes in Tape, such as data creation or updates, are synced to Mautic.
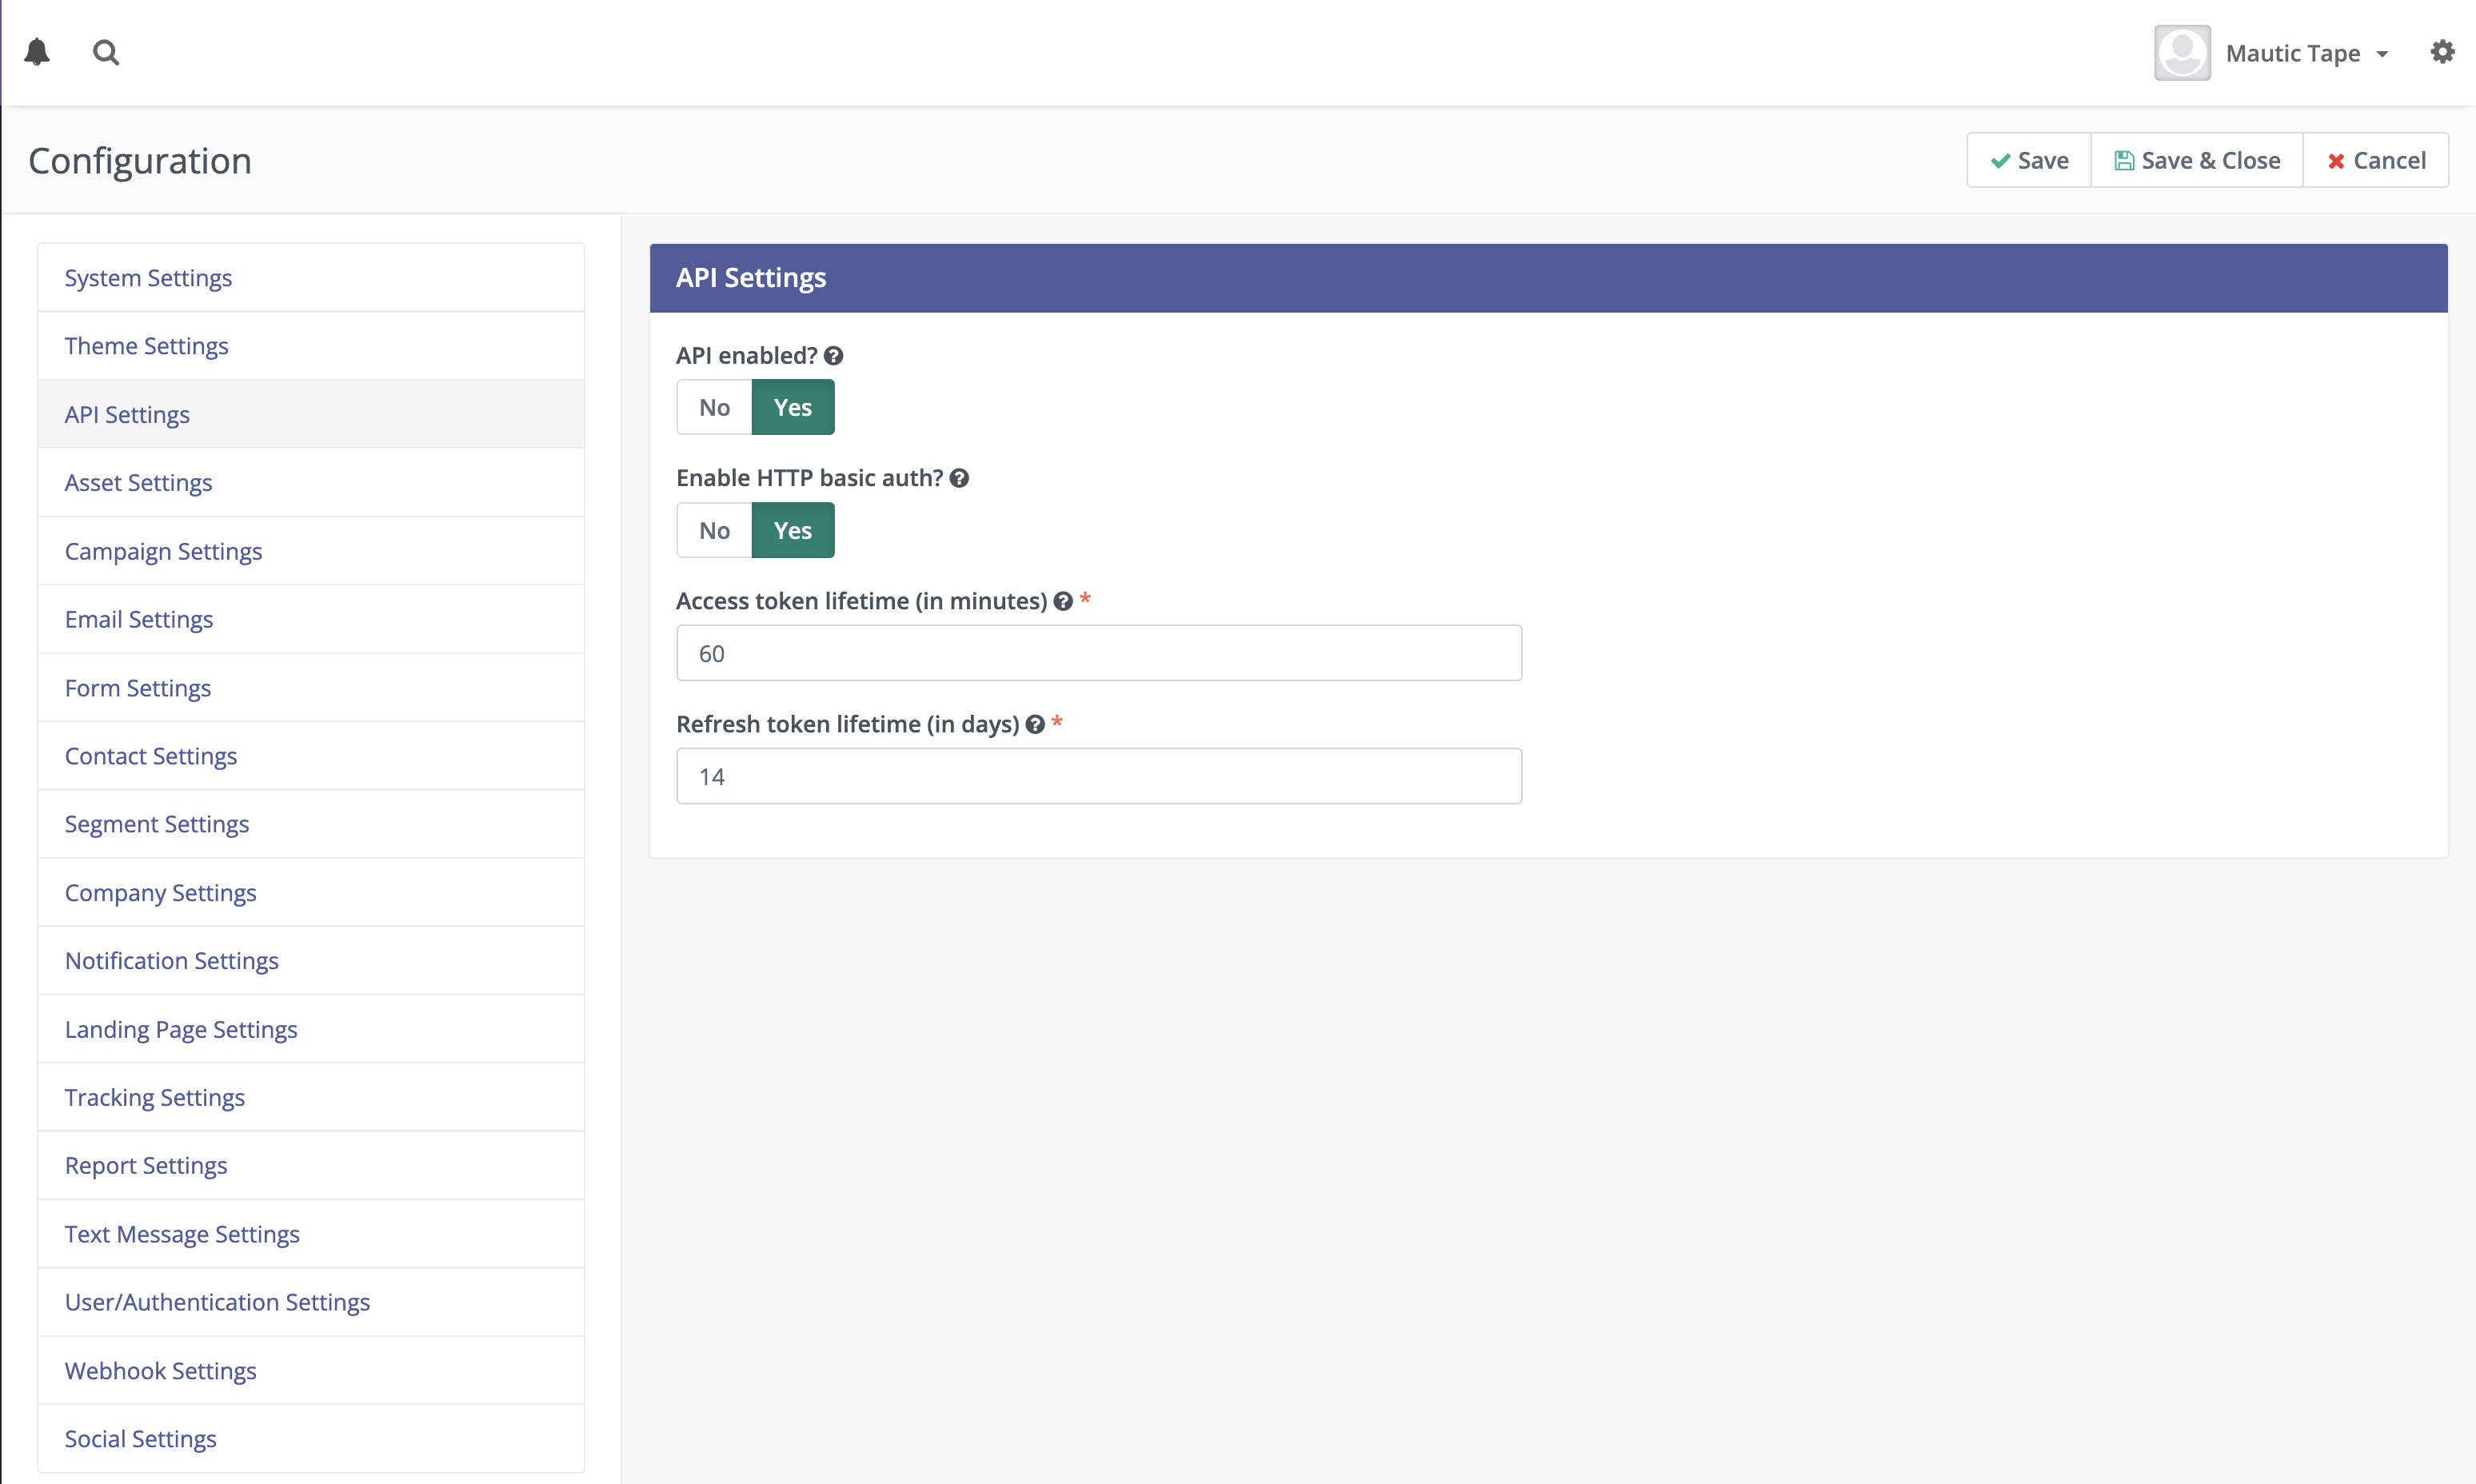
At this point, also double check that your Mautic instance has its API enabled, because the following steps will not work otherwise. Check your Mautic settings and make sure “API” is enabled:
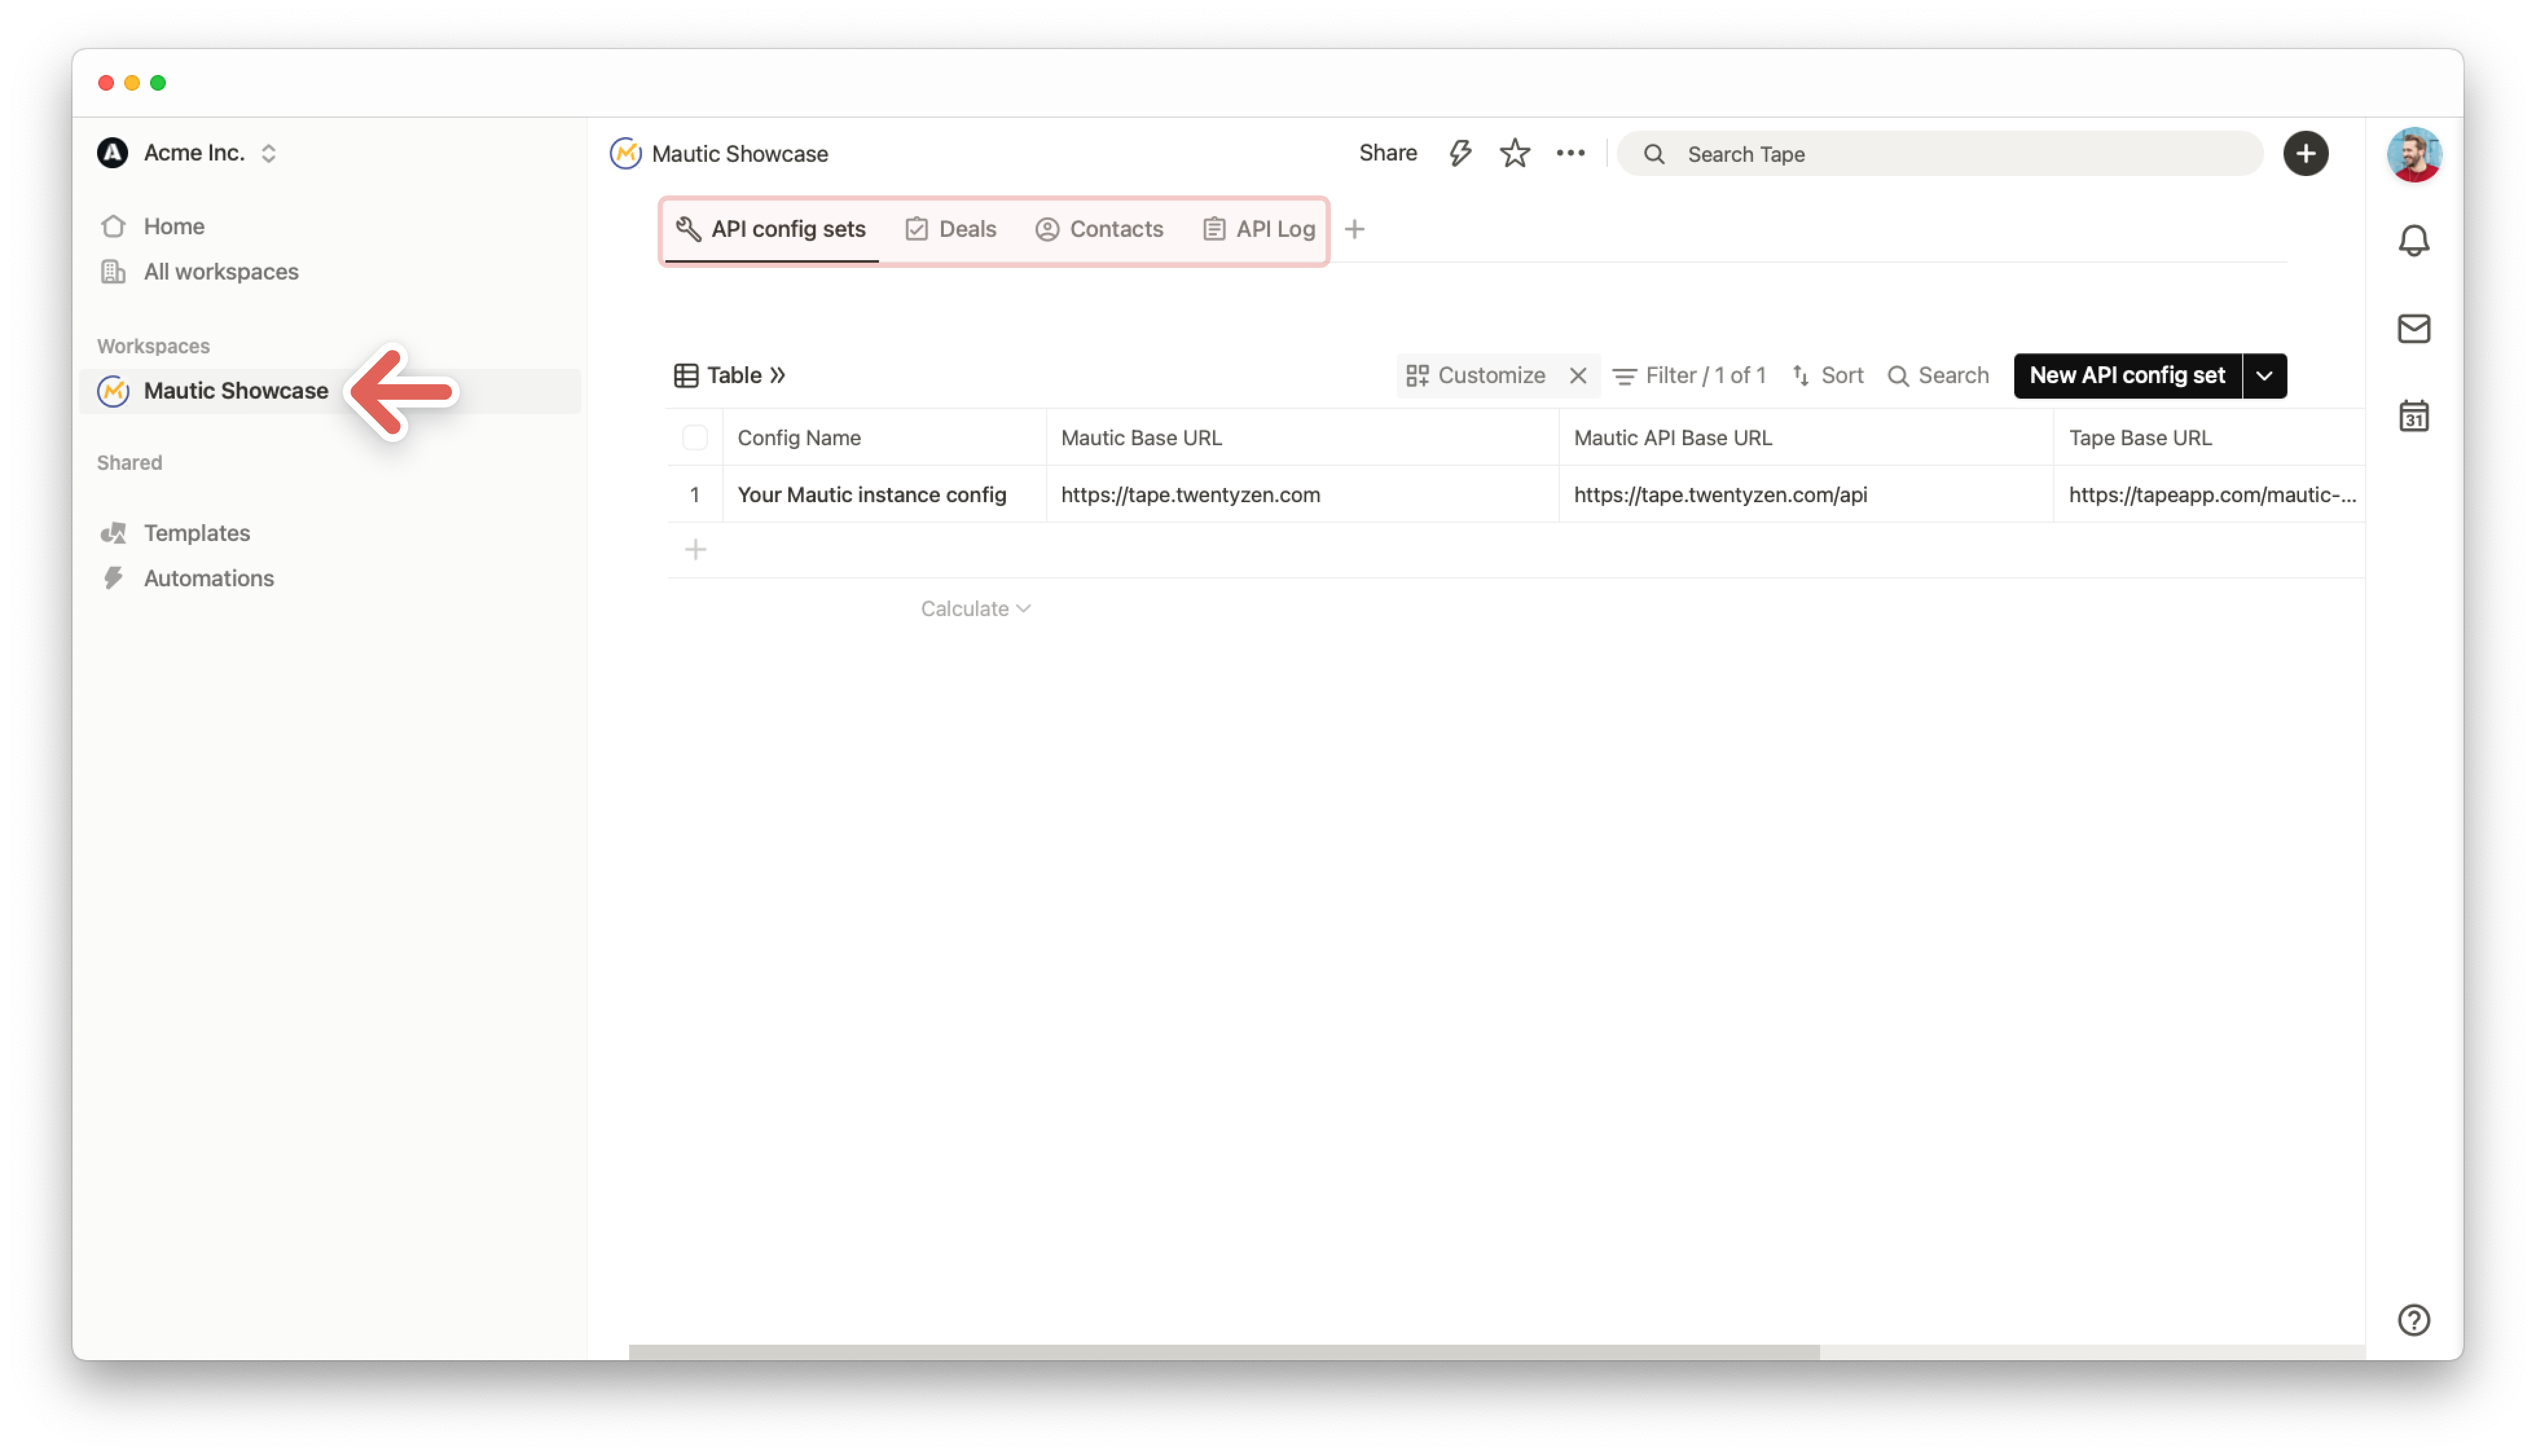
Now back in Tape, Open the API config sets app and click on Your Mautic instance config.
You see a couple of input fields, that require your individual setup.
- Mautic Base URL: This is the URL you use to visit your Mautic instance in the browser.
-
Mautic API Base URL: This is the Mautic API URL. Usually, this is the Mautic base URL plus the
/apisuffix. - Mautic API Basic Auth Token: Your Basic Authentication token for your Mautic instance. You need your Mautic credentials for that, refer to the Mautic documentation for more info. For base-64 encoding, you may use an online encoder or your tool of choice.
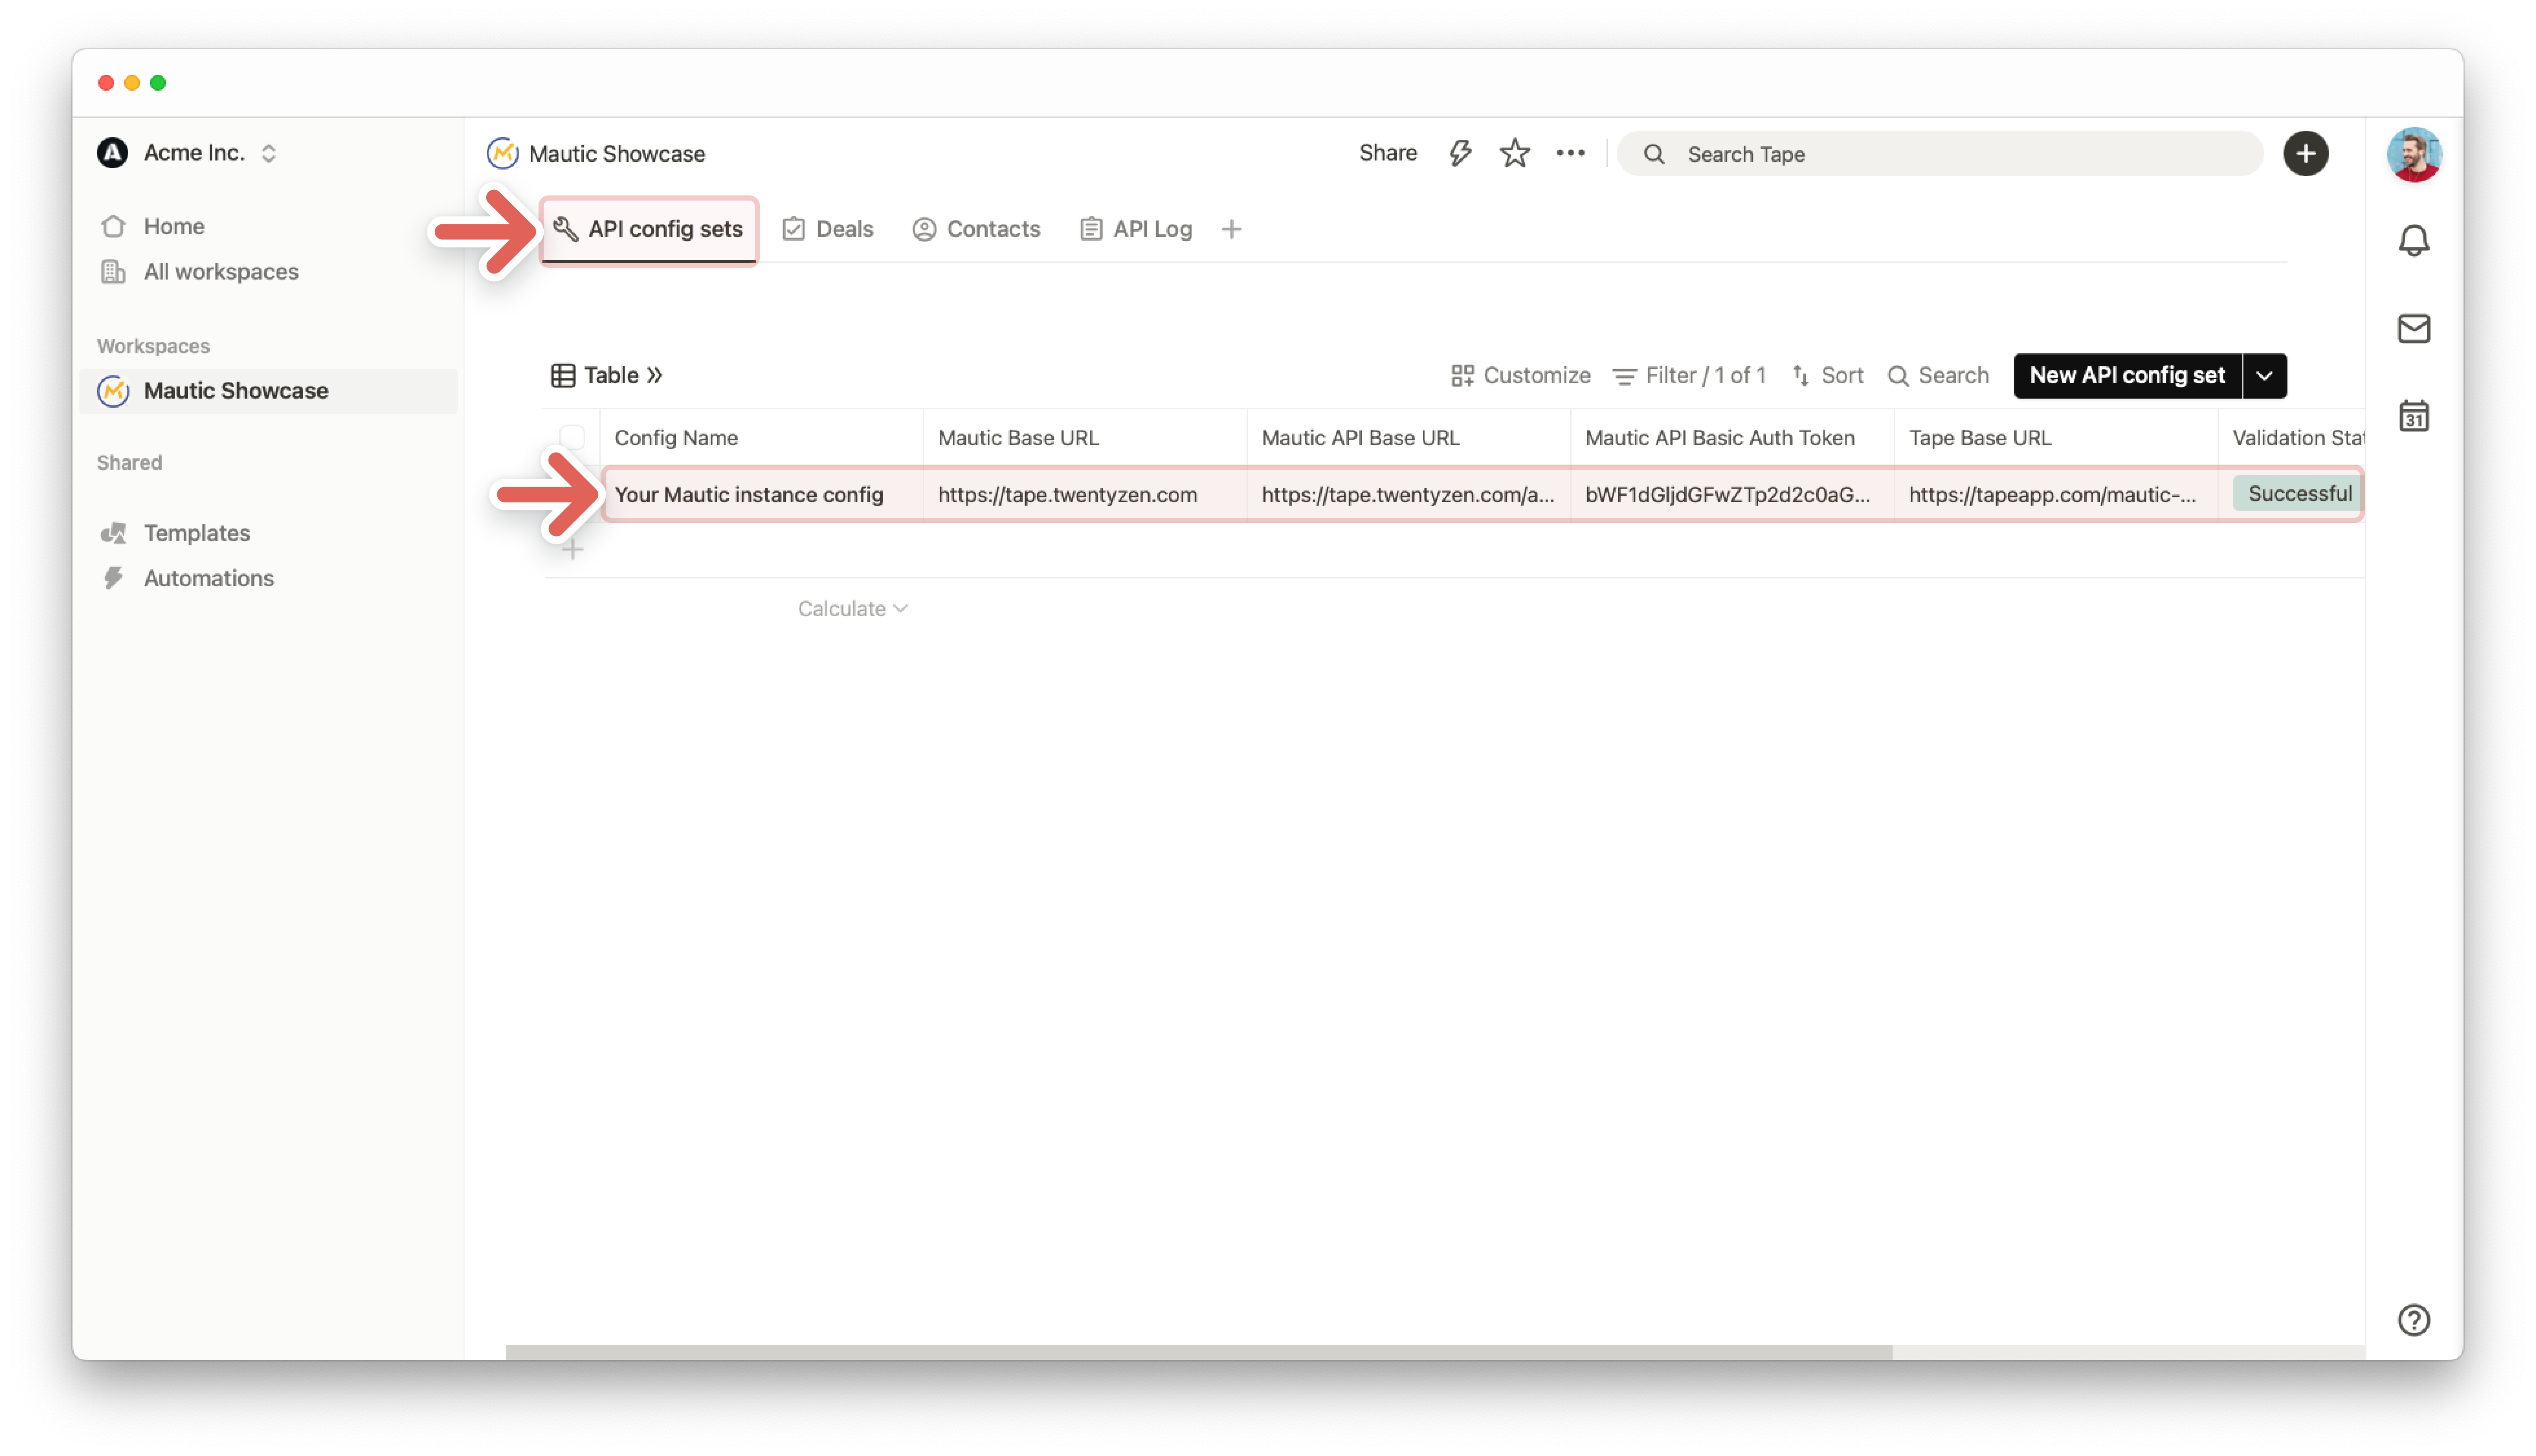
The screenshot shows our demo instance parameter, adjust those to match your Mautic instance and be sure to include your auth token for basic authentication:
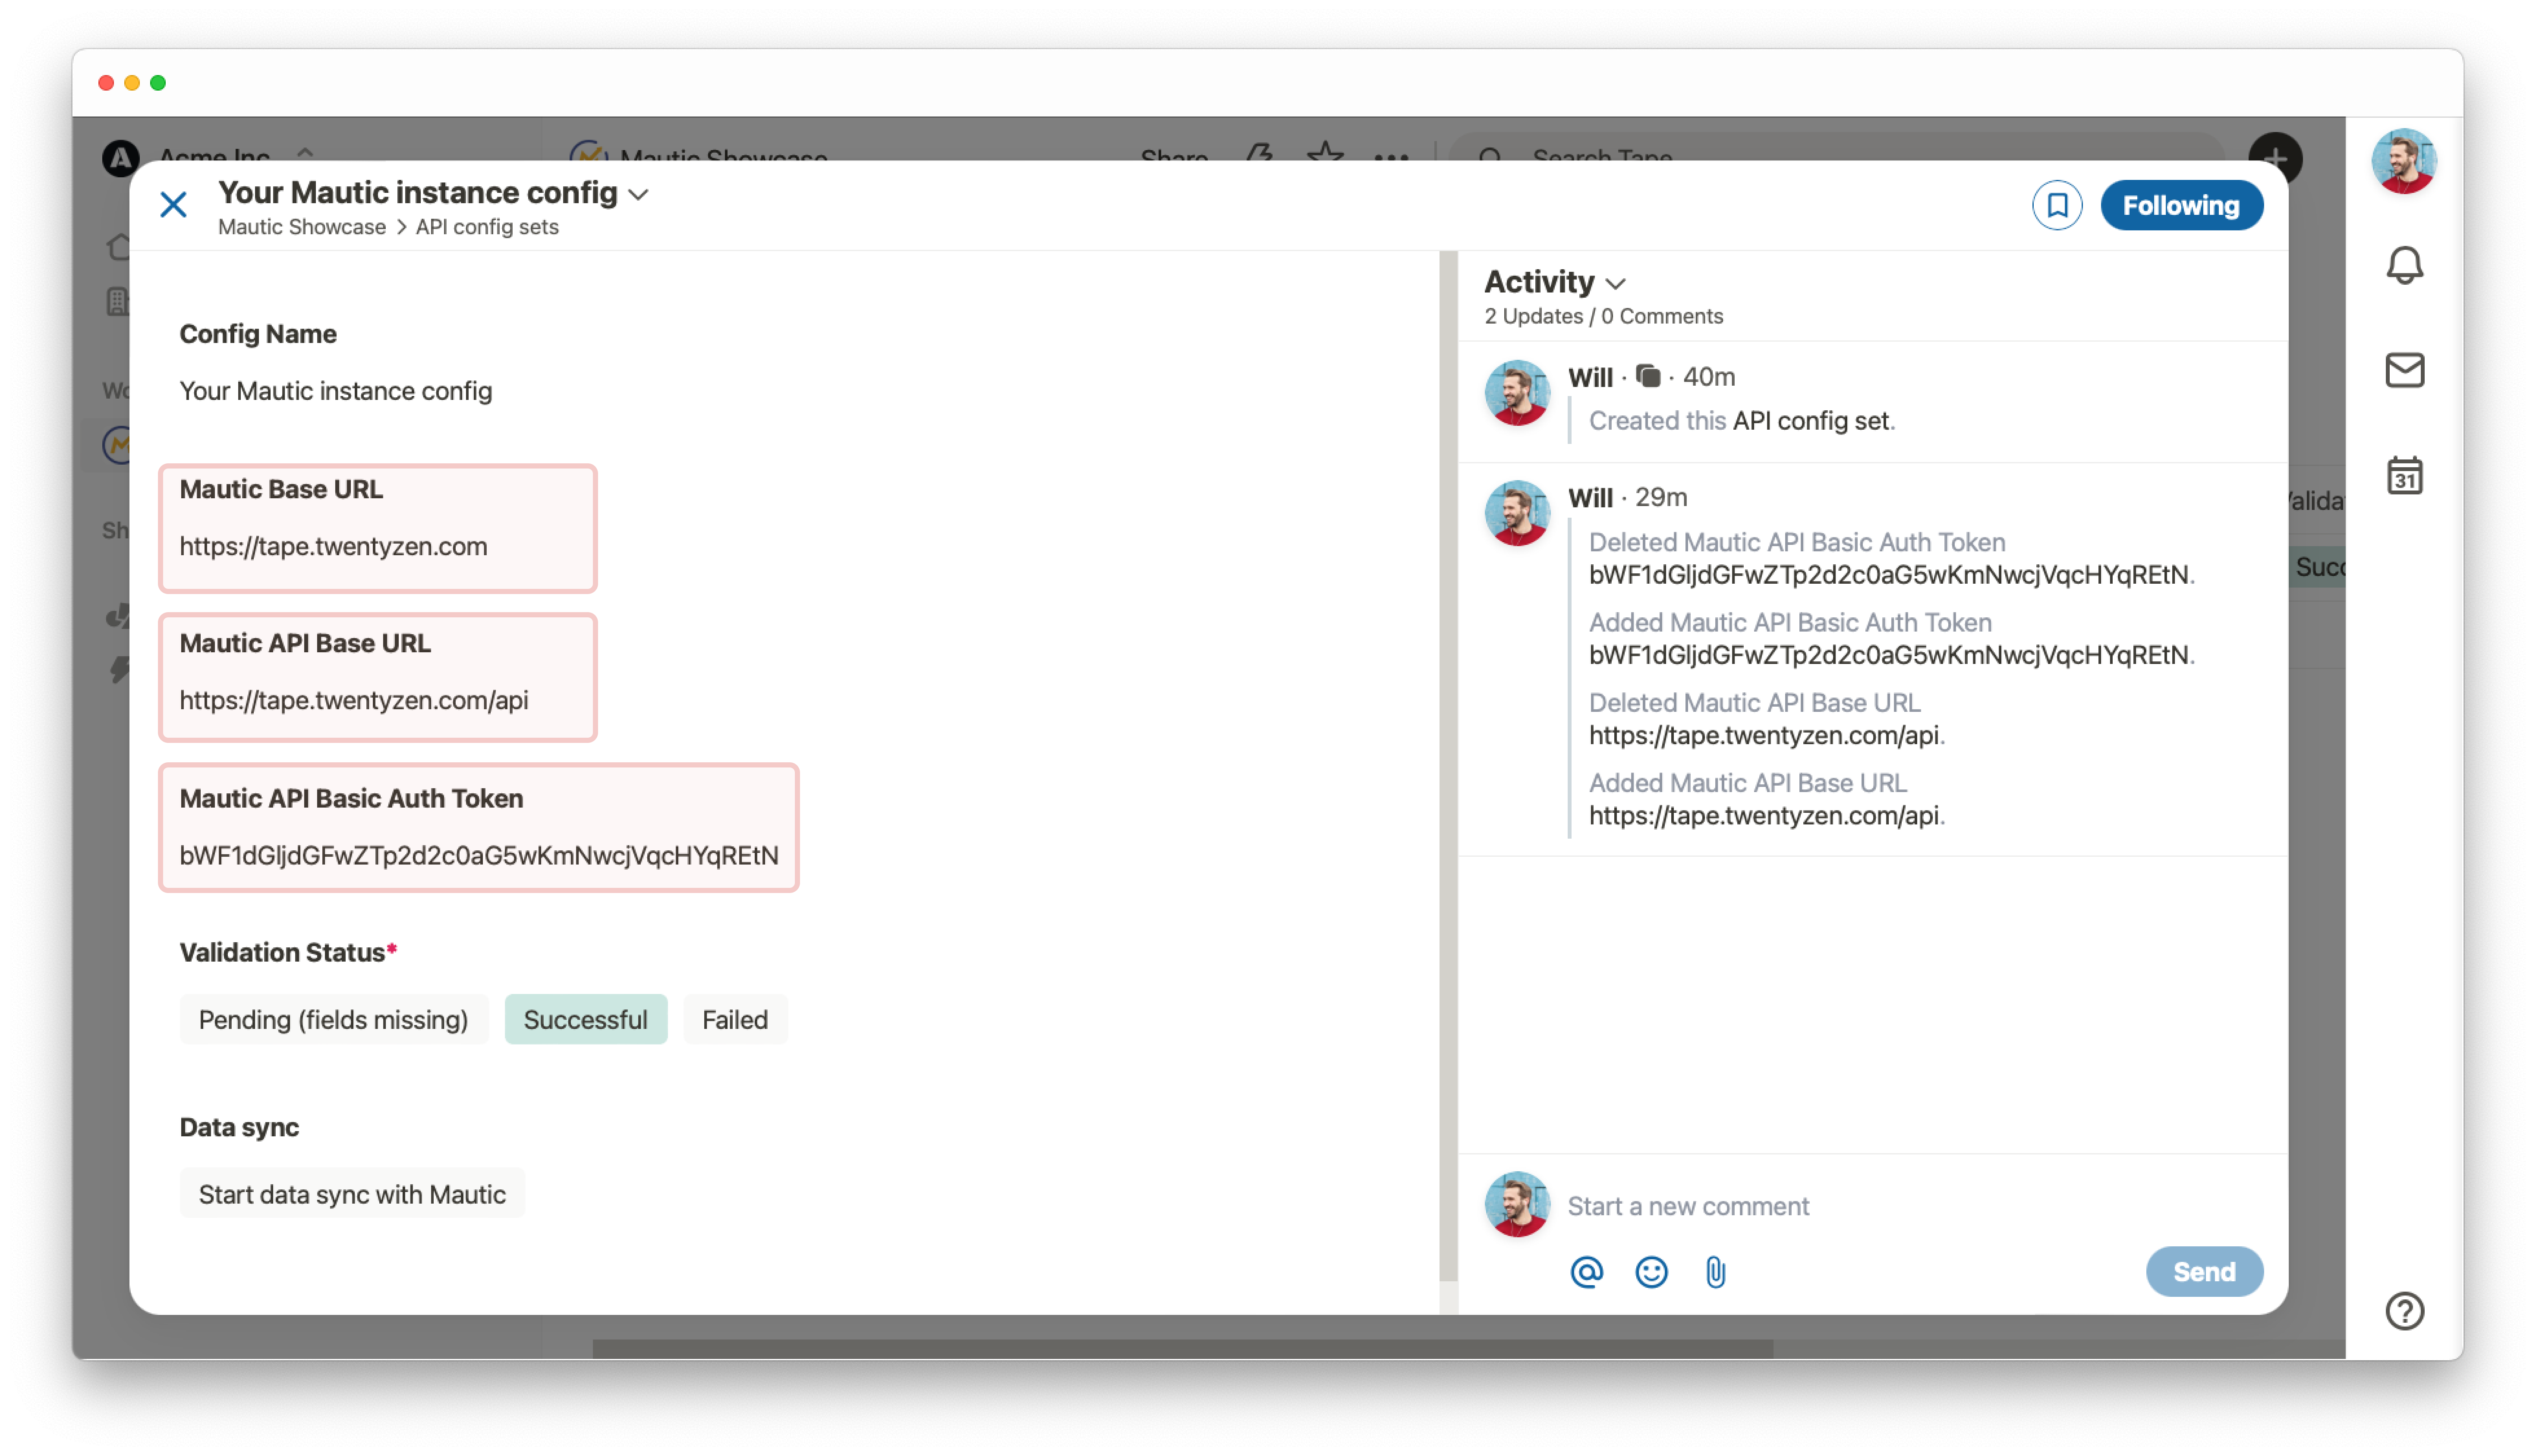
A workflow automation will execute, once you filled in all necessary fields. The field value for Validation Status will move to Successful if your credentials worked and the API connection could be made successfully. If not, it will move to Failed and prompt you to check your config. Be sure to include all necessary config parameters and double check them with the ones provided in the screenshot above to ensure correctness.
Our existing scripts will access your config and should now work out of the box.
![]() Note: In this guide, only contacts will be accessed, and nothing will ever be deleted by the scripts we provide here to avoid any data loss.
Note: In this guide, only contacts will be accessed, and nothing will ever be deleted by the scripts we provide here to avoid any data loss.
3) Initial sync your contacts from Mautic to Tape
Clearance for initial sync using the API. It means your contacts from Mautic will be synced into Tape. If you have successfully completed the step 2), simply click on the button labeled Start data sync with Mautic. This may take a few minutes to complete, depending on how many contacts are saved in your Mautic instance. This step is not necessary if you do not have any contacts saved in Mautic, for example. You can also do it at a later date. The maximum limit for initial contact sync in this showcase is 200, but this could easily be increased later.

4) Sync data from Mautic to Tape
If data is changed inside your Mautic instance, e.g. via the Mautic web interface, we need to make sure that the information flows back into Tape. As Mautic offers webhooks natively, we leverage them in combination with Tape webhook workflow automations to perform that sync back to Tape.
All you need to do is access the workflow center in Tape. Click ![]() on the top at the
on the top at the Contacts App.
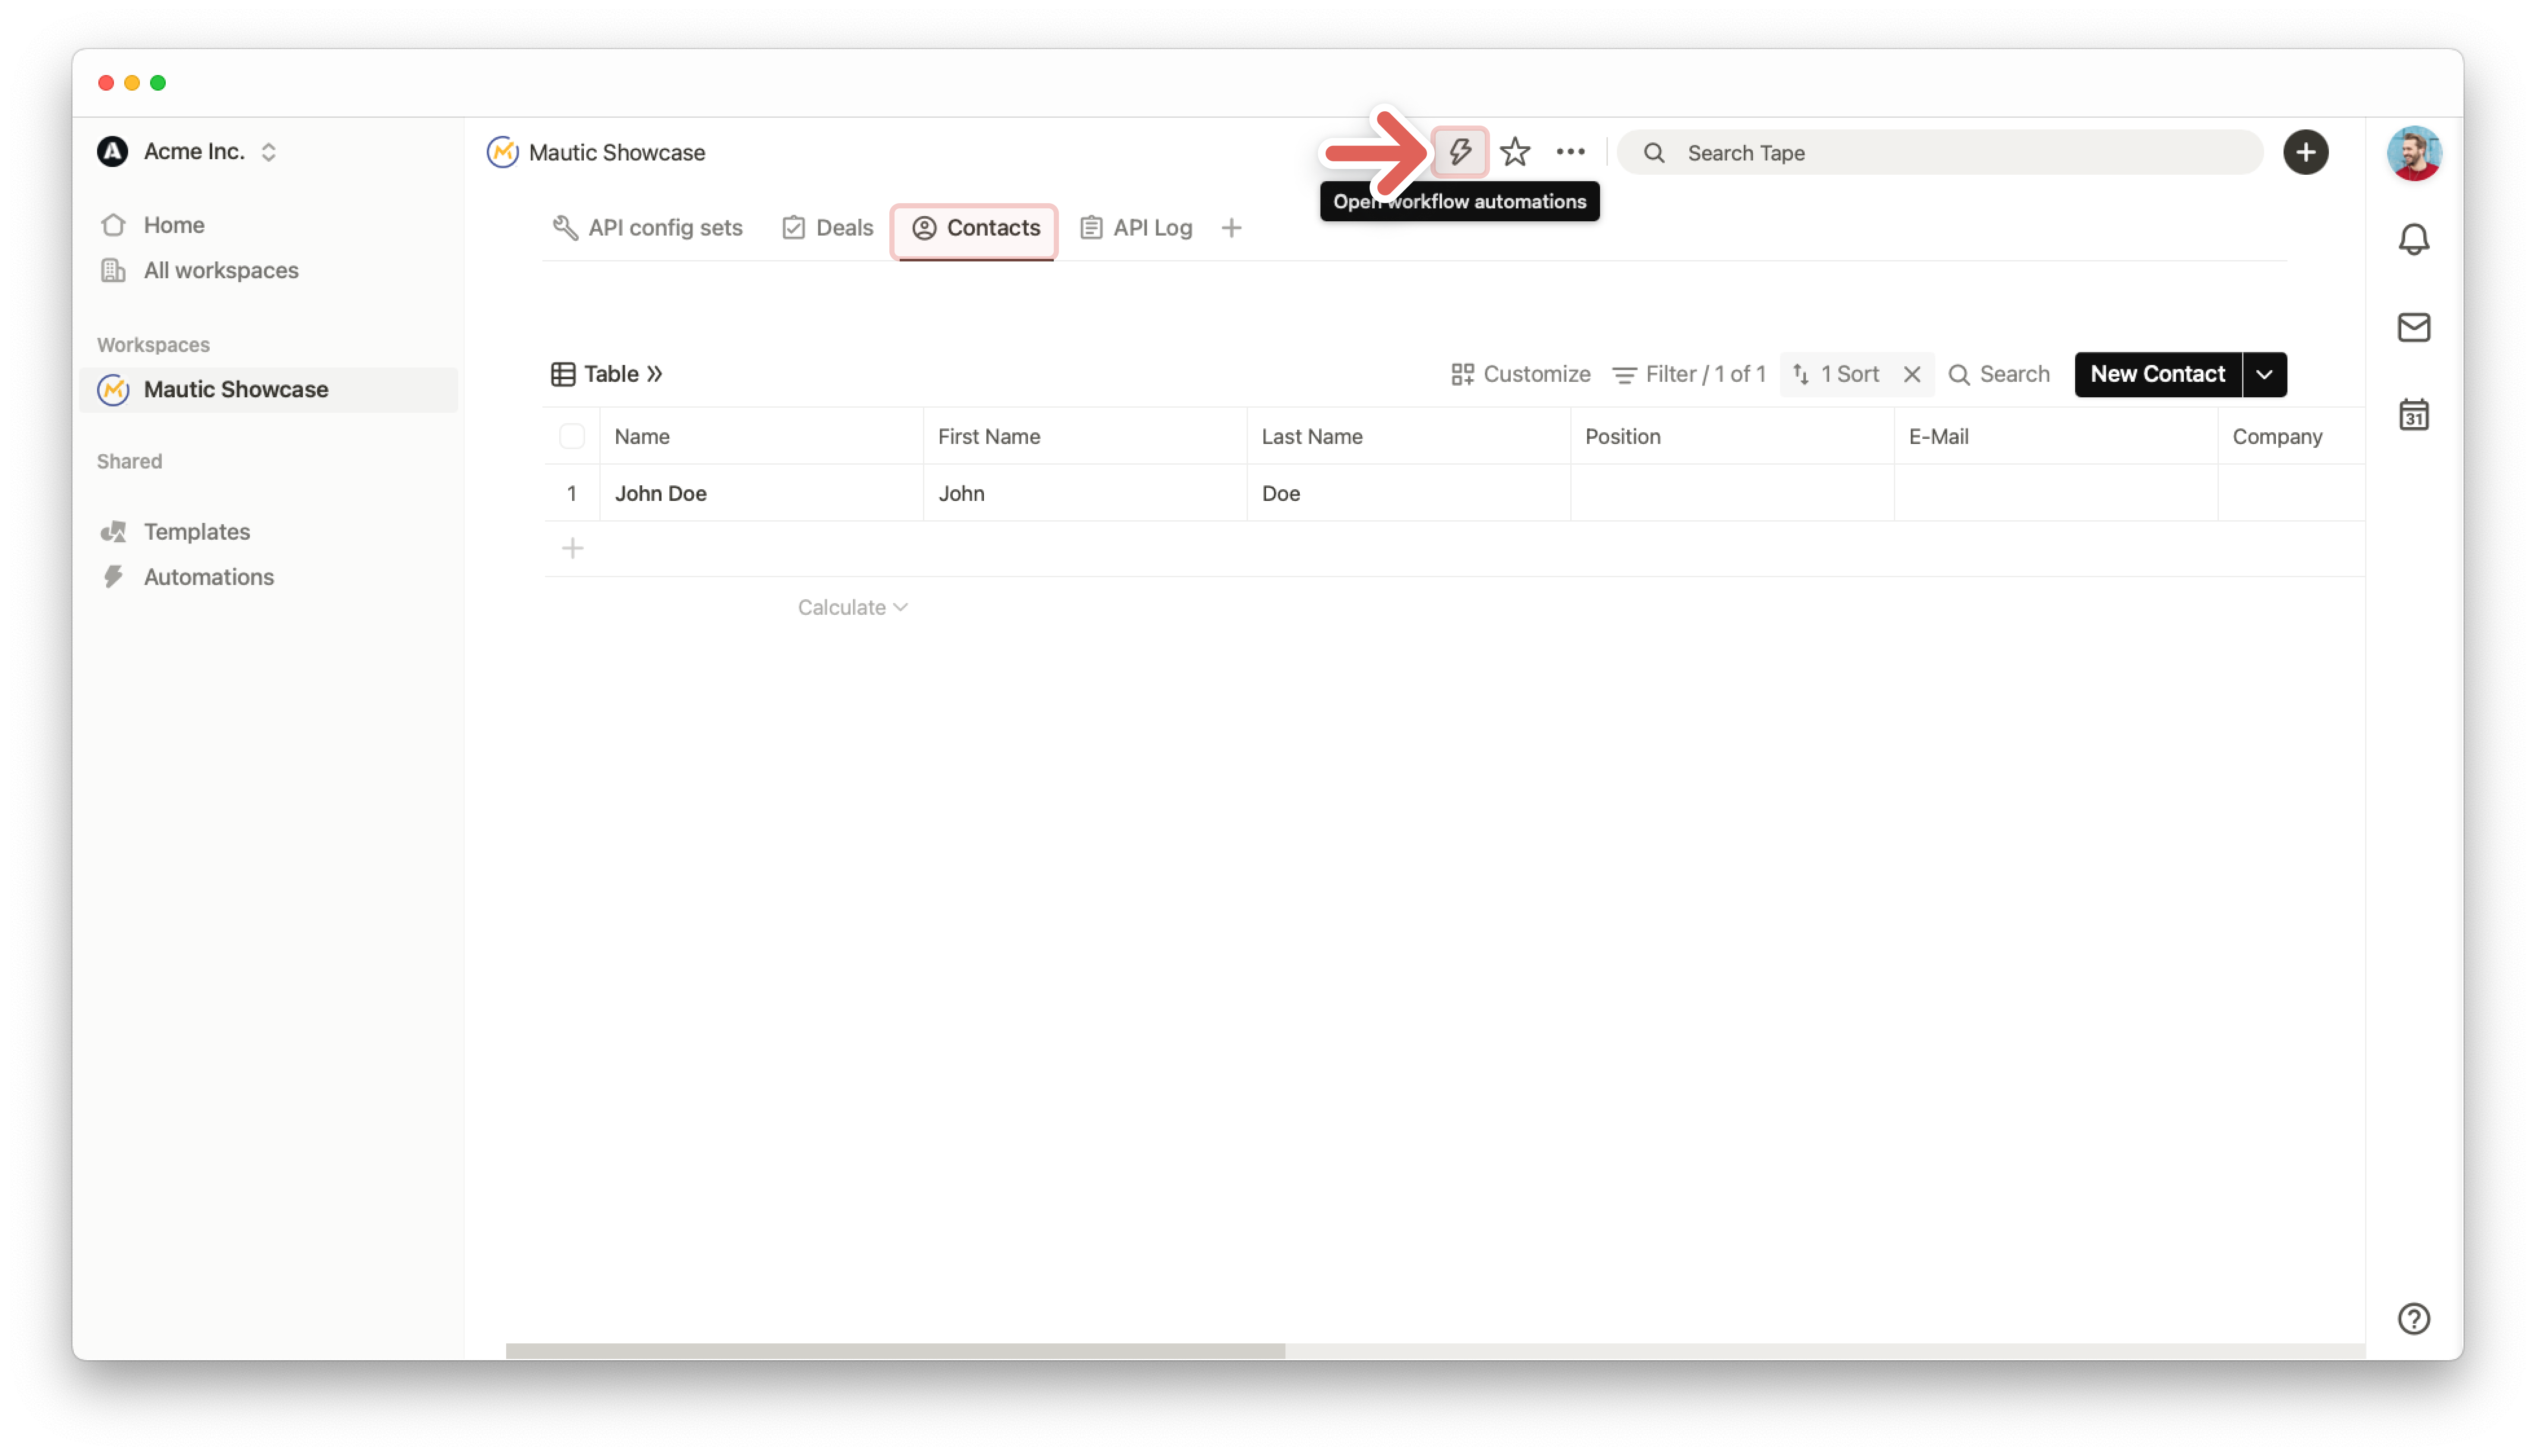
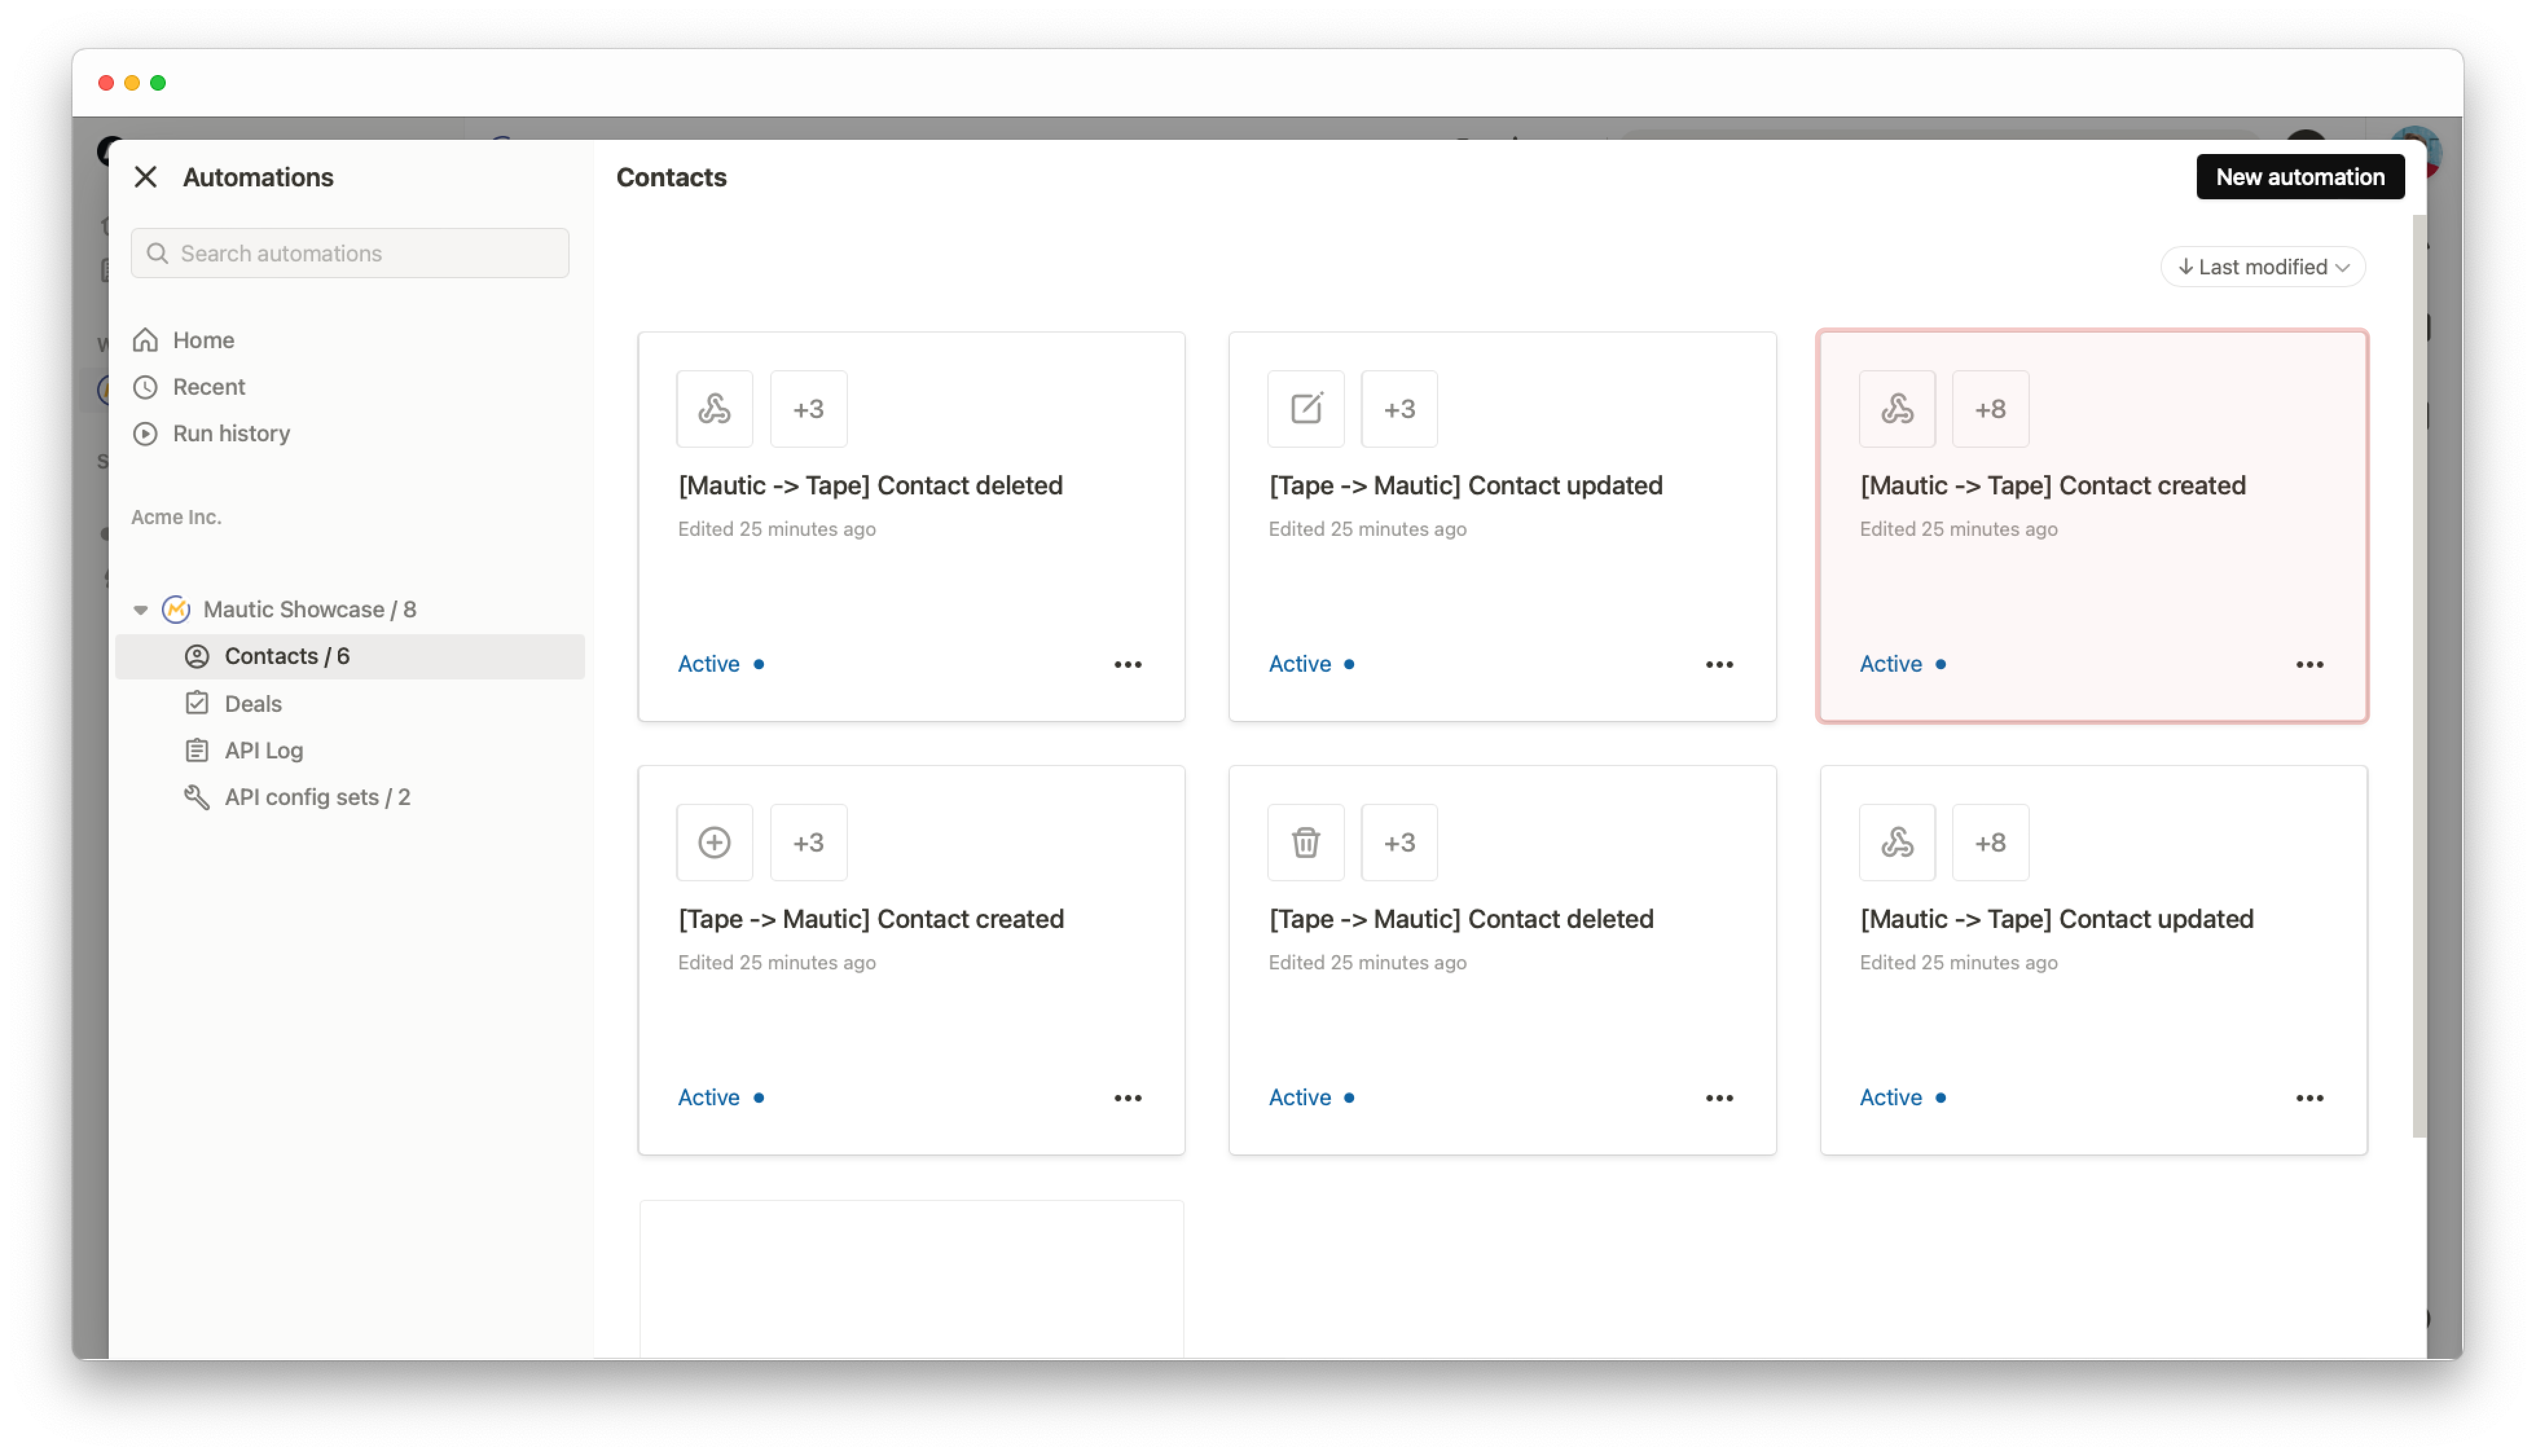
You will find a list of workflow automations, that are used to perform the two-way-sync between Mautic and Tape contacts. Some of the automations are used to write data from Tape to Mautic, and vice versa. We now need to make sure that the ones that write from Mautic to Tape (marked with “[Mautic → Tape]”) work as expected by setting up the proper webhook.
We start with the automation [Mautic -> Tape] Contact created that reacts to a contact created event webhook from Mautic.
Open the automation and it will present you with a webhook URL that is used to trigger the automation.
The relevant part is the URL, that we need to copy via the Copy button.
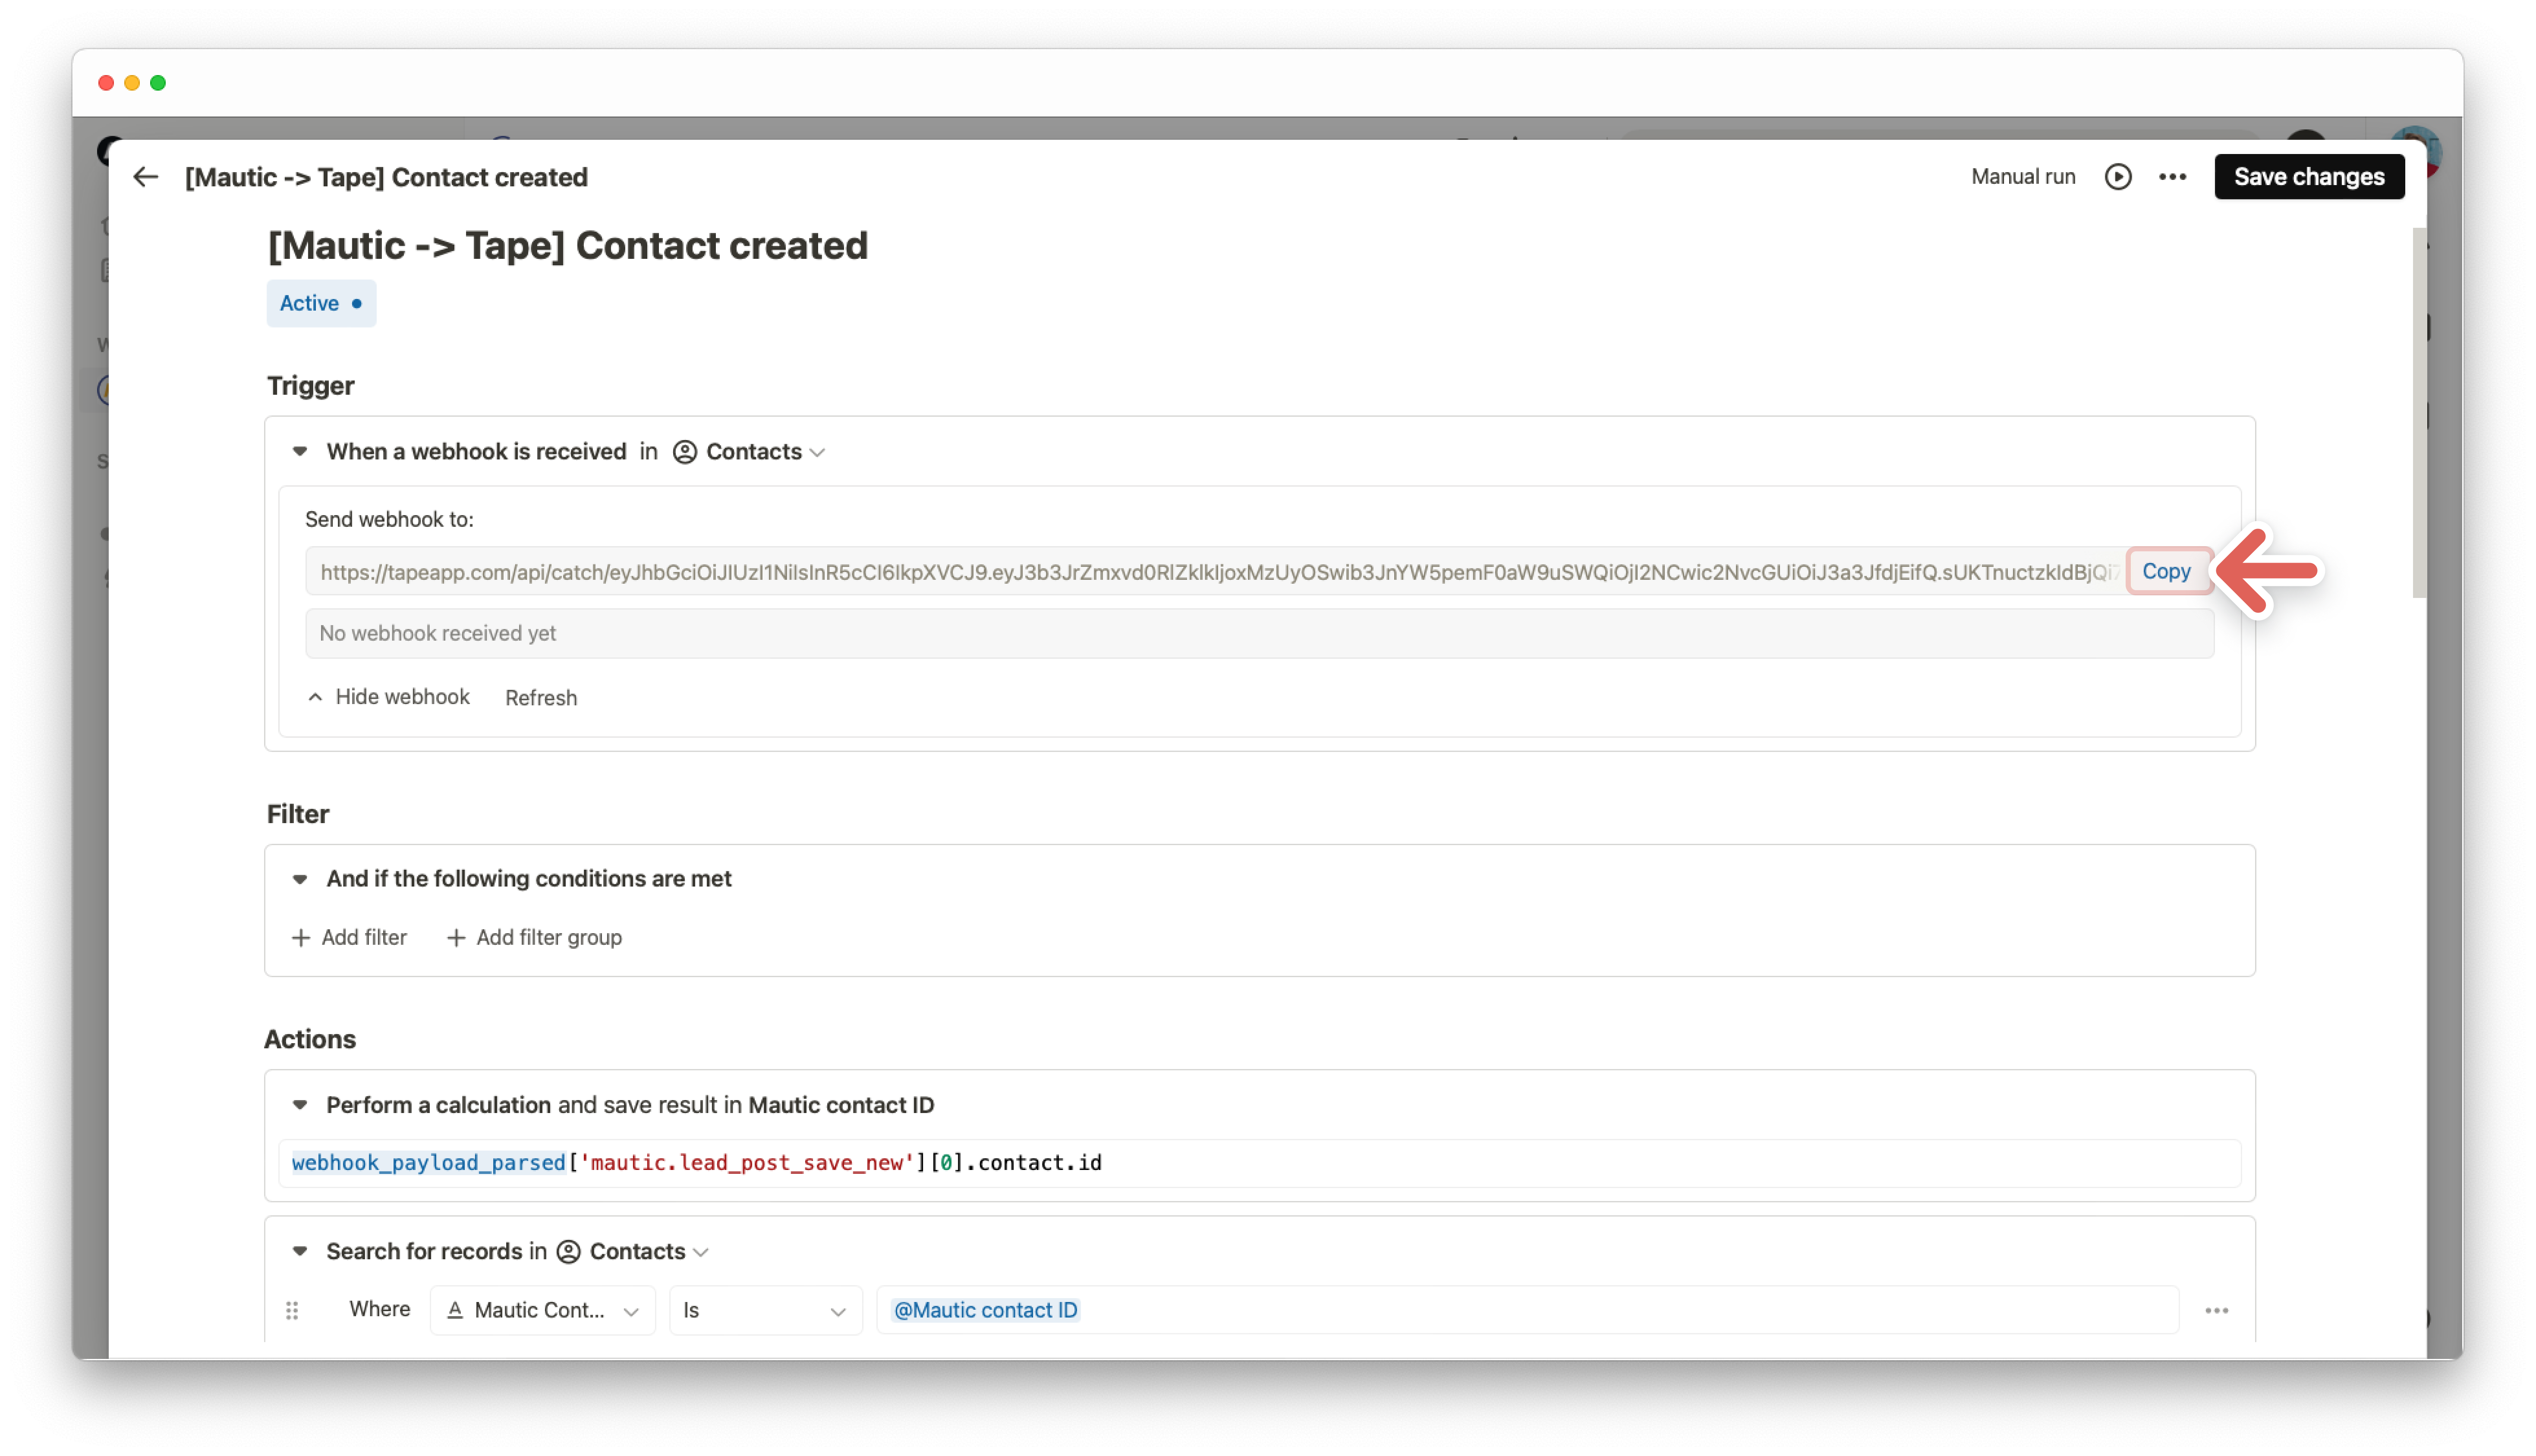
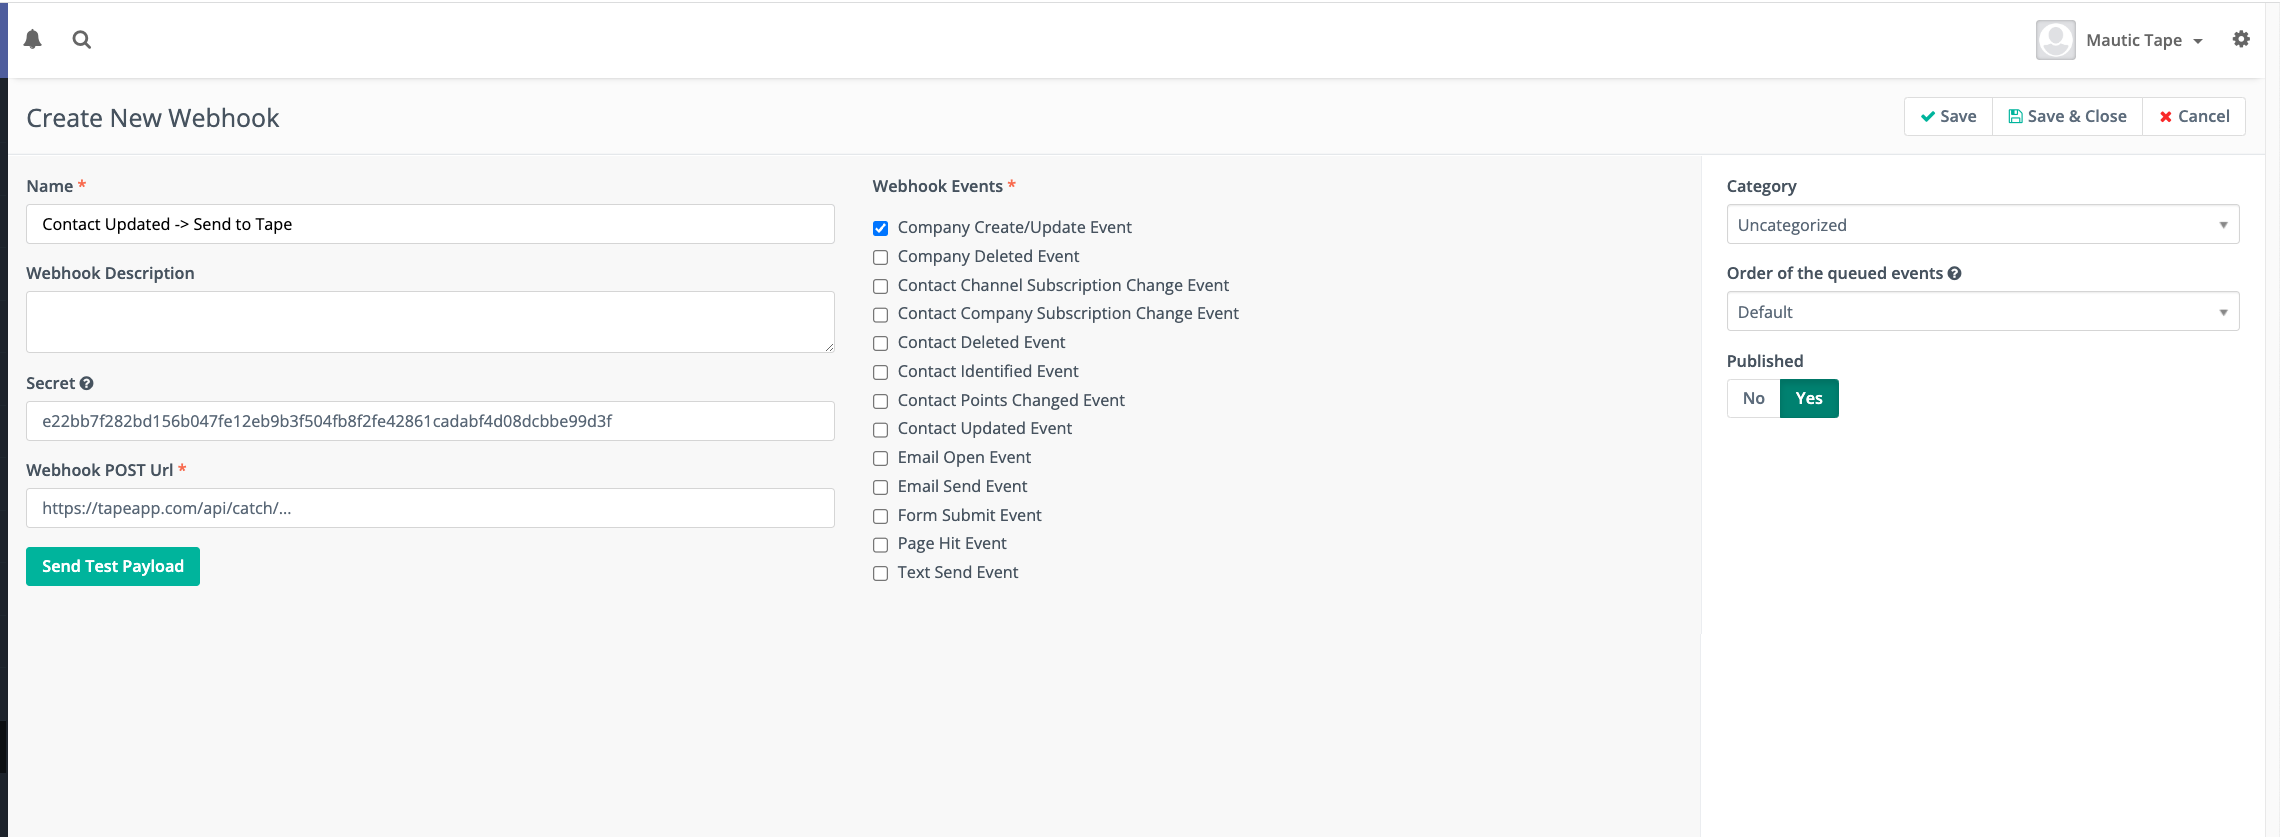
Now, open your Mautic instance and go to Settings → webhooks and create a new webhook via New on the top right. After giving your webhook a descriptive name (so you know what it does in the future), be sure to check the proper events type checkbox and paste your webhook URL from Tape:
Be sure to save your changes, and test your new integration by creating a new contact in Mautic. When a contact is now created in Mautic, it will also be created in Tape by firing the webhook and triggering the workflow. This use case is now all set up.
5) Apply to all syncs you want from Mautic to Tape
In Step 4), the automation creates a contact in Tape whenever a contact is created in Mautic through a webhook.
Repeat step 4) for the remaining workflow automations that need webhooks, e.g. [Mautic -> Tape] Contact updated or [Mautic -> Tape] Contact deleted if you are keen. The process is the same, just use the proper event type in Mautic during webhook creation.
Feel free to also create your own new workflow automations and integrate Mautic and Tape further!
Should you have questions or get stuck, feel free to reach out directly to our partner TwentyZen, who is specialized in powerful Mautic <> Tape integration setups and will be able to assist.
Happy building!
PS: We added an extra app in Tape that shows some of its nice features to enhance your Mautic experience. Visit the “Deals” app to get a taste of our powerful Kanban layout - and of course the deals can be linked to your contacts, that were just synced from Mautic.