Sometimes, we may receive images from external systems as Base64 encoded string data. This guide shows how to process that string and ultimately create image files that are attached to a record in Tape.
For testing purposes, we will use this Base64 string which is a Tape demo image (use the button on the right to copy the string. Careful, it is long!). It can be found and copied right here:
Let’s proceed with the example:
1) Setup your App
Navigate inside Tape onto the app where you would like to create the record with the image attached. Just ensure you have at least one attachment or image field in that app to get the remaining steps on the road.
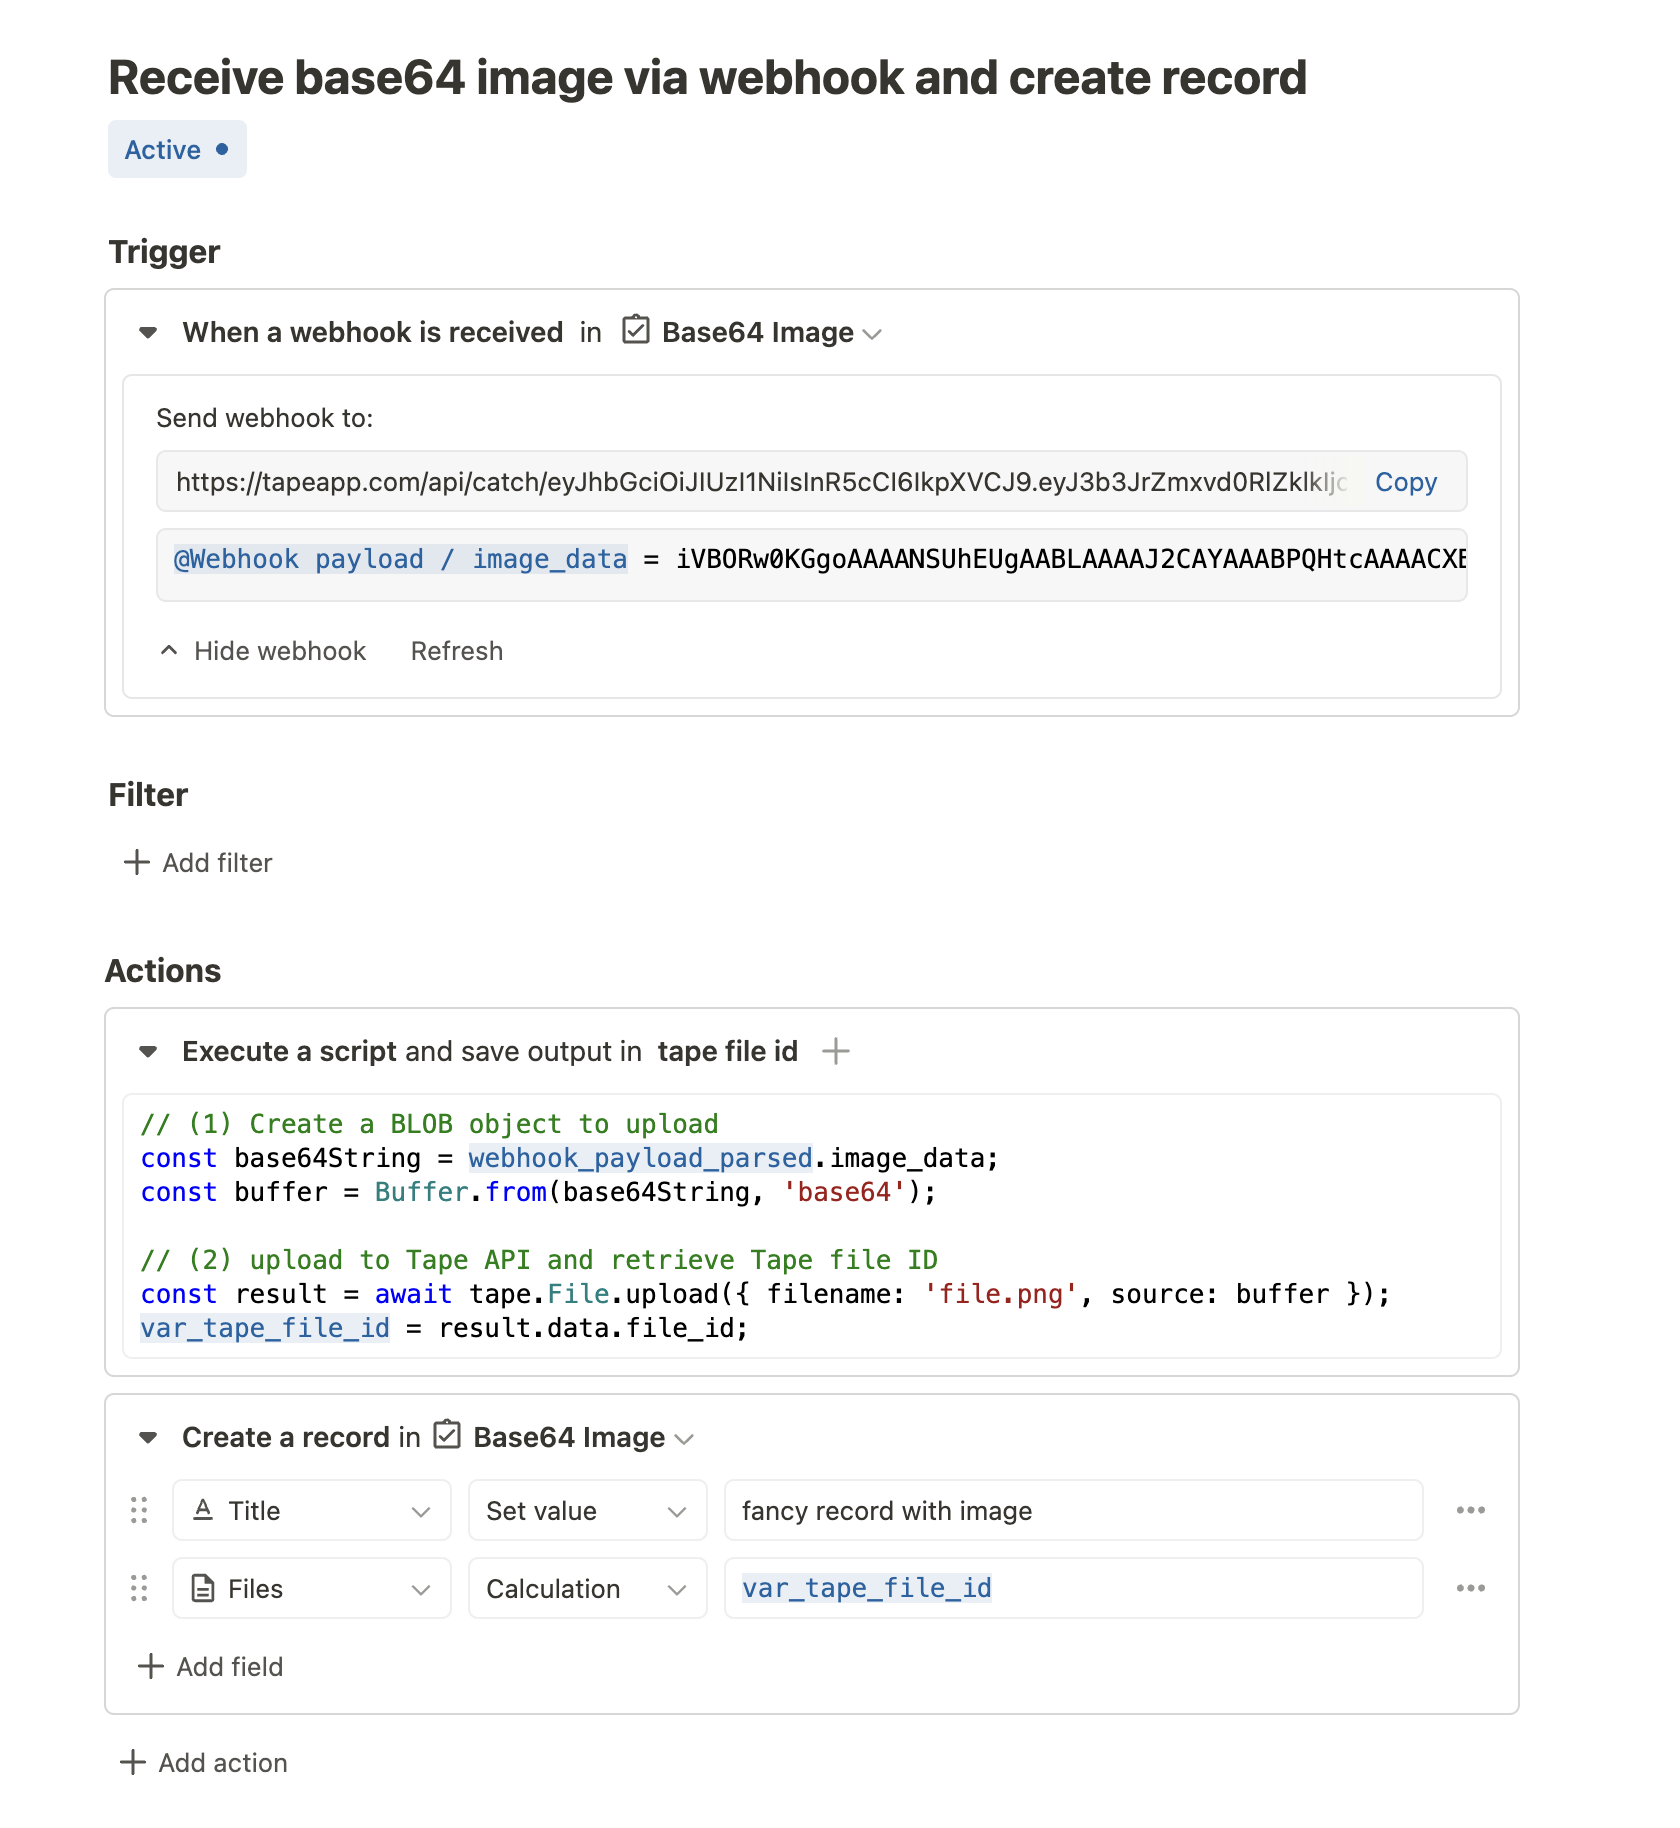
2) Create your webhook receive workflow automation
Open the automation center (using the ![]() icon button) and create a workflow automation using the webhook received trigger. Remove all filters (we do not need them for this particular example) and two actions:
icon button) and create a workflow automation using the webhook received trigger. Remove all filters (we do not need them for this particular example) and two actions:
- an execute script action
- a record create action for your preferred app
For your script action, you can paste this code that retreives the base 64 string from the webhook payload, uploads the image to Tape and retrieves the Tape file ID:
// (1) Create a BLOB object to upload
const base64_string = webhook_payload_parsed.image_data;
const buffer = Buffer.from(base64_string, 'base64');

// (2) upload to Tape API and retrieve Tape file ID, store in variable for later use
const result = await tape.File.upload({ filename: 'file.png', source: buffer });
var_tape_file_id = result.data.file_id;
Note that you should also rename the variable by clicking on it - in my case, I named it tape file id - it will then be available as var_tape_file_id inside the script block, as seen in the code example.
In this example case the app has an attachment field “Files” that we would like to add the image to. Add an assignment to your attachment or image field and use the “Calculation” assignment type to access your variable (it will hold the Tape file ID of your base 64 image).
Your workflow should now look similar to this:
3) Test your automation using the workflow editor’s manual run feature
Make sure your automation works by either triggering an actual POST to your webhook URL - or way easier by manually running it with the example payload from above. Click on “Manual Run” on the top right, select “Custom Payload” and paste the payload from the beginning of the article.
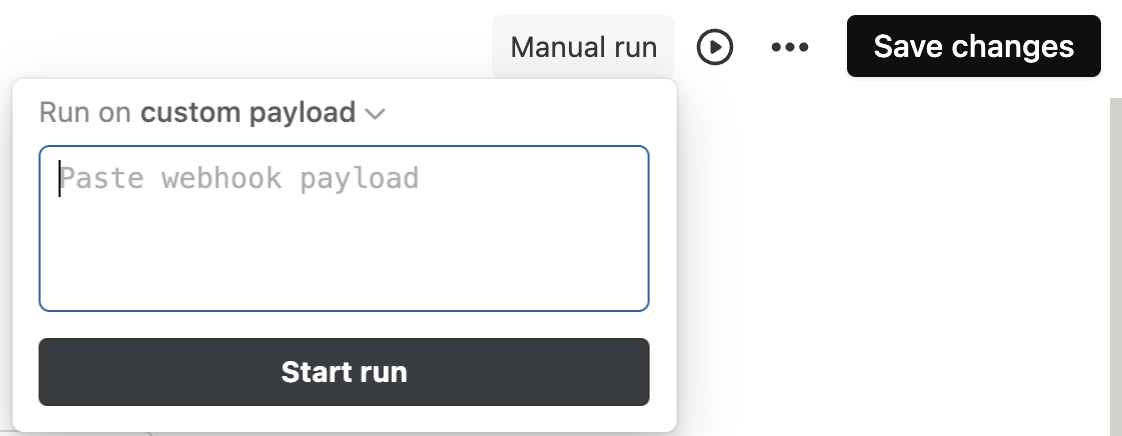
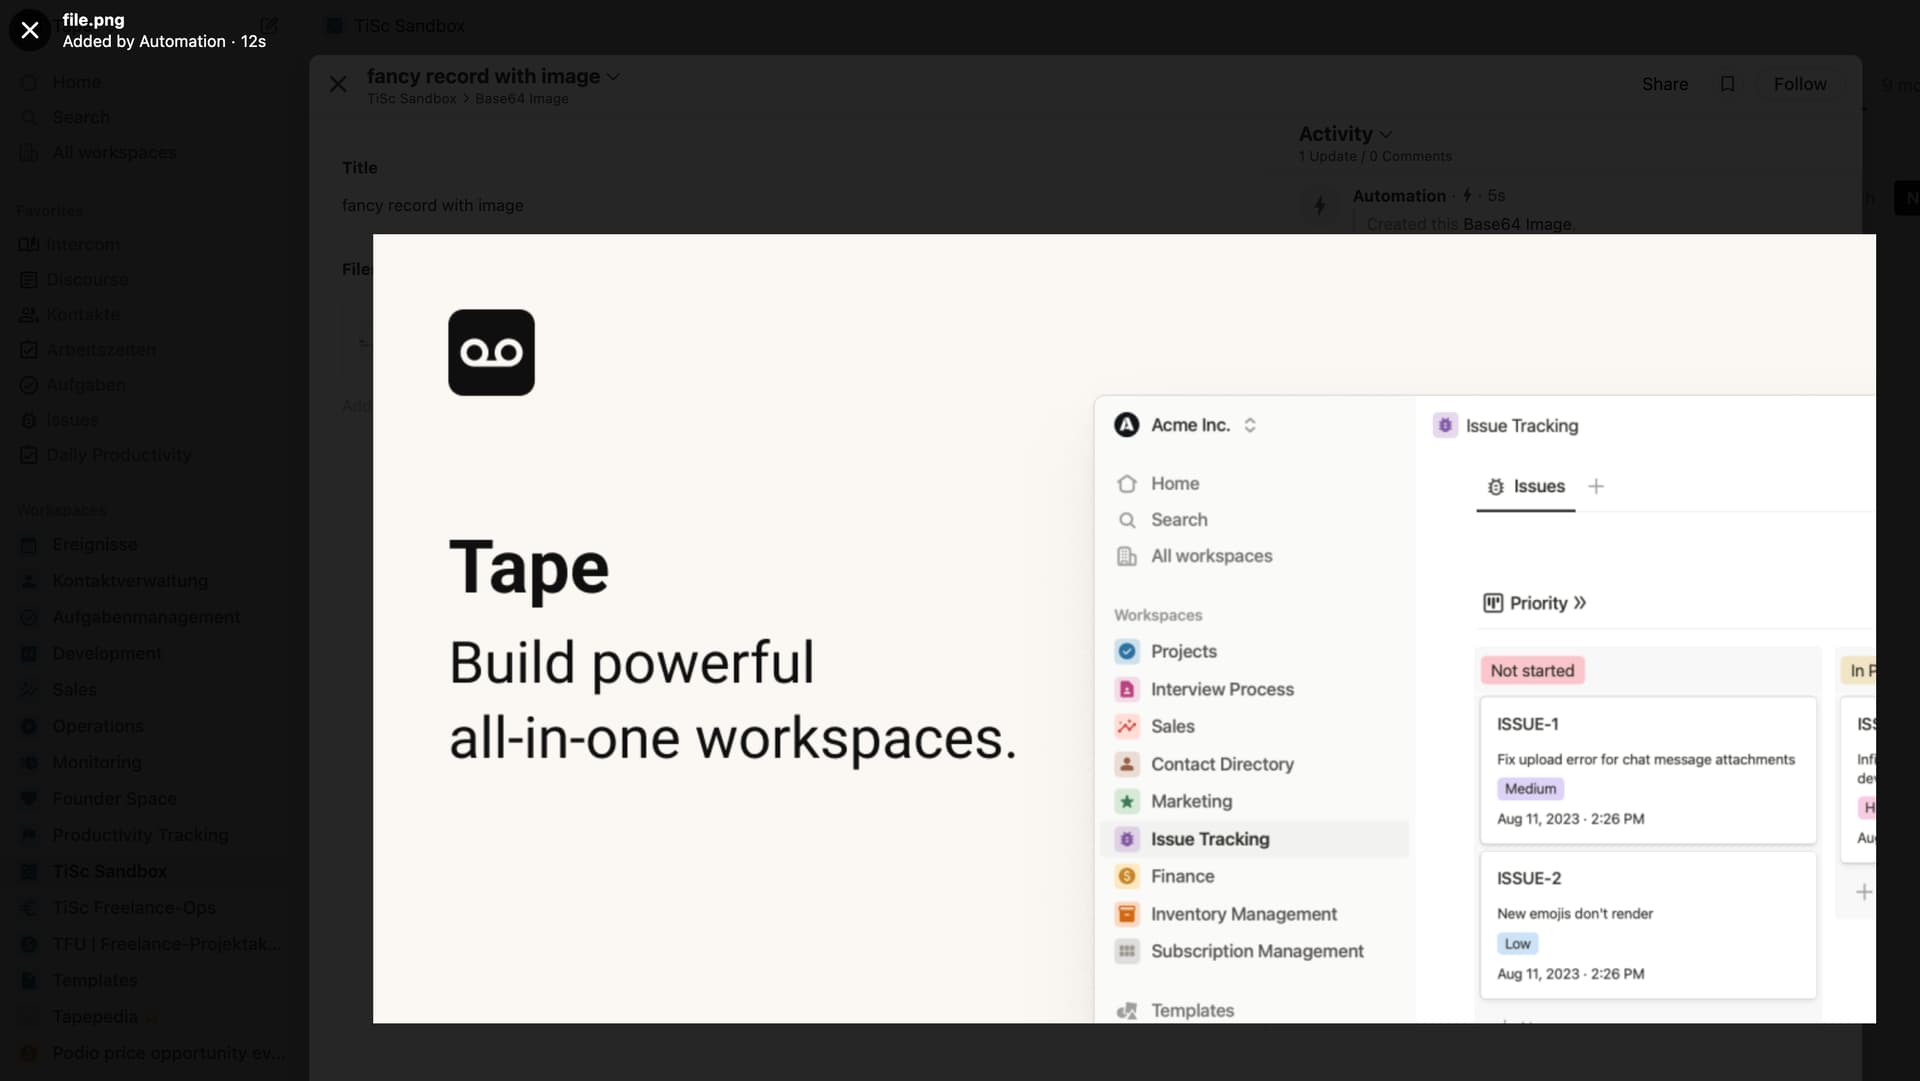
When clicking “Start run” the automation should create your record and attach the image - of course you will see the run in the right logs sidebar.
Voila:

Let us know in the comments how it is working for you, and if you have additions or ideas on how to improve this guide.
Happy coding &
Cheers
Tim