Due to various community requests from Brazil ![]() , we created this guide that shows how to create a signature document inside of Autentique using their API and Tape workflow automations. We are going to use a PDF that is stored inside Tape - it could also be generated beforehand inside of Tape using the PDF action.
, we created this guide that shows how to create a signature document inside of Autentique using their API and Tape workflow automations. We are going to use a PDF that is stored inside Tape - it could also be generated beforehand inside of Tape using the PDF action. ![]()
This enables countless use cases, e.g. creating contract documents based on your data in Tape and having them signed by your clients via Autentique ![]()
Get Started
In order to integrate with Autentique, you will need a registered account. A free trial will be sufficient to get this setup going. We will need your API secret, which can be found under settings and the “API access” tab:

Copy your key, you will need it in the next steps. ![]()
Scenario
For this scenario we use a simple Documents app that holds document records with a title and the file attachment. We will use PDFs, as this is what Autentique works best with.
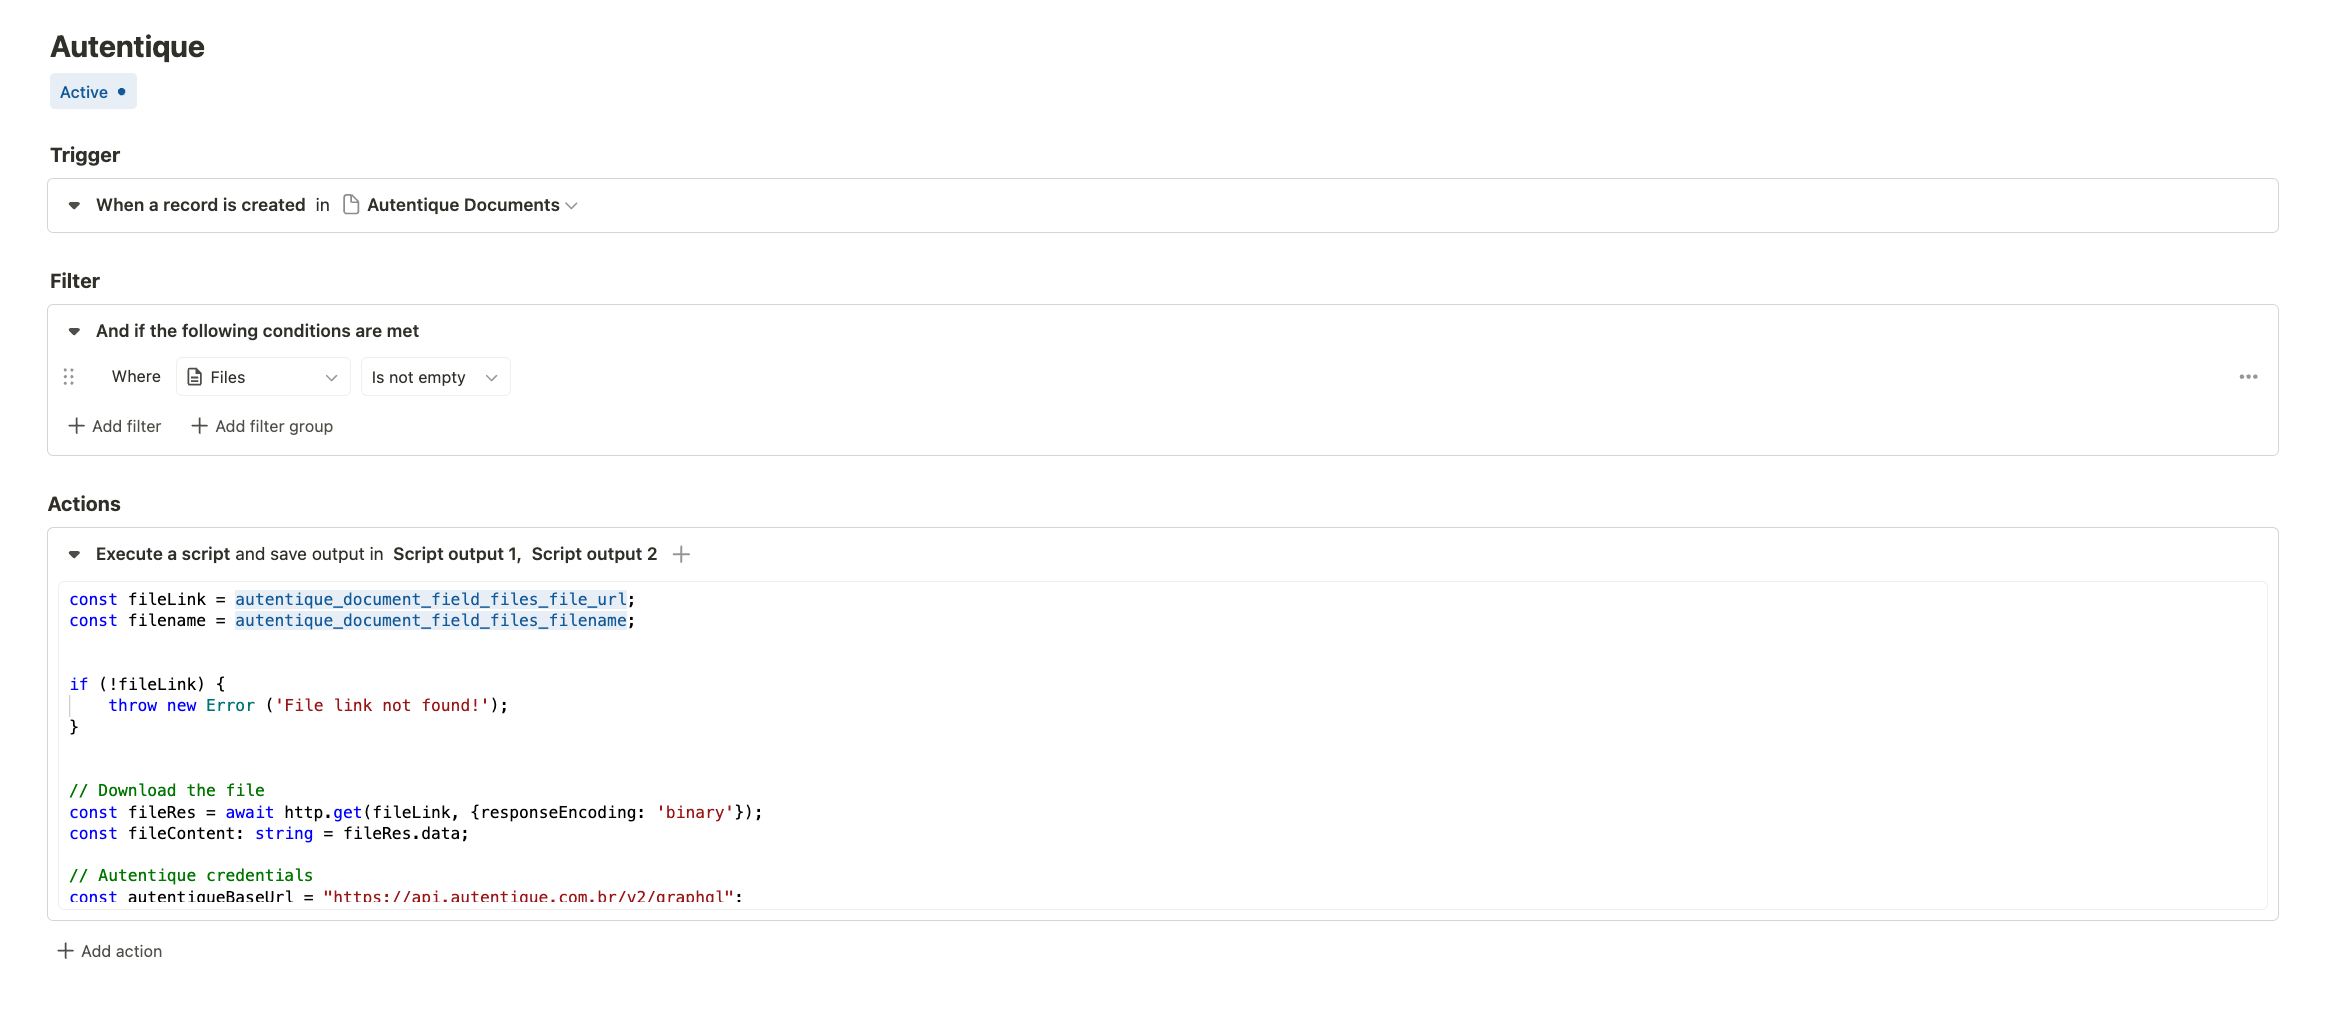
Let’s start with creating a workflow automation, for simplicity we will use a record creation trigger and send the document to Autentique upon record creation. Feel free to add a sanity check filter that checks whether your attachment field is populated - only in that case our workflow will be reasonable to run.
As Autentique uses a GraphQL API, which is more complicated to work with, especially with file uploads, we need a sophisticated script for that. Kudos to our community members @gracosilva and @bruno.freitas who came up with their input and attempts beforehand that led to this guide and to the adjustments made to the Workflow execution environment. We introduced a new function to the HTTP client that is called postFormData and handles the cumbersome implementation details of this spec.
Workflow execute script action
We will add an execute script action and use the following code to send the document to Autentique:
const fileLink = autentique_playground_field_files_file_url;
const filename = autentique_playground_field_files_filename;


if (!fileLink) {
    throw new Error ('File link not found!');
}

// Download the file
const fileRes = await http.get(fileLink, {responseEncoding: 'binary'});
const fileContent: string = fileRes.data;

// Autentique credentials
const autentiqueBaseUrl = "https://api.autentique.com.br/v2/graphql";
const autentiqueAccessToken = "YOUR_ACCESS_TOKEN";
const autentiqueEmail = 'signer@yoursignerdomain.com';

// GraphQL API operations
const operations = JSON.stringify({
    query: "mutation CreateDocumentMutation($document: DocumentInput!, $signers: [SignerInput!]!, $file: Upload!) {createDocument(document: $document, signers: $signers, file: $file) {id name refusable sortable created_at signatures { public_id name email created_at action { name } link { short_link } user { id name email }}}}",
    variables: {
        document: { name: filename },
        signers: [{ email: autentiqueEmail, action: "SIGN" }],
        file: null
    }
});

const map = JSON.stringify({ "file": ["variables.file"] });


// Compose form data to send
const formData = {
    operations,
    map,
    file: {
        buffer: Buffer.from(fileContent, 'binary'),
        filename,
        contentType: 'application/pdf'
    }
}

// Set authentication header
const headers = {
    'Authorization': `Bearer ${autentiqueAccessToken}`,
};

// Send the request
await http.postFormData(autentiqueBaseUrl, {
    headers,
    formData
})
.then(response => {
    console.log(JSON.stringify(response));
})
.catch(error => {
    console.error(error);
});
This script should run out of the box, after you replace your access token inside the script and also make sure to set a proper signer email address. The document should be created in Autentique, and become visible in your documents section. The final workflow automation might look similar to this (note that the script is not fully visible due to the scroll container, be sure to include the full script from above):
Notes
This should give you a good starting point of integrating with Autentique. Refer to their developer API docs to leverage more powerful use cases by adjusting your API calls, using existing documents, querying and polling and also using webhooks. ![]()
As usual, drop your comments below and let us know how this works for you, if you have any further questions or if you have ideas on how to improve this guide. ![]()
Happy signing
Tim