Tape currently doesn’t have Webforms built in however this shouldn’t put you off we are spoilt for choice with Forms providers from the old favourites like JotForms and Google Forms to newer options like Tally.so and Fillout.
Yesterday I said in this thread that if I couldn’t find a guide to using Webforms with Tape I would post one well there is one specifically about Webforms which is here it is a guide to using Google Forms written by Tim, there is also one about using Fillout forms sub-form feature here
However, I thought I would add one anyway. In this guide, I will use Fillout and show you how you can ‘Pre-fill’ aspects of the form as well.
Fillout account
Sign up for a free Fillout account you can do everything we want to do with a free account and lots more.
Build your form
This is a simple matter of adding field types from the left-hand pane and giving them names, you add pages at the bottom
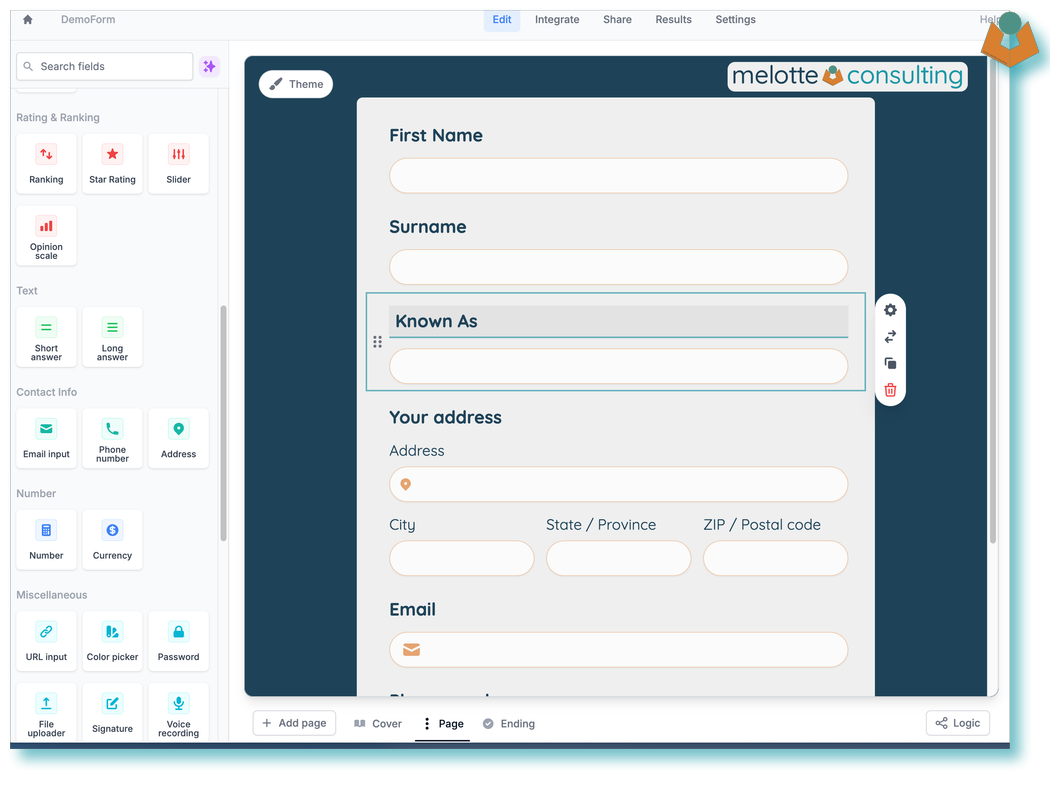
You can add display logic to fields and pages if required.
Once you have your form layout go into the settings:
In the settings, you want the
URL Parameters option. This is where you add the fields you want to pre-fill I have added three you can add as many as you want however the ref one is key as that is going to hold our Tape Record ID which will enable us to update the relevant record when the form is submitted.: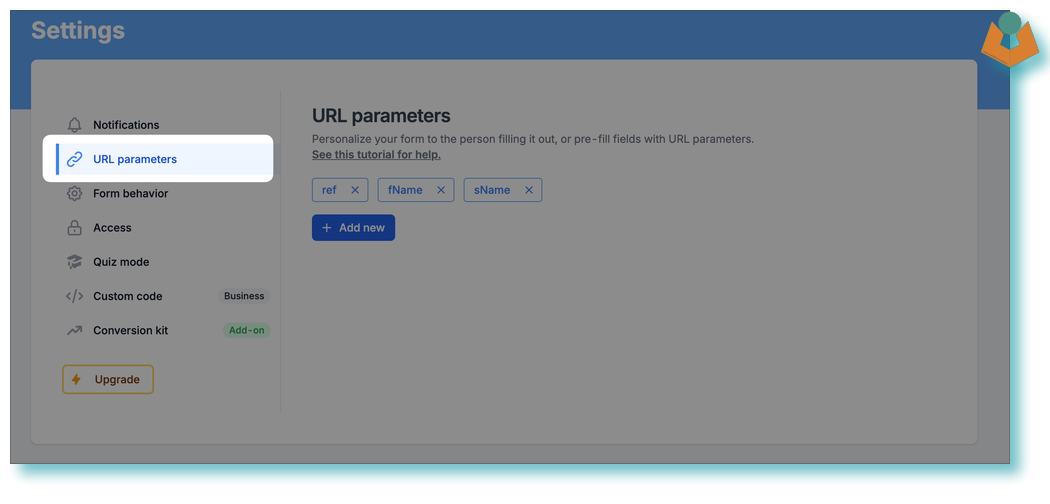
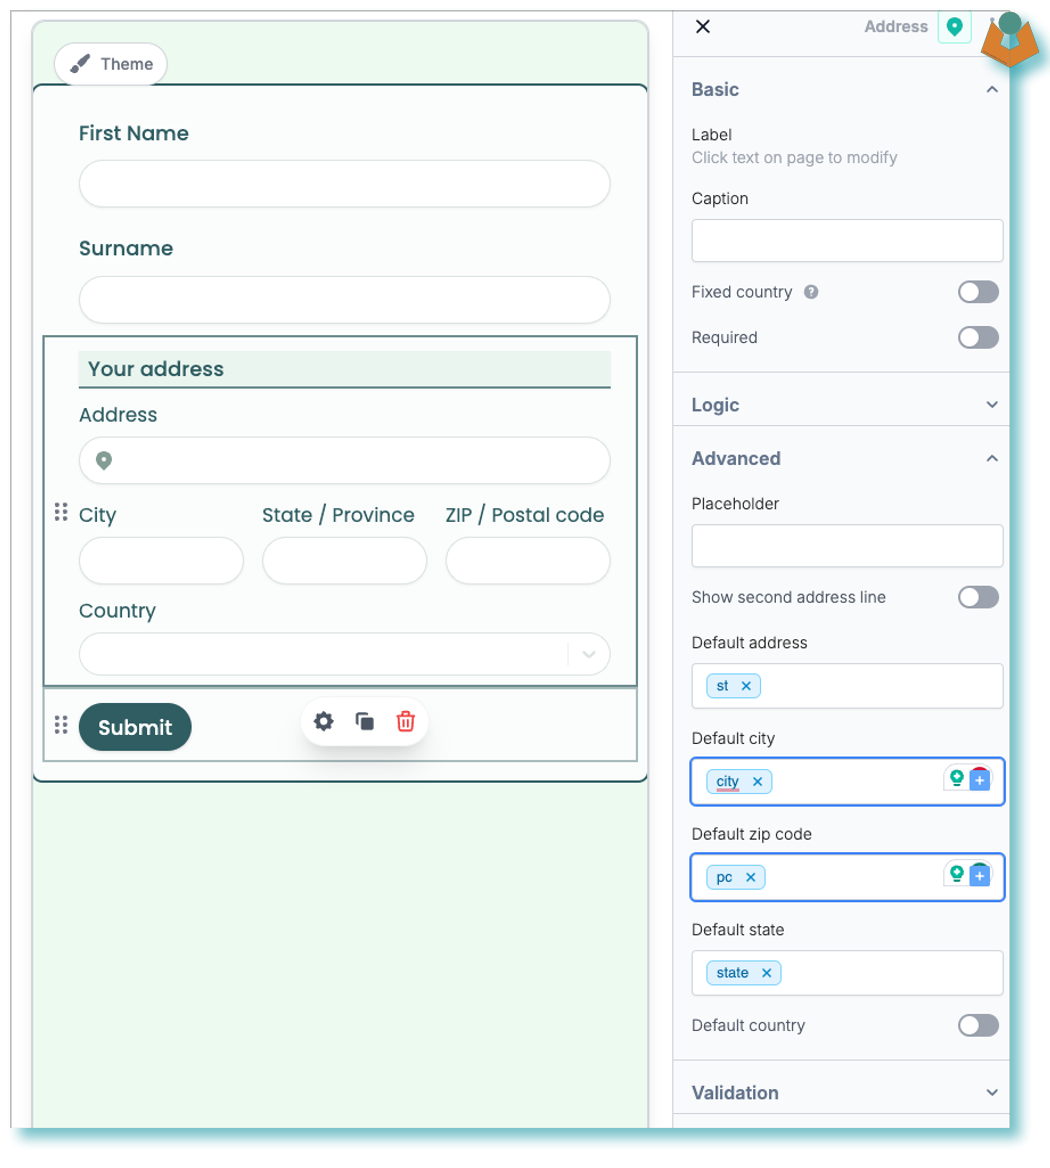
Now if we go back into the edit screen and click on a field we can add a Pre-fill into the placeholder, this enables people to see the data you already have and update it if they want.
To do this select the field you want to pre-fill the placeholder and go across to the Placeholder option on the right a blue plus will appear:
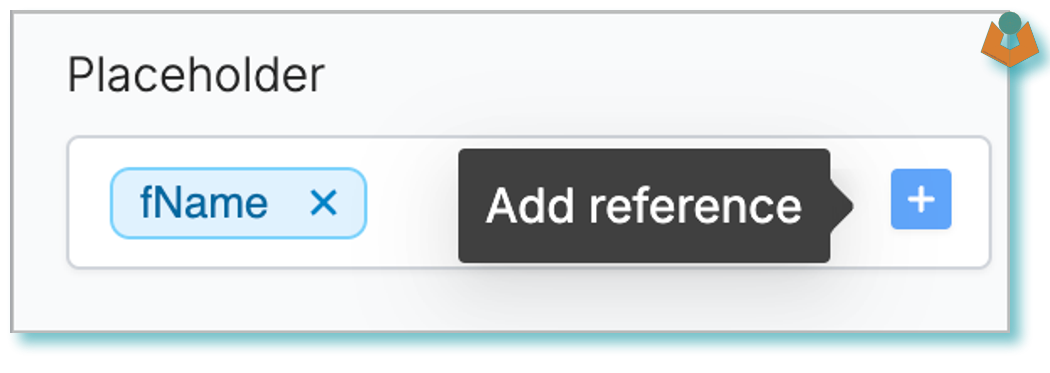
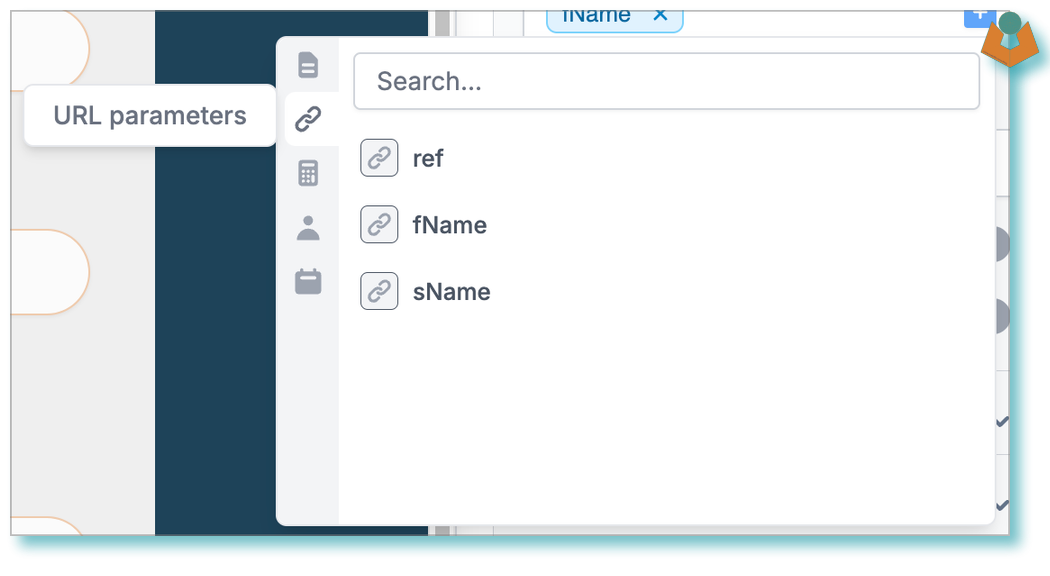
Click the plus button then in the box that appears click on the link symbol on the left and the URL options will appear:
We are nearly finished with the form for now but before we move to Tape let’s publish the form. When you click publish you get another window with the link to the form:
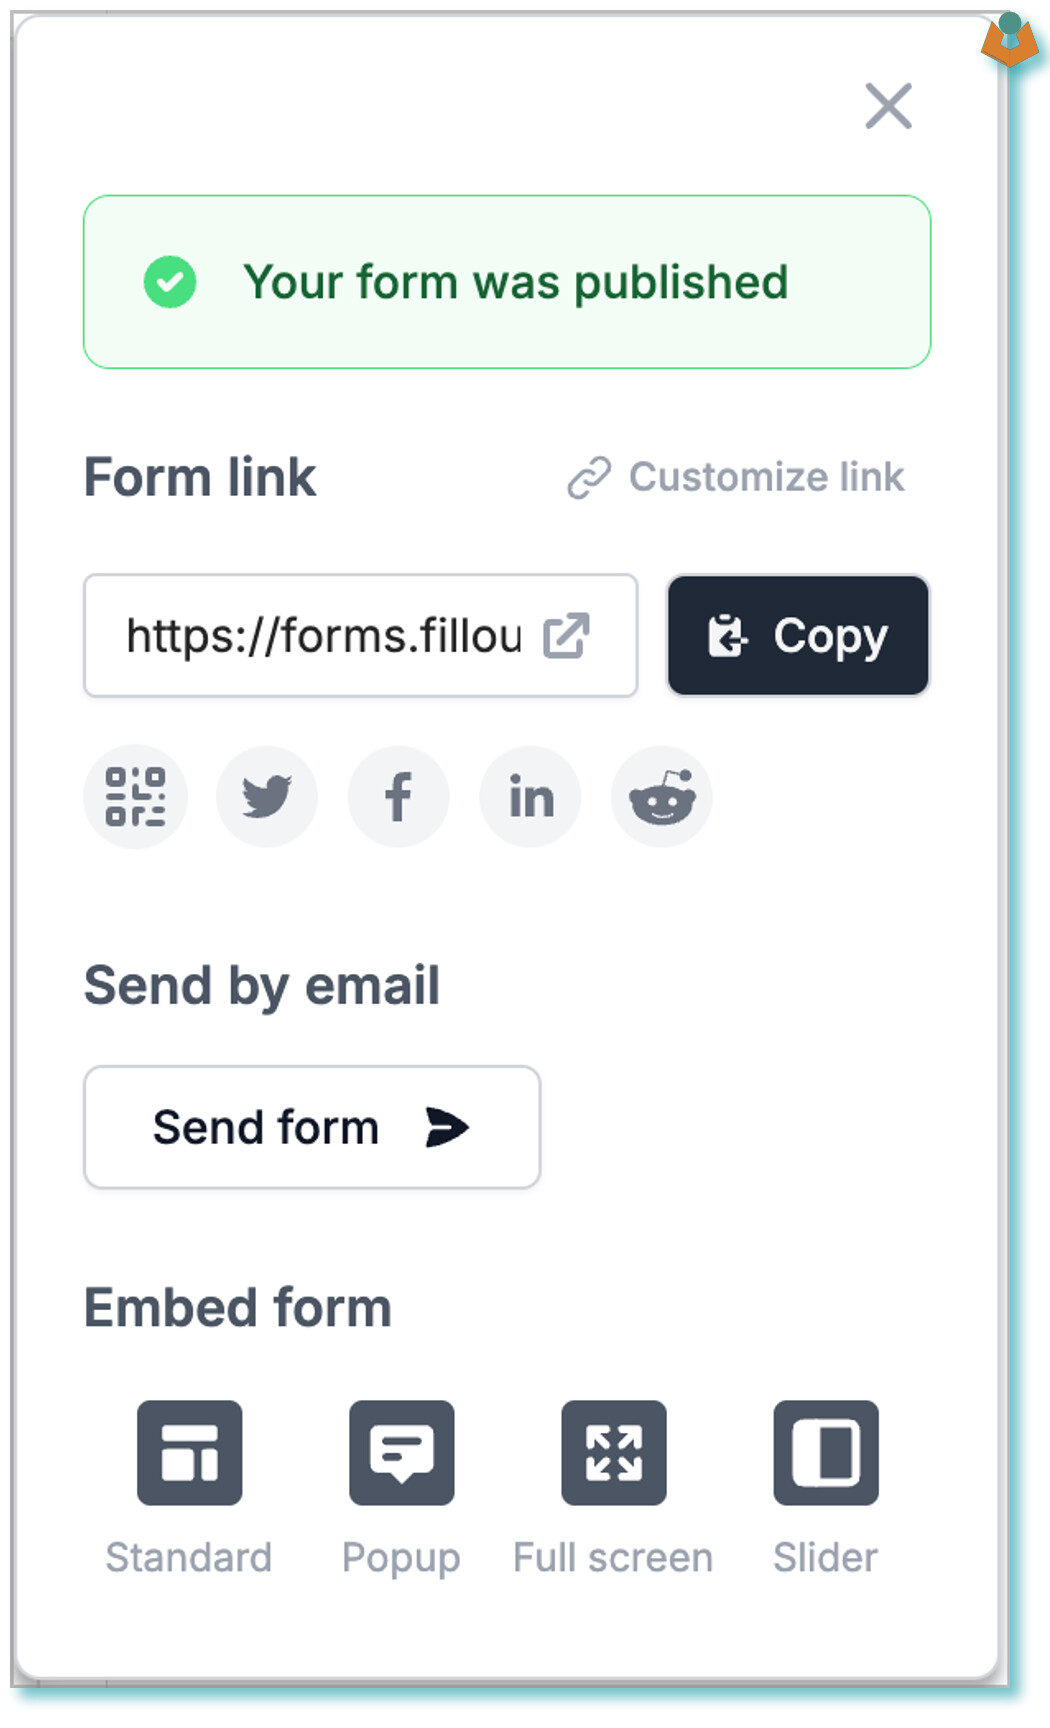
we want the link, so click copy, Fillout is nice to us and gives us the link to the form with placeholders for our pre-fill fields:
https://forms.fillout.com/t/dsWTqutRgXus?ref=xxxxx&fName=Jason&sName=xxxxxIf you don’t have a clipboard manager paste that into a text file or somewhere you can get it back.
Create your URL in Tape
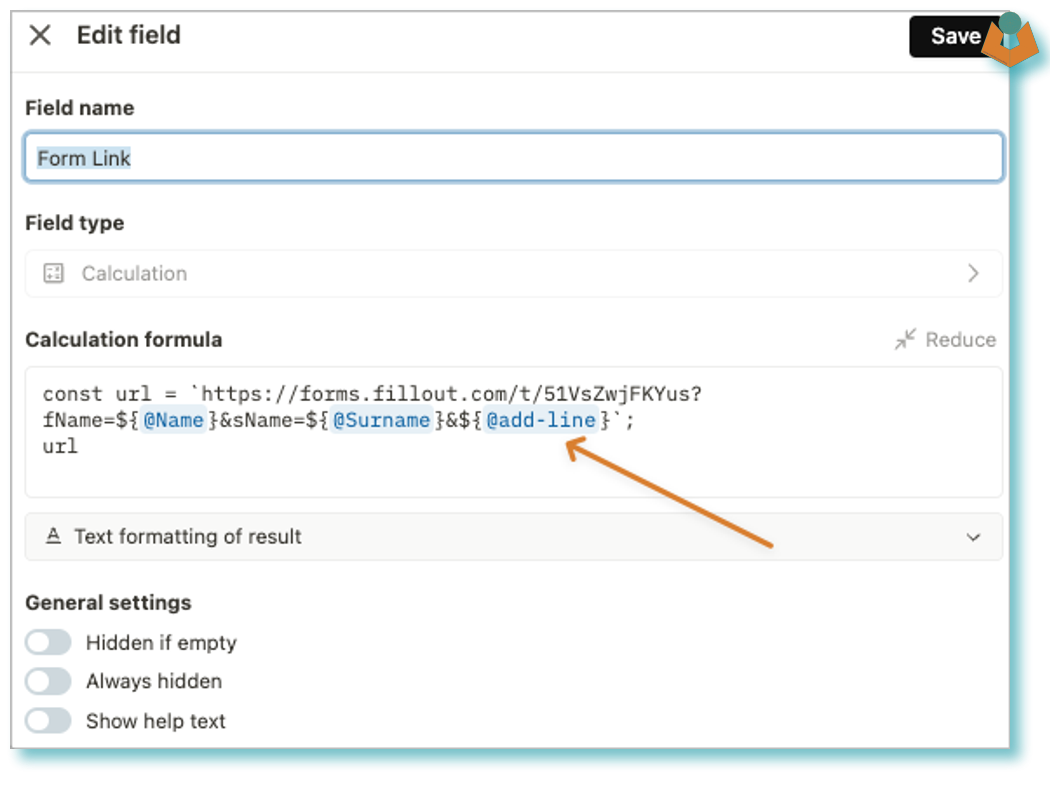
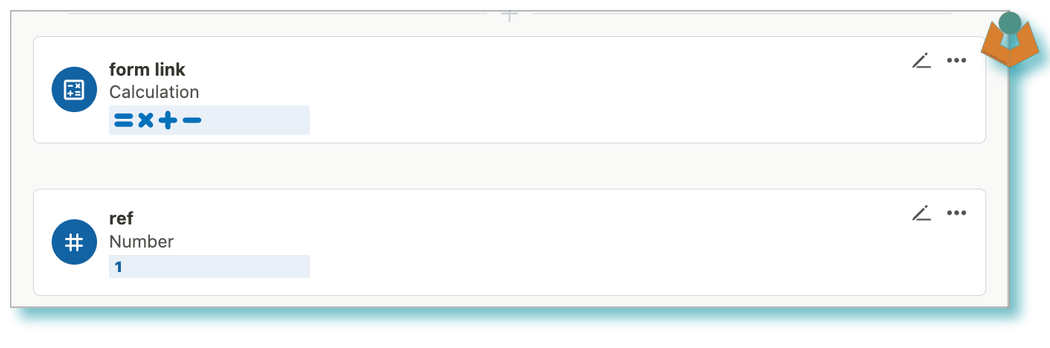
If you move into Tape you need two fields you may not have. These are a Number field for your ref and the other is a calculation field to create your URL. In my example they look like this:
To create your calculation field you will need to add a valid calculation this is where the URL you copied from Fillout comes into play.
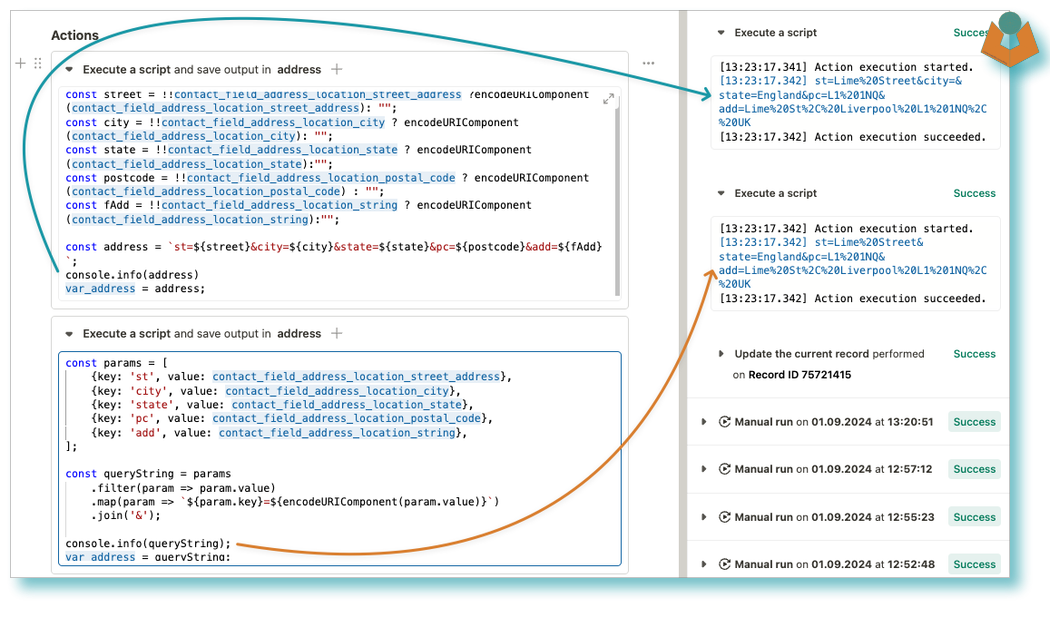
I have split the URL into two so that you can see both the base URL and the ‘pre-fill’ part:
const b = 'https://forms.fillout.com/t/dsWTqutRgXus?';
const u = `ref=${@ref}&fName=${@First Name}&sName=${@Surname}`;
`${b}${u}`
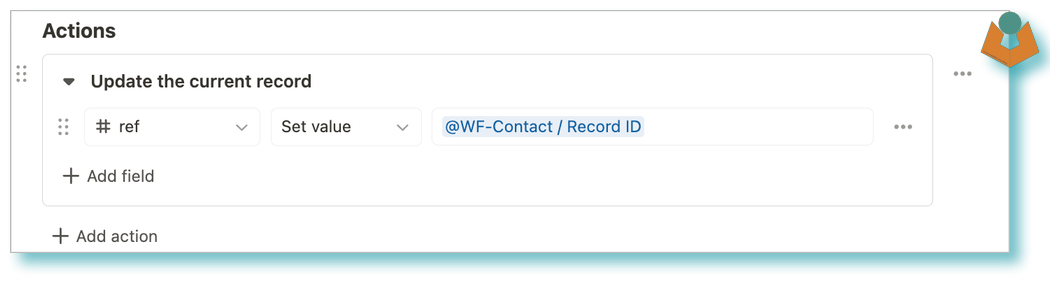
For a unique reference, you could use a Unique ID field I tend to use the Record ID but you do have to add that to the field via automation so do what feels right to you.
Setting up the Webhook
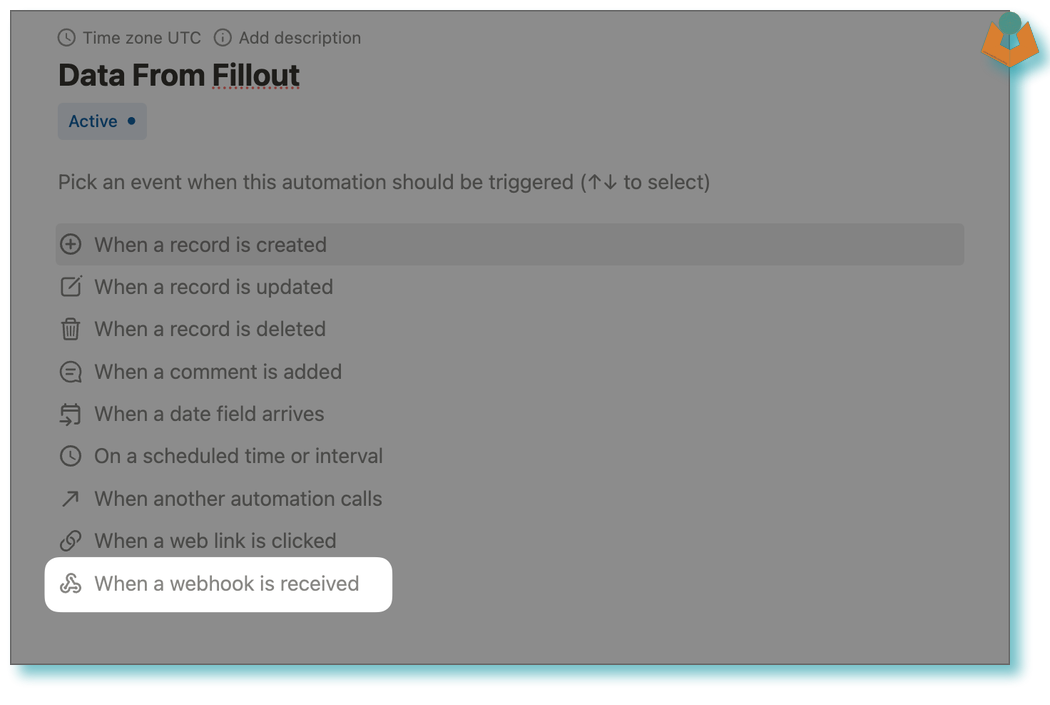
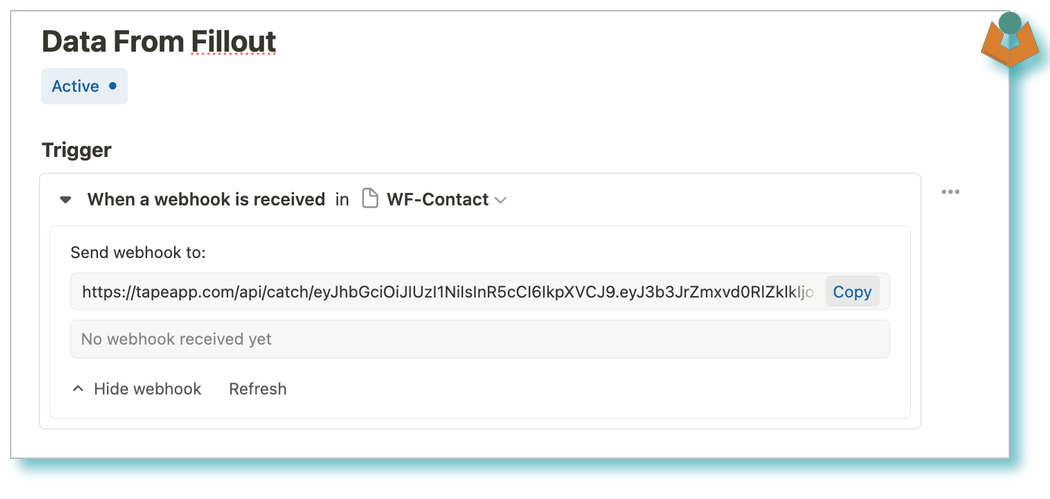
We need to link the form to the Tape app, the first step is to create an automation in Tape with a Webhook trigger:
Once you have created the automation in Tape you can copy the URL:
Link the form to Tape
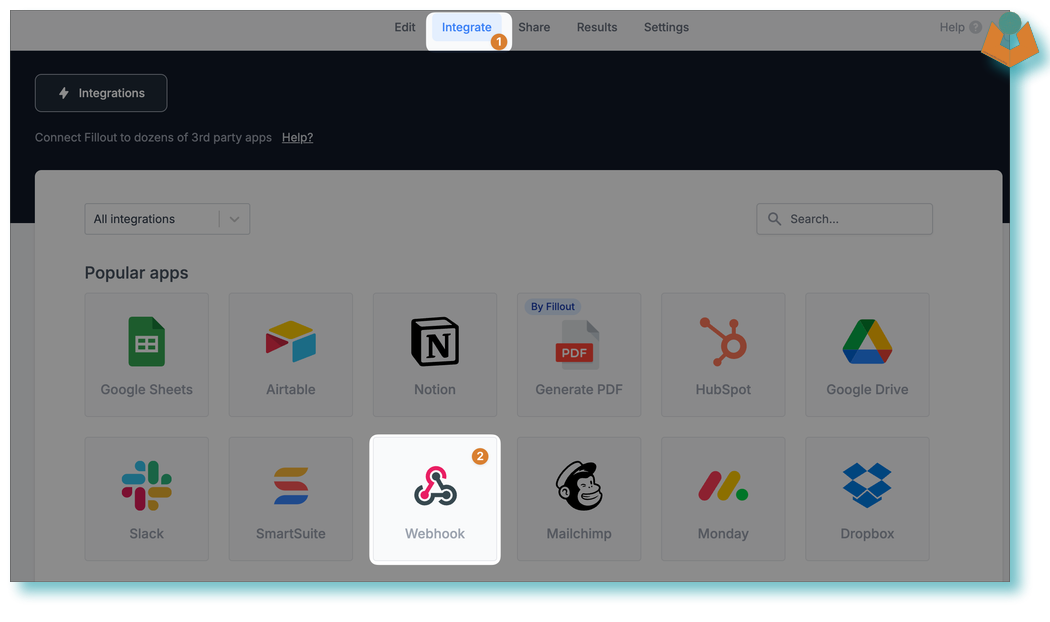
Time to head back into Fillout Select Integration from the top options and then Webhook:
Paste your copied Tape Webhook URL into the
URL field: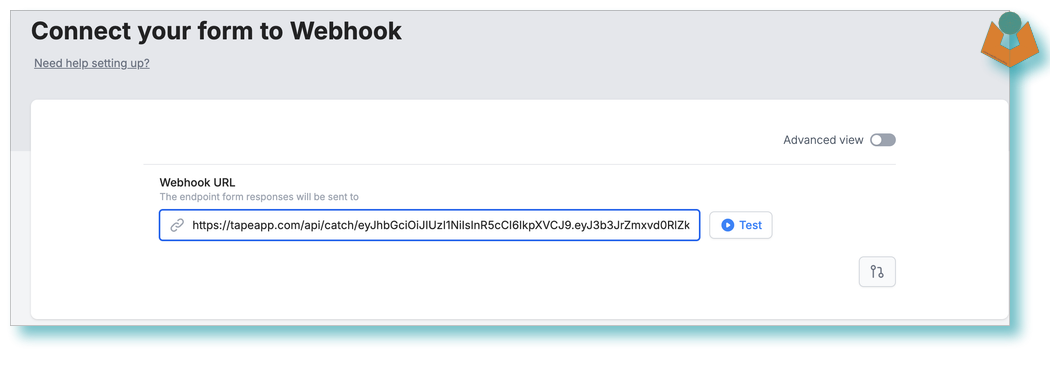
Press the test button, and check that you get a
Status:200 message before moving back to Tape
Complete the Tape Automation
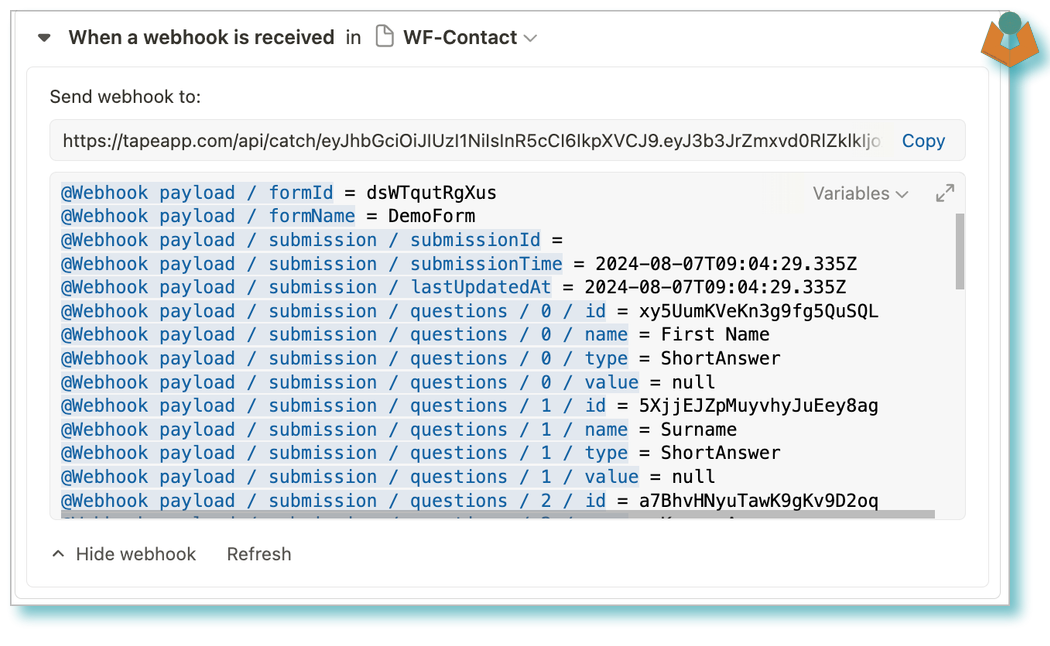
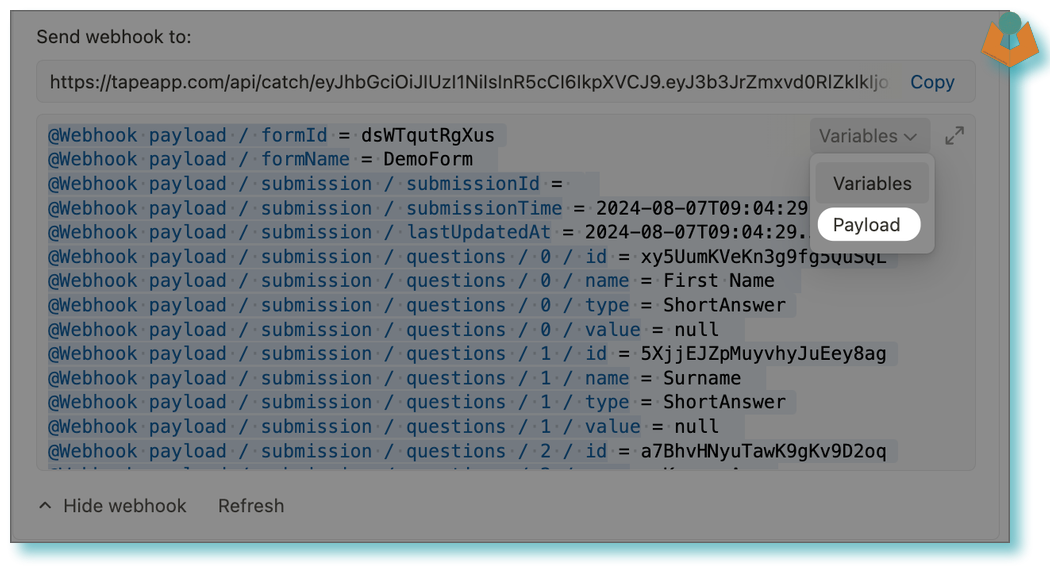
Hit the refresh button in your Tape webhook and the box will fill with a whole raft of information, if it looks confusing don’t worry it is not as bad as it first looks:
@Webhook payload / formId = dsWTqutRgXus
@Webhook payload / formName = DemoForm
@Webhook payload / submission / submissionId =
@Webhook payload / submission / submissionTime = 2024-08-07T09:04:29.335Z
@Webhook payload / submission / lastUpdatedAt = 2024-08-07T09:04:29.335Z
@Webhook payload / submission / questions / 0 / id = xy5UumKVeKn3g9fg5QuSQL
@Webhook payload / submission / questions / 0 / name = First Name
@Webhook payload / submission / questions / 0 / type = ShortAnswer
@Webhook payload / submission / questions / 0 / value = null
@Webhook payload / submission / questions / 1 / id = 5XjjEJZpMuyvhyJuEey8ag
@Webhook payload / submission / questions / 1 / name = Surname
@Webhook payload / submission / questions / 1 / type = ShortAnswer
@Webhook payload / submission / questions / 1 / value = null
@Webhook payload / submission / questions / 2 / id = a7BhvHNyuTawK9gKv9D2oq
@Webhook payload / submission / questions / 2 / name = Known As
@Webhook payload / submission / questions / 2 / type = ShortAnswer
@Webhook payload / submission / questions / 2 / value = null
@Webhook payload / submission / questions / 3 / id = vbcDMrmEhQTdK1H8xvzK4G
@Webhook payload / submission / questions / 3 / name = Your address
@Webhook payload / submission / questions / 3 / type = Address
@Webhook payload / submission / questions / 3 / value / address =
@Webhook payload / submission / questions / 3 / value / city =
@Webhook payload / submission / questions / 3 / value / state =
@Webhook payload / submission / questions / 3 / value / zipCode =
@Webhook payload / submission / questions / 3 / value / country = United Kingdom
@Webhook payload / submission / questions / 4 / id = atqSJaWzMZXa9oX6et42Ad
@Webhook payload / submission / questions / 4 / name = Email
@Webhook payload / submission / questions / 4 / type = EmailInput
@Webhook payload / submission / questions / 4 / value = null
@Webhook payload / submission / questions / 5 / id = 79iJxaNPkRHNSqdgNNZXCE
@Webhook payload / submission / questions / 5 / name = Phone number
@Webhook payload / submission / questions / 5 / type = PhoneNumber
@Webhook payload / submission / questions / 5 / value = null
@Webhook payload / submission / urlParameters / 0 / id = ref
@Webhook payload / submission / urlParameters / 0 / name = ref
@Webhook payload / submission / urlParameters / 0 / value = null
@Webhook payload / submission / urlParameters / 1 / id = fName
@Webhook payload / submission / urlParameters / 1 / name = fName
@Webhook payload / submission / urlParameters / 1 / value = Jason
@Webhook payload / submission / urlParameters / 2 / id = sName
@Webhook payload / submission / urlParameters / 2 / name = sName
@Webhook payload / submission / urlParameters / 2 / value = null
Tape splits the payload out into variables for you which can be handy however form providers quite often don’t send ‘Null’ fields (Fillout does) which then changes the numbers and everything breaks so to be safe we will pull the data out of the payload manually.
If you go to the top right of the payload window Variables will appear click on that and you get an option Paylaod which will give you the payload in JSON format. You want this so click the option:
now your payload window will look something like this:
{
  "formId": "dsWTqutRgXus",
  "formName": "DemoForm",
  "submission": {
    "submissionId": "",
    "submissionTime": "2024-08-07T09:04:29.335Z",
    "lastUpdatedAt": "2024-08-07T09:04:29.335Z",
    "questions": [
      {
        "id": "xy5UumKVeKn3g9fg5QuSQL",
        "name": "First Name",
        "type": "ShortAnswer",
        "value": null
      },
      {
        "id": "5XjjEJZpMuyvhyJuEey8ag",
        "name": "Surname",
        "type": "ShortAnswer",
        "value": null
      },
      {
        "id": "a7BhvHNyuTawK9gKv9D2oq",
        "name": "Known As",
        "type": "ShortAnswer",
        "value": null
      },
      {
        "id": "vbcDMrmEhQTdK1H8xvzK4G",
        "name": "Your address",
        "type": "Address",
        "value": {
          "address": "",
          "city": "",
          "state": "",
          "zipCode": "",
          "country": "United Kingdom"
        }
      },
      {
        "id": "atqSJaWzMZXa9oX6et42Ad",
        "name": "Email",
        "type": "EmailInput",
        "value": null
      },
      {
        "id": "79iJxaNPkRHNSqdgNNZXCE",
        "name": "Phone number",
        "type": "PhoneNumber",
        "value": null
      }
    ],
    "calculations": [],
    "urlParameters": [
      {
        "id": "ref",
        "name": "ref",
        "value": null
      },
      {
        "id": "fName",
        "name": "fName",
        "value": "Jason"
      },
      {
        "id": "sName",
        "name": "sName",
        "value": null
      }
    ],
    "quiz": {},
    "documents": [],
    "scheduling": [],
    "payments": []
  }
}
In this we can see each field that we have in our form and within each field there is an id we are going to use this to pull the relevant value for each field.
      {
        "id": "79iJxaNPkRHNSqdgNNZXCE",
        "name": "Phone number",
        "type": "PhoneNumber",
        "value": null
      }
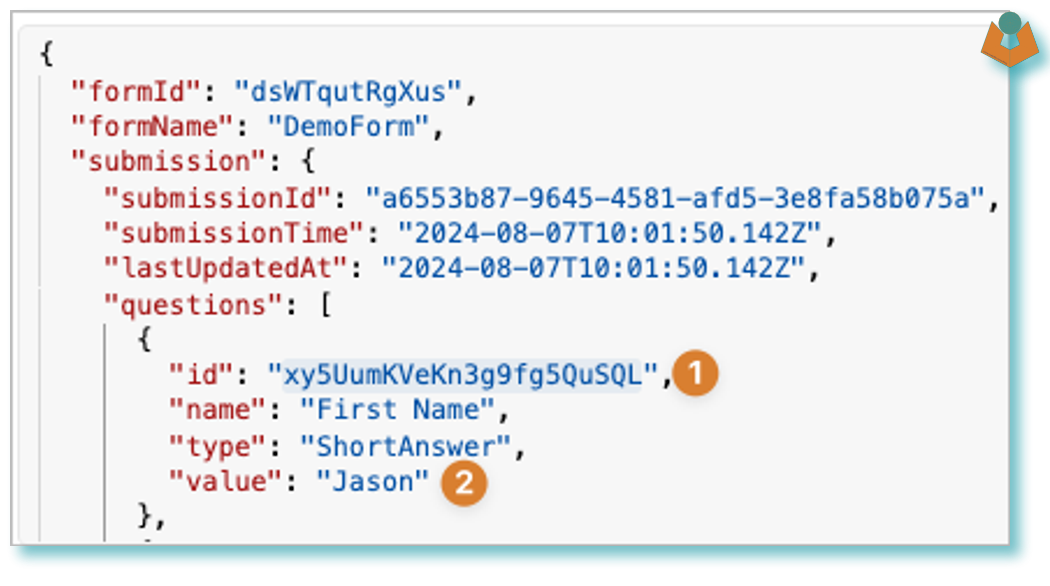
JSONata is an incredibly useful library and we will use it to pull out the value for each field using the id from the payload as the designator. I have sent a test form submission and as you can see from the following image:
- The ID is
xy5UumKVeKn3g9fg5QuSQL - The value of the
First Namefield isJason
You can also see that the field data is buried under the submission object and then questions in the payload.
So how do we get that information out of the payload?
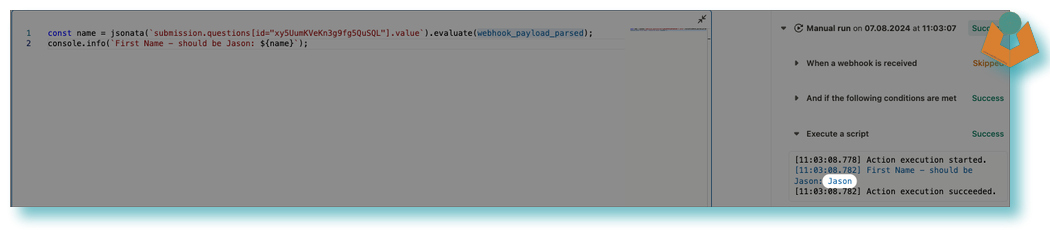
jsonata(`submission.questions[id="xy5UumKVeKn3g9fg5QuSQL"].value`).evaluate(webhook_payload_parsed)`
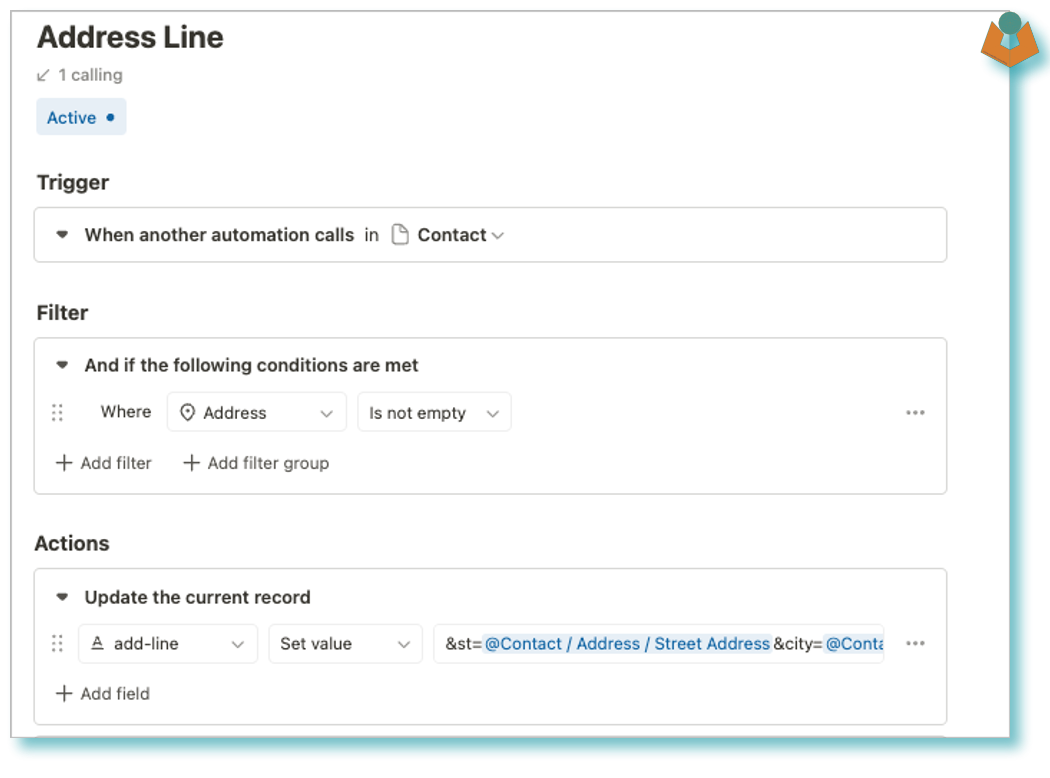
Now we know how to get the data out of the payload we can use that to fill in our record fields.
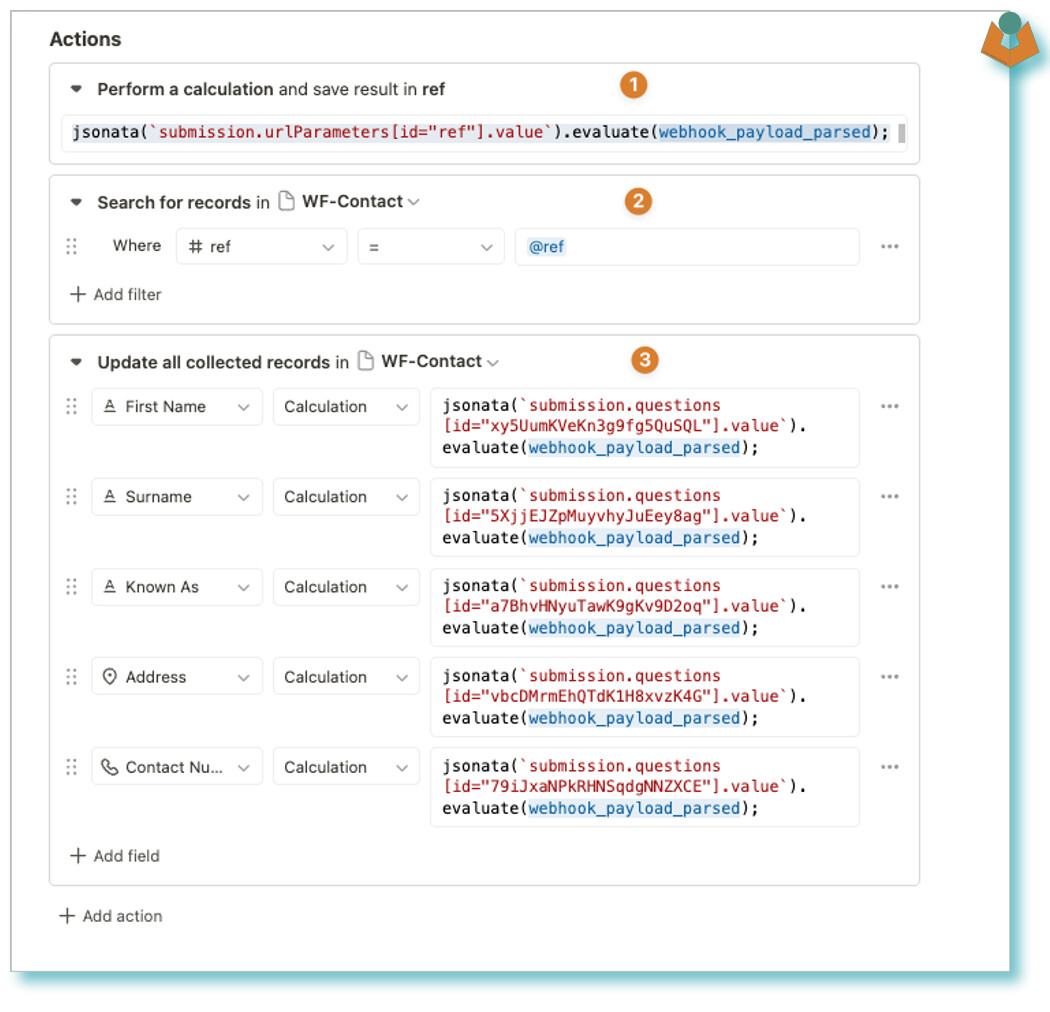
- We need to get the
reffrom the payload so we can search for the relevant record the easiest way is to use a calculation block and build a variable to search for. - We search for the record using the
reffrom the payload in our new variable. - We update the record using the
idof the field to find thevalueof the field.
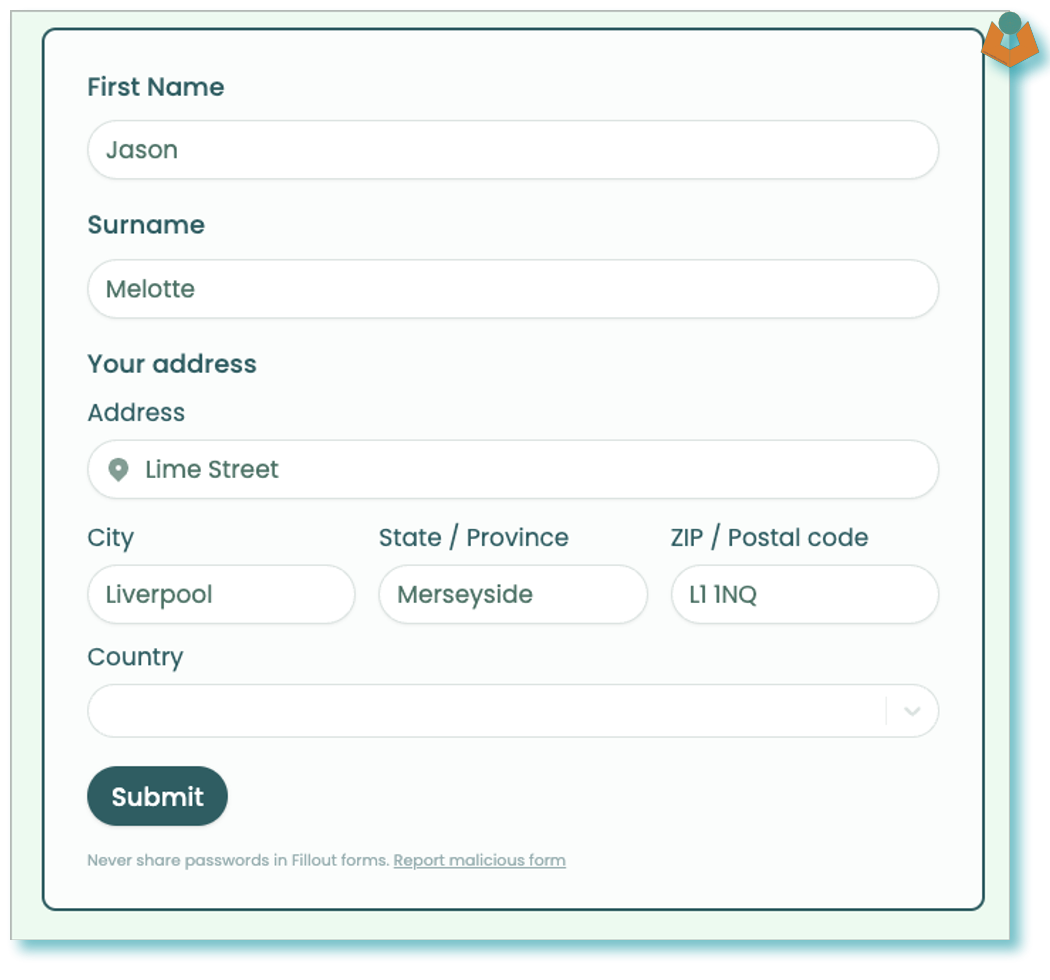
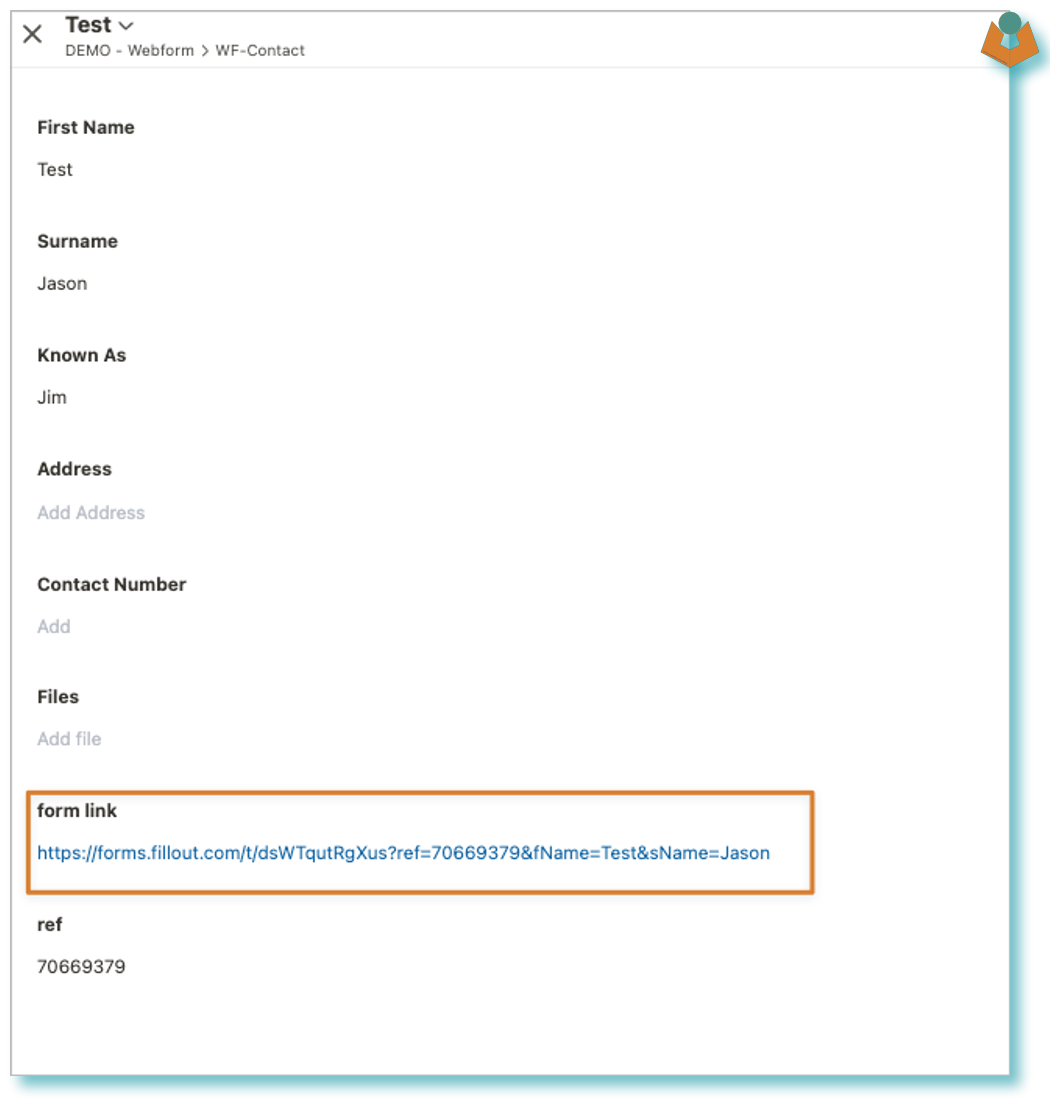
If we create a test record we can see the prefill URL in the form link field waiting to be sent to the user.
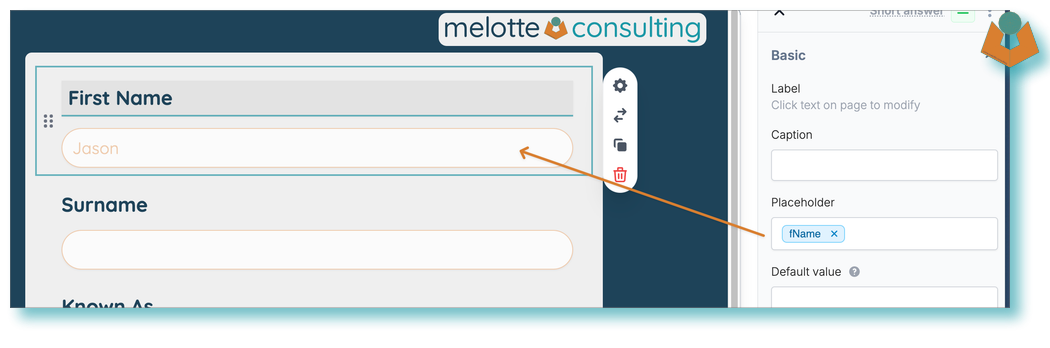
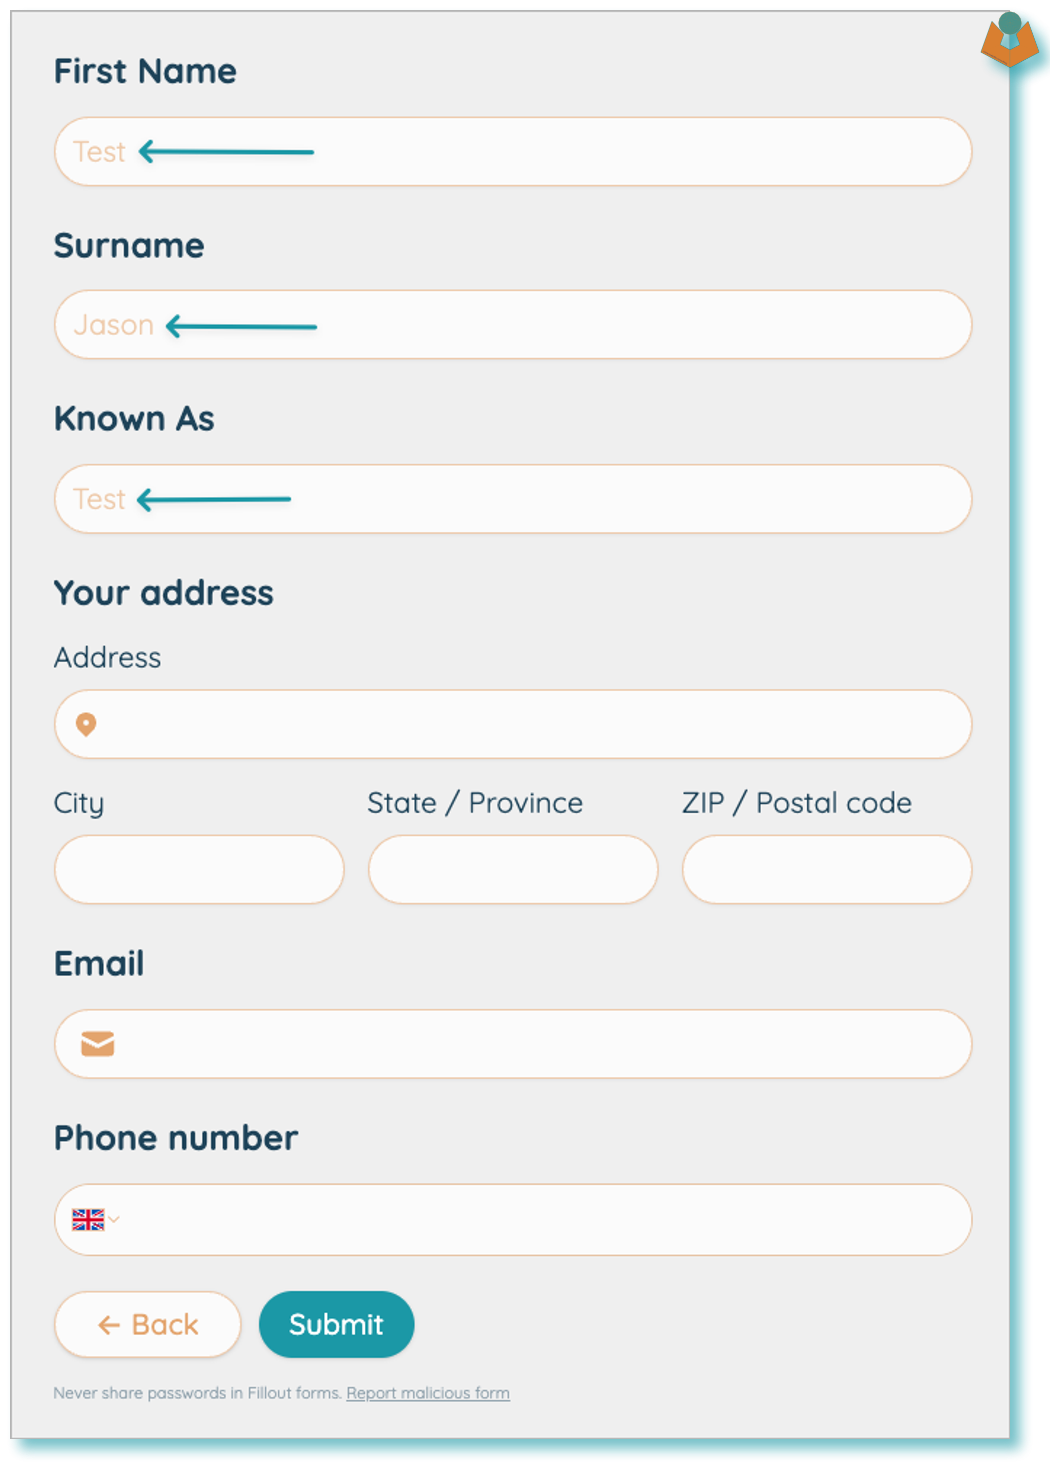
click on the link and your form opens with the prefilled fields visible:
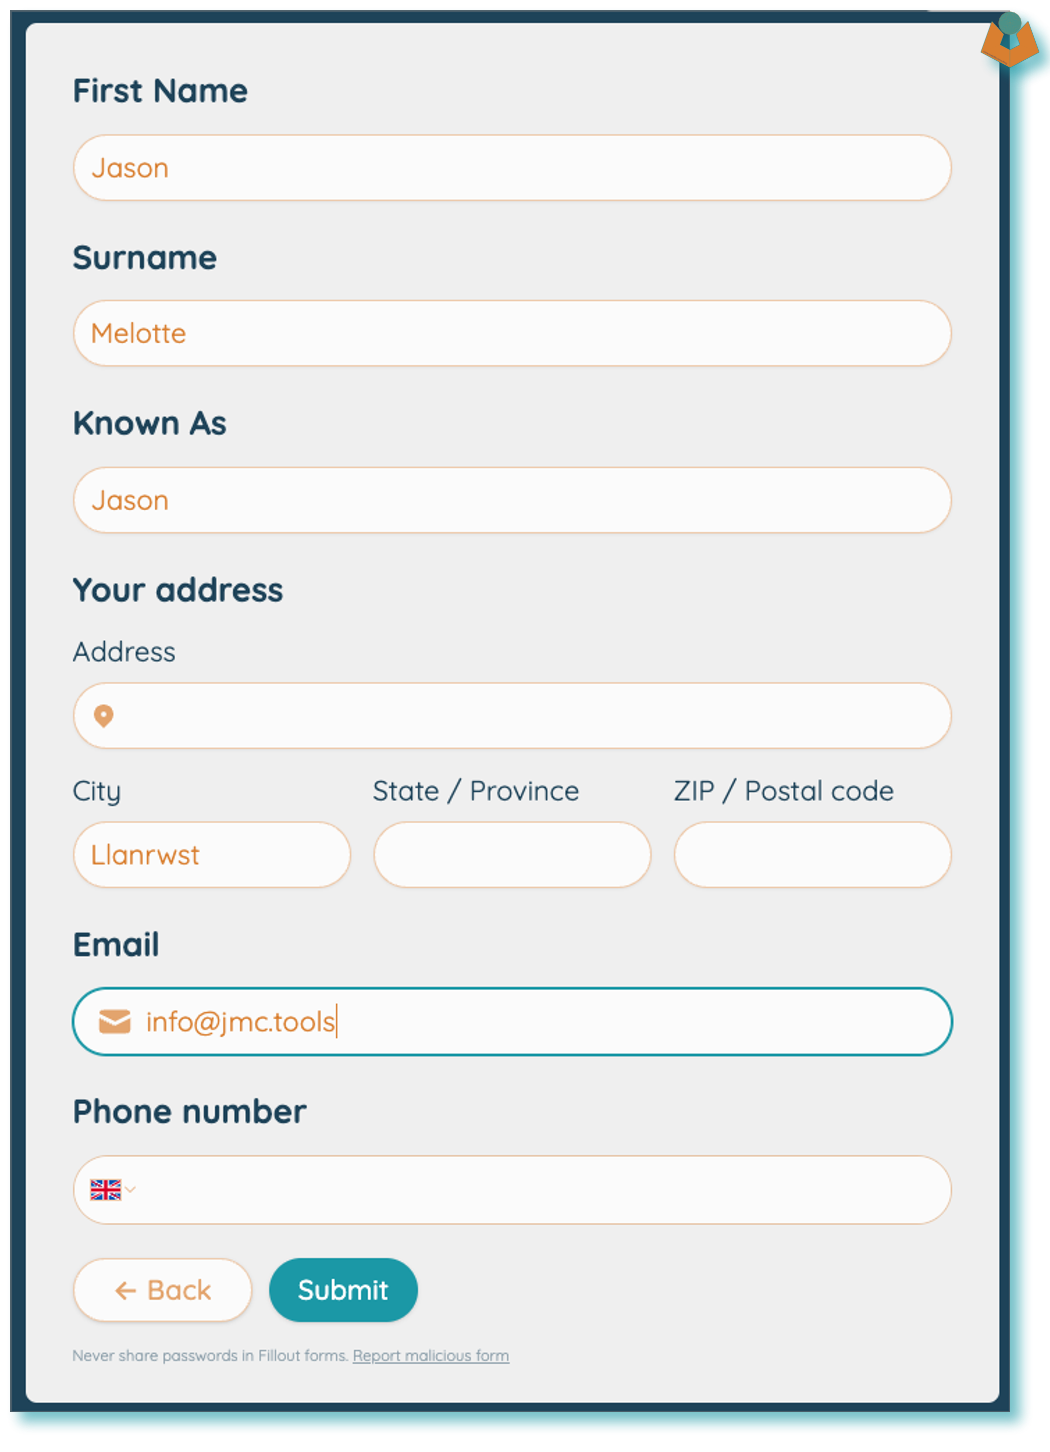
We can now correct the information in the form and when we press submit the data will be sent to Tape and the record will be updated, incredibly quickly.
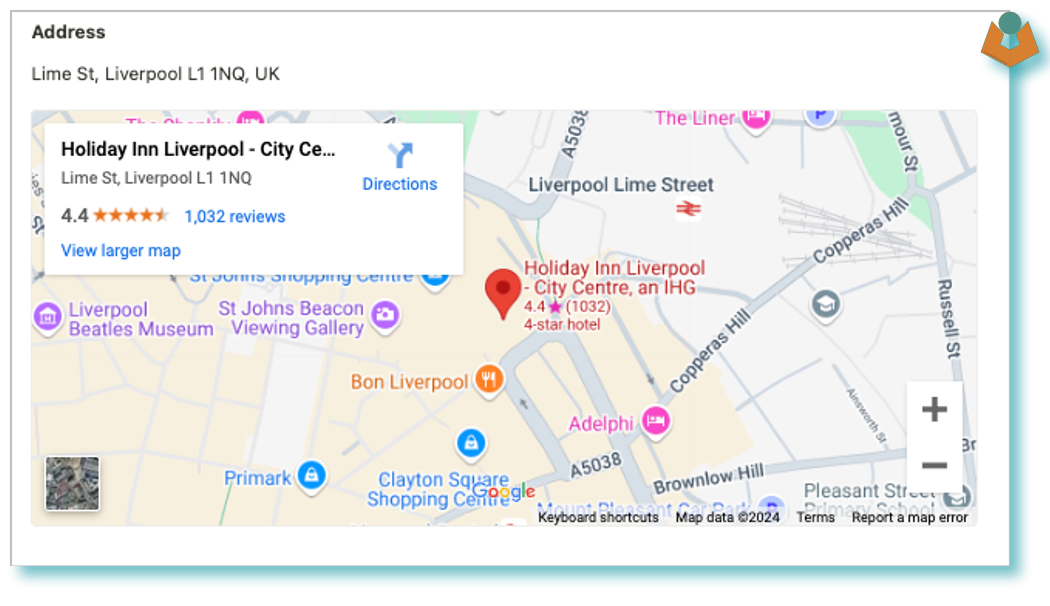
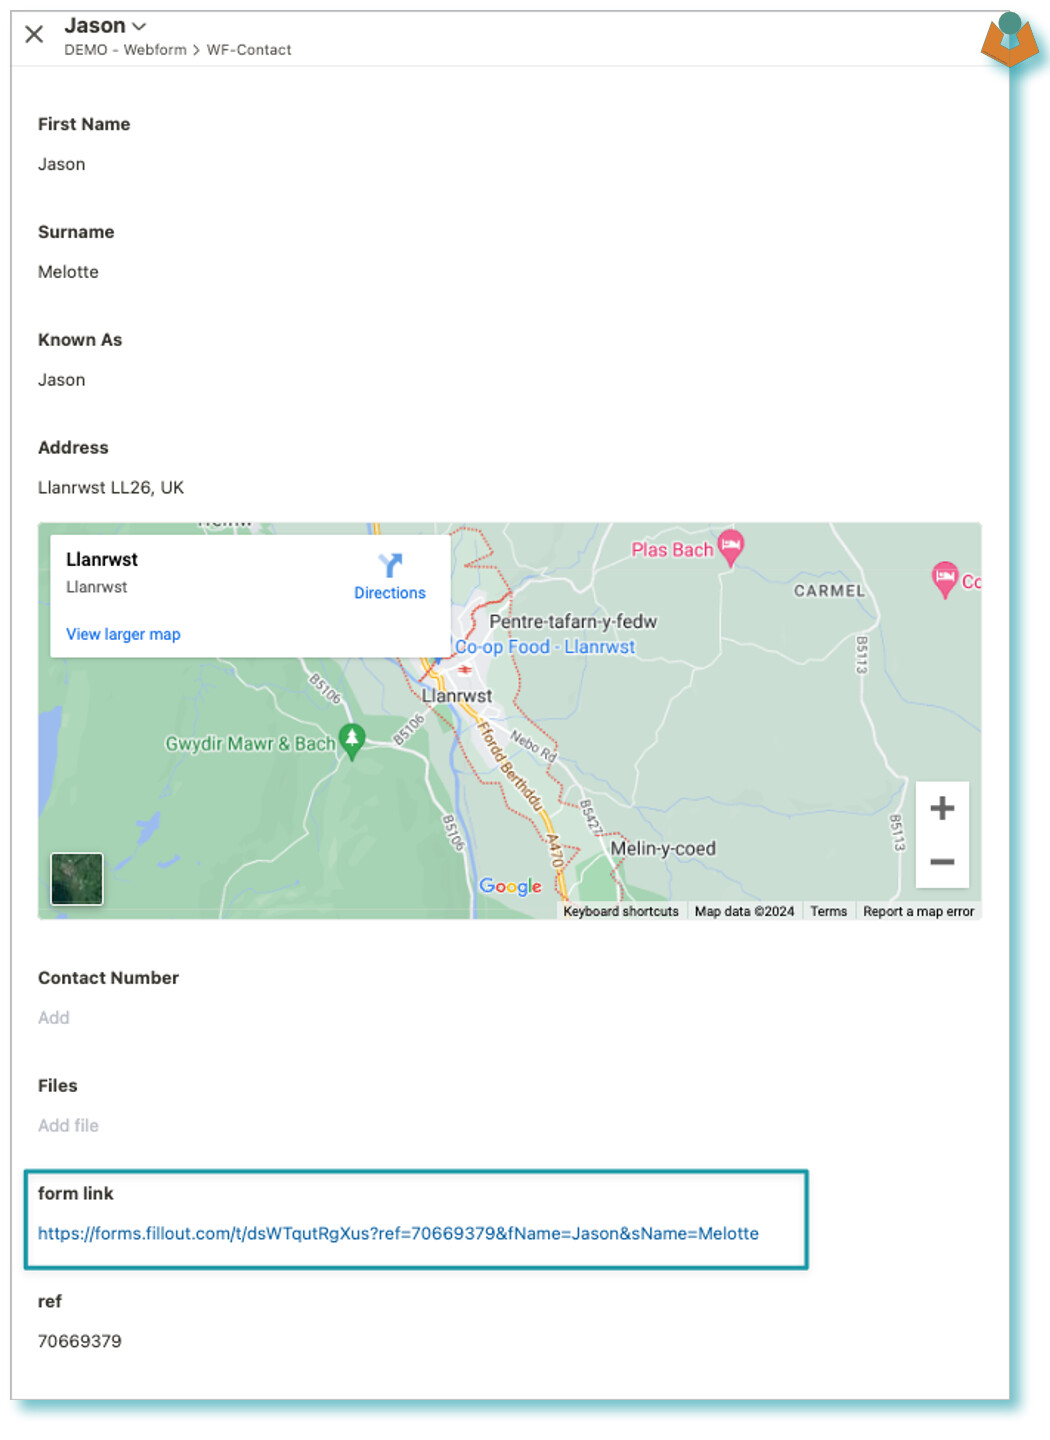
Two things of note here the address update is so intelligent it just takes the information it is given and updates the record with that information, I often forget how clever it is and worry about my address mapping being wrong. The second is that the form link will also be updated with the new information so if it needs to be used again it will have the latest information pre-filled.
As I said at the start I have used Fillout for this, but it is a similar process with most other form providers. Hopefully the above makes sense as always feel free to get in touch if you have any questions.