Dates are everywhere: deadlines, events, project phases, and meeting schedules.
That’s why the date field is one of the most used field types in Tape.
We’re happy to release the new date field today across the new record experience, Tape Forms, and the mobile app when you create and edit records.
 How to get started
1.) Switch to the new record experience in one of your database apps.
· Click the ••• button in the top right
· select New Record Beta
· click Set as default for you (all details ➔)
2.) Open any record in a database app
3.) Unlock the record via the ••• menu in the top right
4.) Click the + icon in the left margin whenever you hover over a new line
5.) Select Date from the field type list (Help Center ➔)
To configure date fields:
Open the ⋮⋮ menu in the left margin when you hover over a date field
 What stays familiar
Everything you already expect from a date field is still here:
- Date with optional time (12h / 24h)
- End date for date ranges (Hidden / Shown / Required)
- Show in calendar
- Hide when empty, Always hide
 What’s new
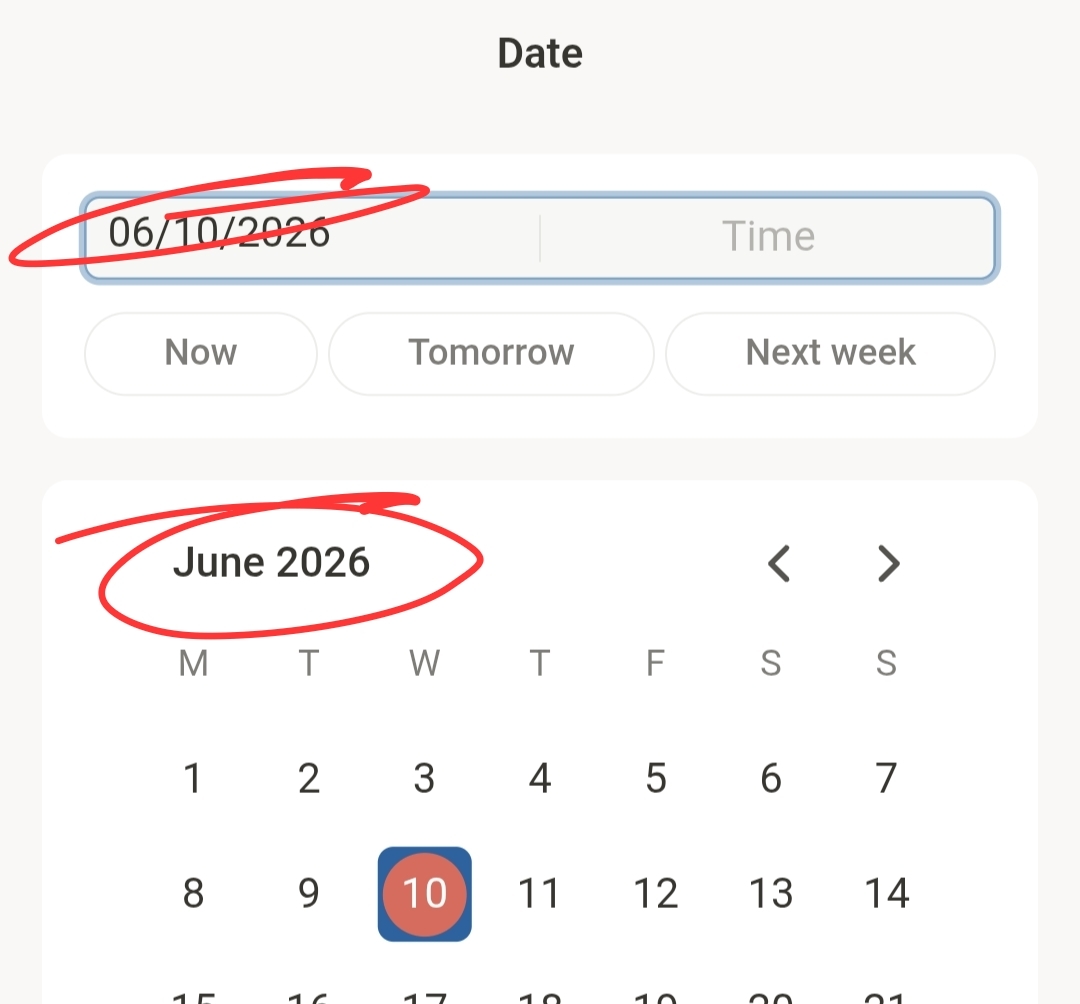
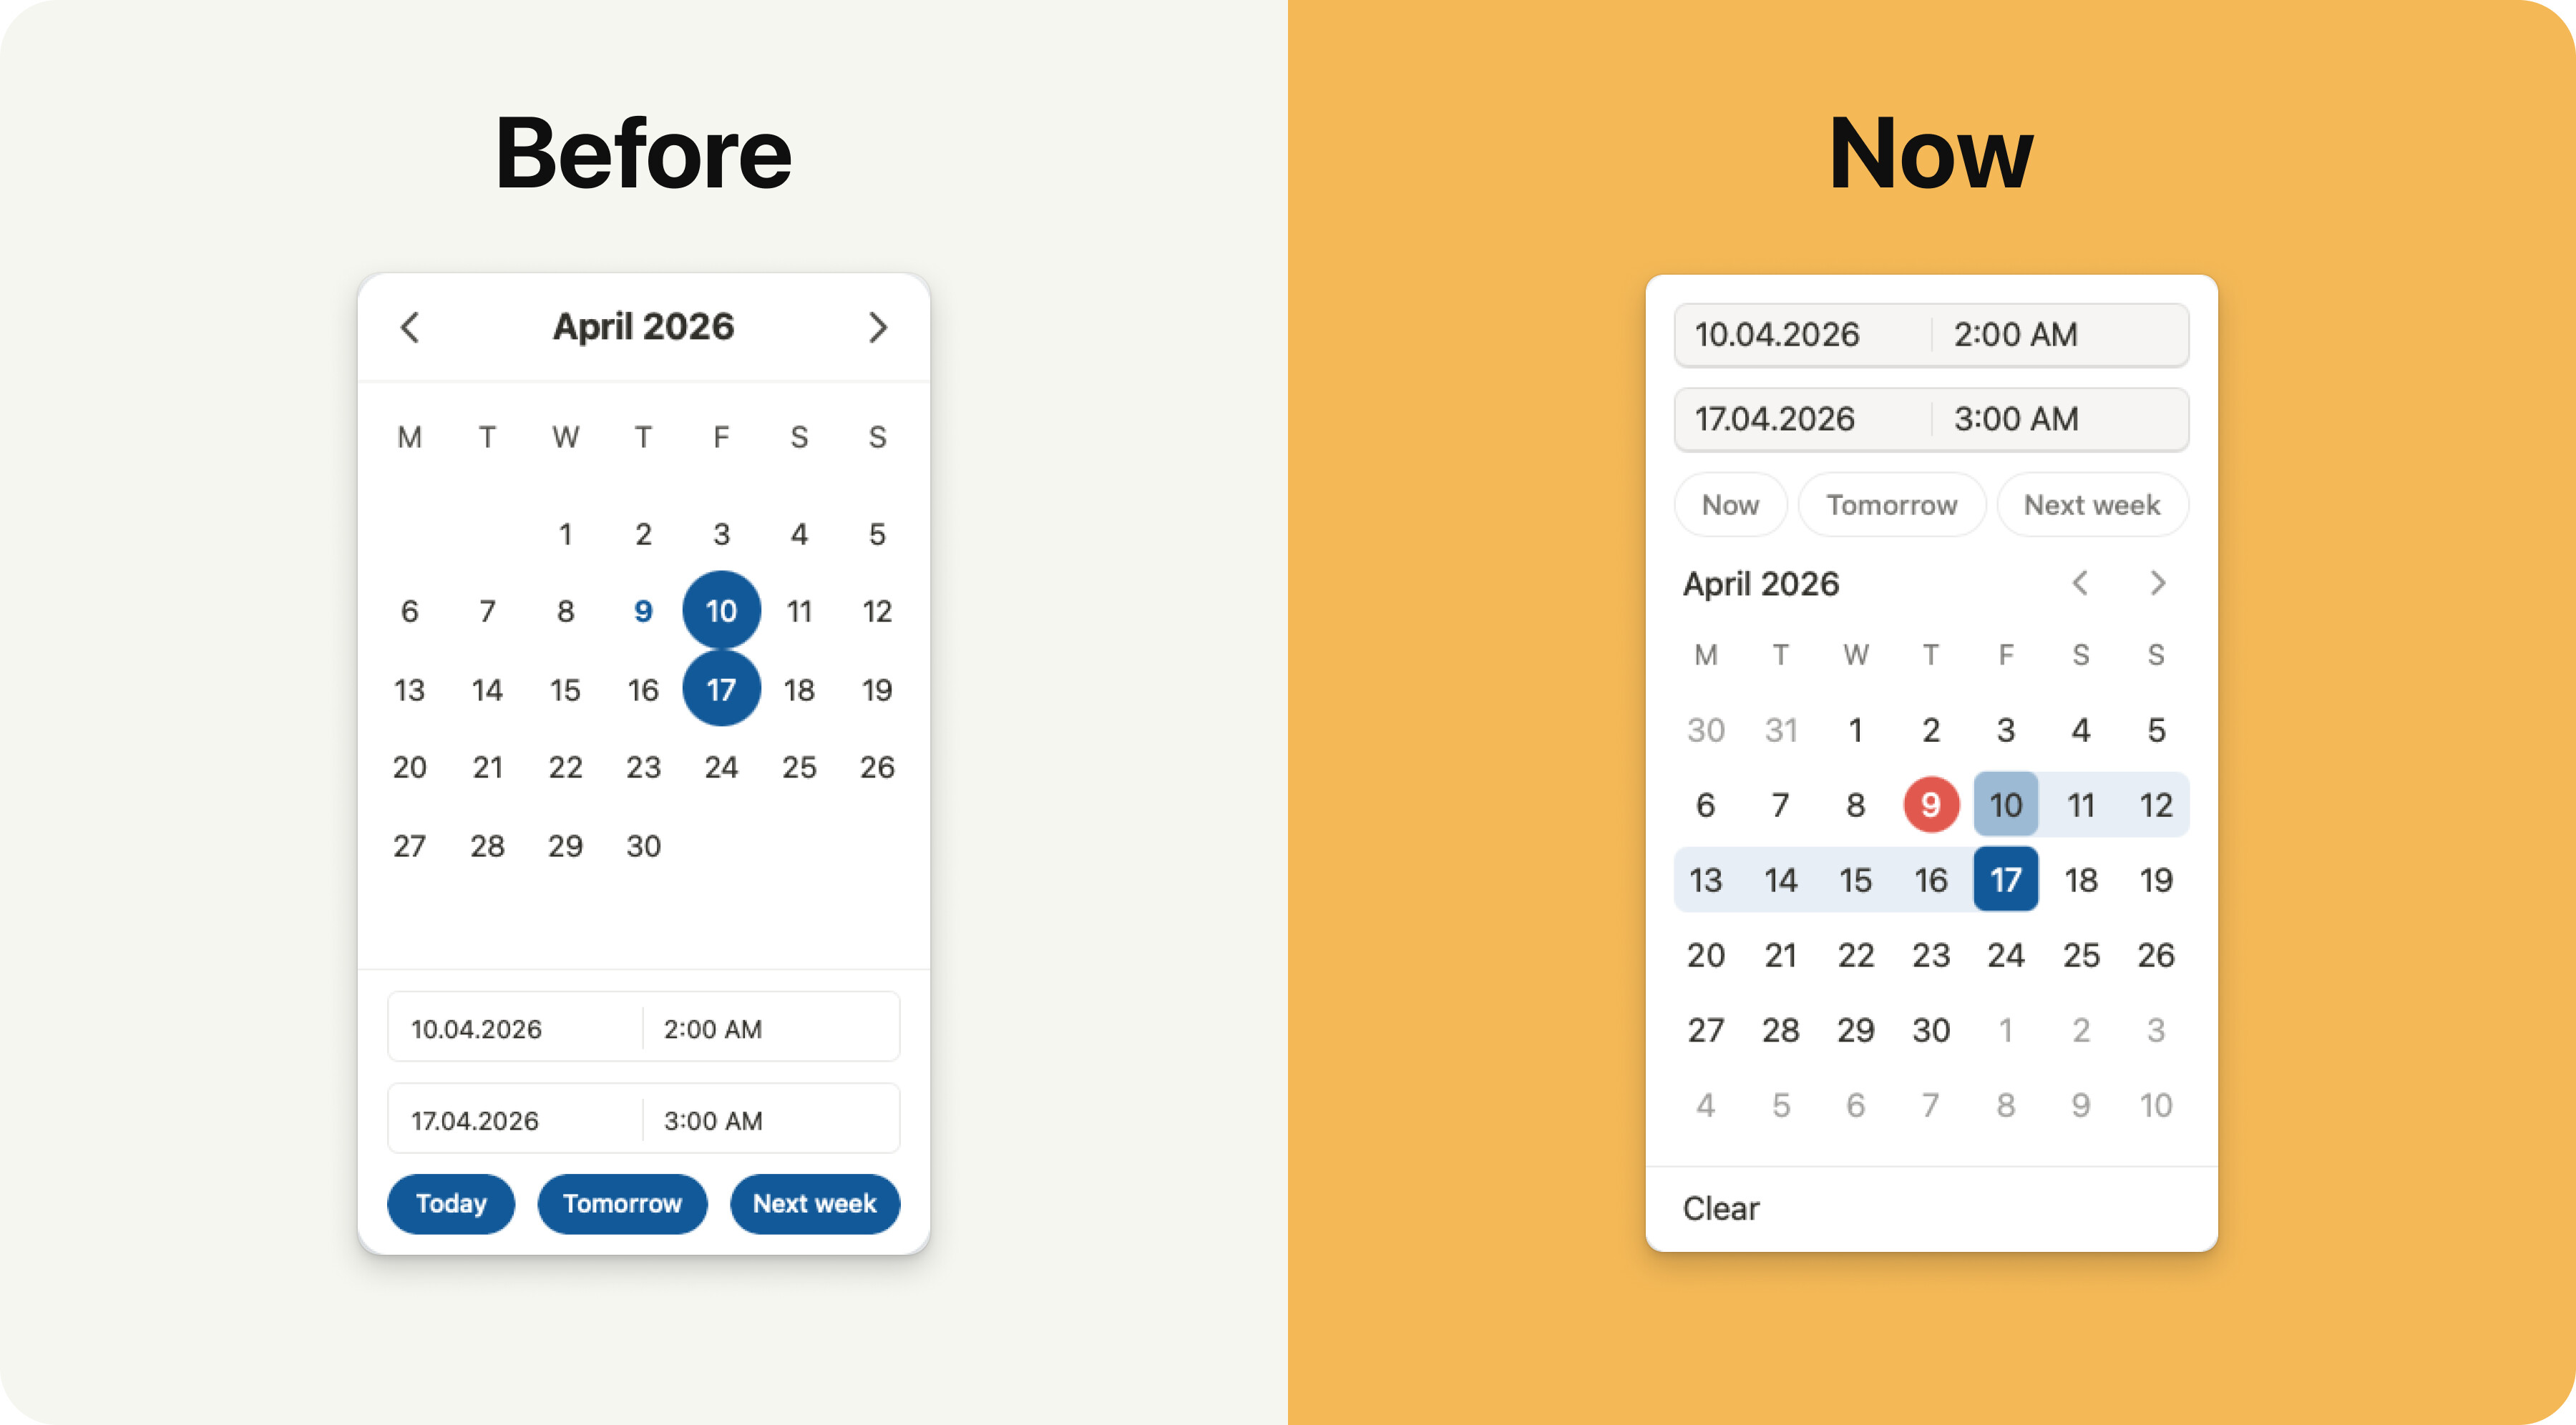
- The date picker got a big refresh and is now much easier to use. We’ve now rolled it out in the classic record too, because it simply works better.
- Date fields now also work in forms. We also focused on making the mobile experience feel smooth, especially when selecting and editing dates and times with the new date picker.
- Default value
- Now: current date and time, with optional offsets like days, weeks, or months.
- Today: current date without time, with optional offsets. This makes setups like today + 14 days easy, so every new record starts with a date two weeks out.
- Specific date: a fixed date from the date picker.
- Due date for status
- Shows up when a status field is added. If you turn this setting on and the date has passed while the status is not completed, the date turns red. If it is today or tomorrow, it turns blue. This works in the record, in views, and in relation fields.
- Relation fields and references
- Edit the date directly in card or list layout without opening the record.
- Field access (Premium plan feature)
- Restrict who can view or edit the date field.
- Rules (Premium plan feature)
- Show or hide date fields based on other field values.
- Display options
- Use the new “View only” option to make sure nobody can change the date field value.
- Quick-select buttons
- Quick-select options like “Today/Now”, “Tomorrow”, and “Next week” are still there.
- And now with “Clear”, you can remove the value without selecting and deleting text manually.
- Style settings
- Label display and size, placeholder, tooltip, field icon, and more. The full style system is available for the date field.
- Rearranging date fields
- Use the ⋮⋮ handle next to the field label to drag and drop date fields. Reorder them, move them around the record, or place them into different columns.
- Include end date (optional)
- No more separate field types. Just turn it on or off in the settings.
- Calendar view across months
- The date picker now shows days from the previous and next month. This makes it easy to select date ranges across months in one view. For example, you can pick April 28 as the start date and May 3 as the end date in the same grid.
Date formats:
It now gives you much more control over how dates are shown across your organization.
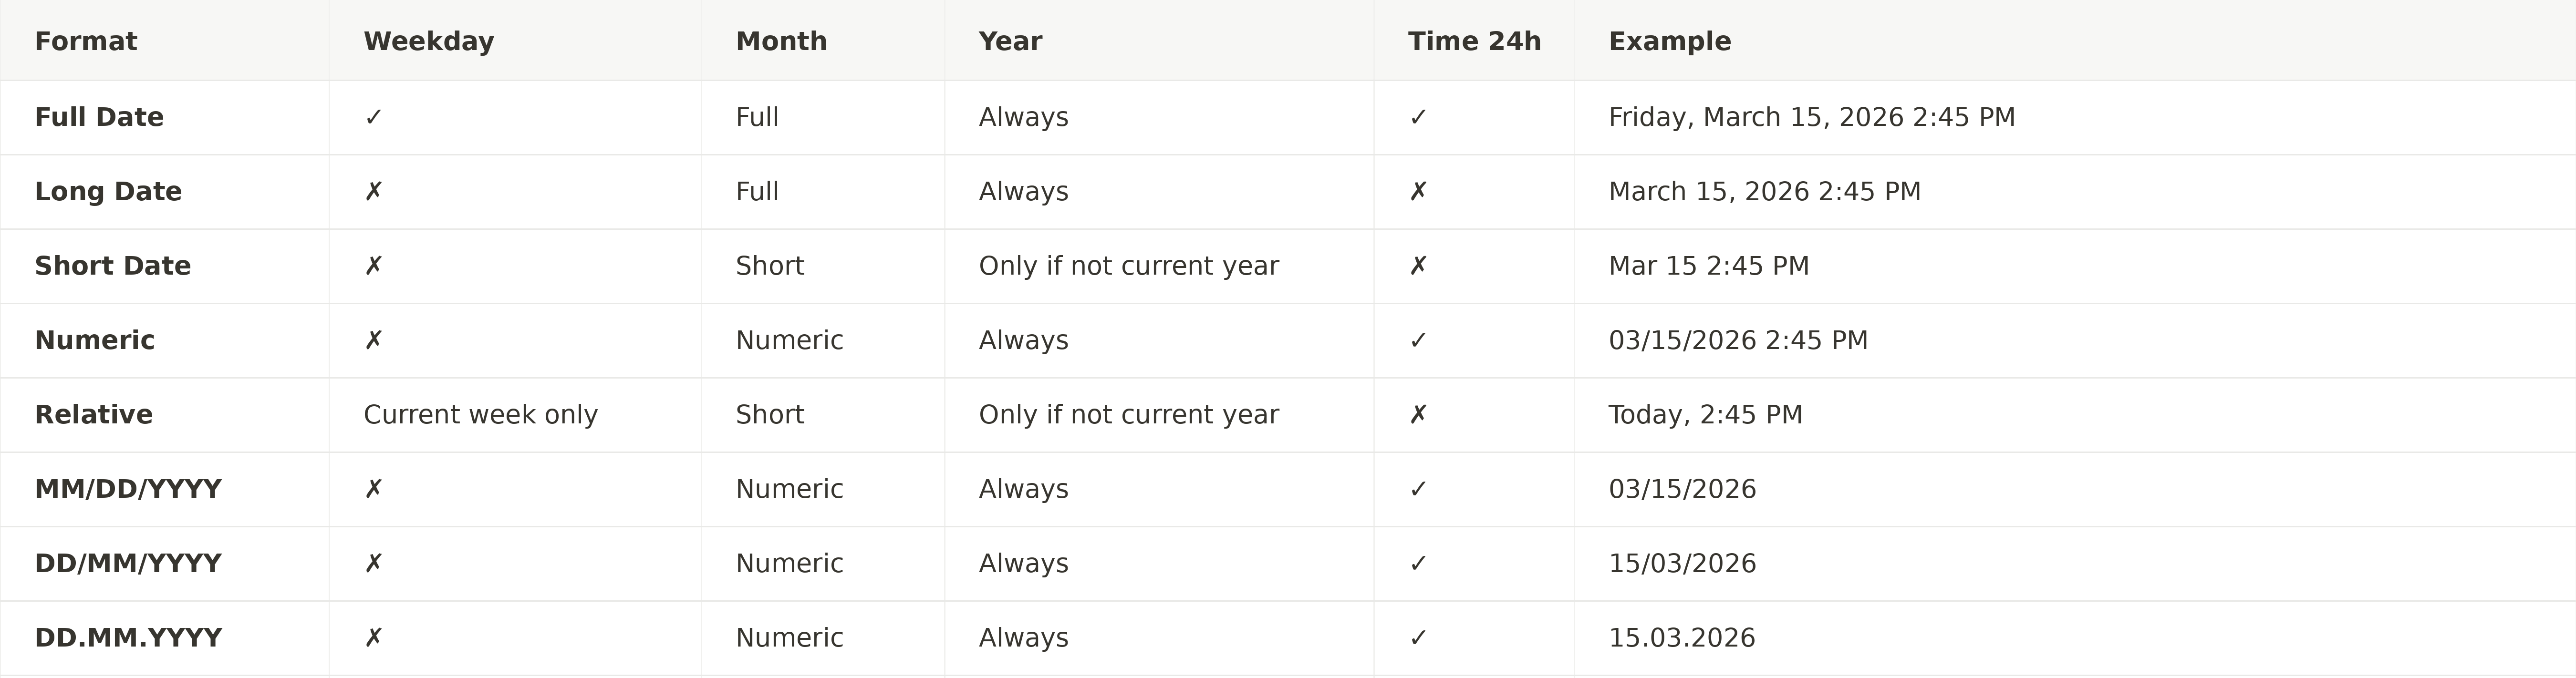
You can now choose from these date formats:
This lets you choose the best date format for your team, while still keeping each user’s personal format settings.
Baseline is always the user’s format settings
Each user can choose their own date and time format.
To find them, click your profile picture → Preferences → Language and formats.
Users can choose between:
- Date format
- MM/DD/YYYY; MMMM DD, YYYY
- DD/MM/YYYY; DD MMMM YYYY
- DD.MM.YYYY; DD. MMMM YYYY
- Time format
- 12 hours
- 24 hours
The simplest setup:
If you want to keep things simple, just keep the default setting.
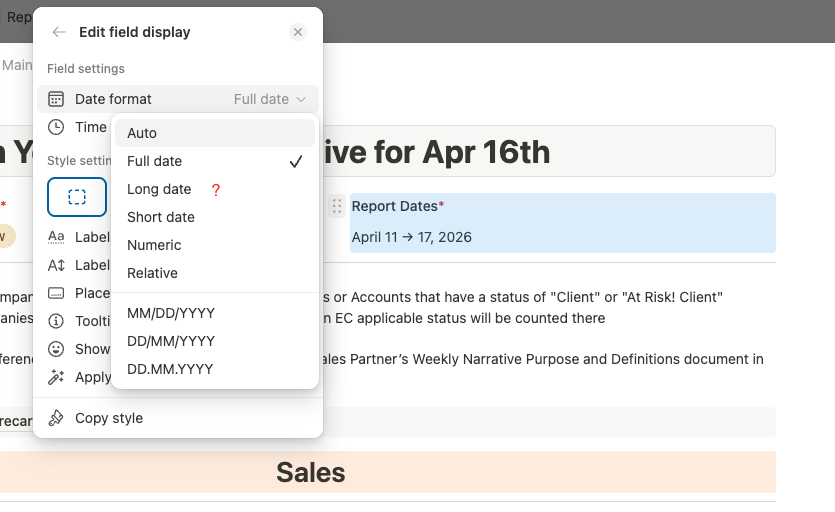
(Or change it back by setting Edit field display → Date format to Auto)
Then choose the format in Edit field → Date format
Full date, Long date, Short date, Numeric, or Relative
Dates are shown based on each user’s personal date and time format. For example:
Short datein the field settings:- If the user uses
MM/DD/YYYY, the date shows asFeb 25 - If the user uses
DD.MM.YYYY, the date shows as25. Feb
- If the user uses
Full datein the field settings:- If the user uses
MM/DD/YYYY, the date shows asWednesday, February 25, 2026 - If the user uses
DD.MM.YYYY, the date shows asWednesday, 25. February 2026
- If the user uses
That’s it. The date format is used in the field, in views (Table, Board, List), and in relation layouts (Cards, List).
Advanced options:
Go to: Edit field display → Date format
- Auto: This is the default and inherits the format settings from
Edit field→Date format. Everything works as described above in “The simplest setup”.
You can override these settings:
- Choose Full date, Long date, Short date, Numeric, or Relative. The date field still follows the same logic as each user’s personal date and time format, but can now be different in e.g. views and in the record.
- You can also override each user’s personal date and time format. This is useful when consistency matters more than personal preference. Use this when everyone should see the same format. Choose one of these options:
- MM/DD/YYYY
- DD/MM/YYYY
- DD.MM.YYYY
Some examples:
- A date field can have one format in a table and a different format inside the record (e.g. Edit field = Long date and Edit field display = Numeric)
- Using the “record layout” feature, each layout can use its own date format.
- Tape forms can show a date field in “Long date”, while the linked database shows the same date field in “Full date”.
We hope these new features open up even more use cases for you in Tape.
If you want to get a head start, just duplicate the ![]() template workspace.
template workspace.
Thanks for being part of the journey.
Happy building.