As of today, we are thrilled to announce that the trigger ![]() On schedule
On schedule ![]() has been added to our supercharged workflow automation
has been added to our supercharged workflow automation ![]() .
.
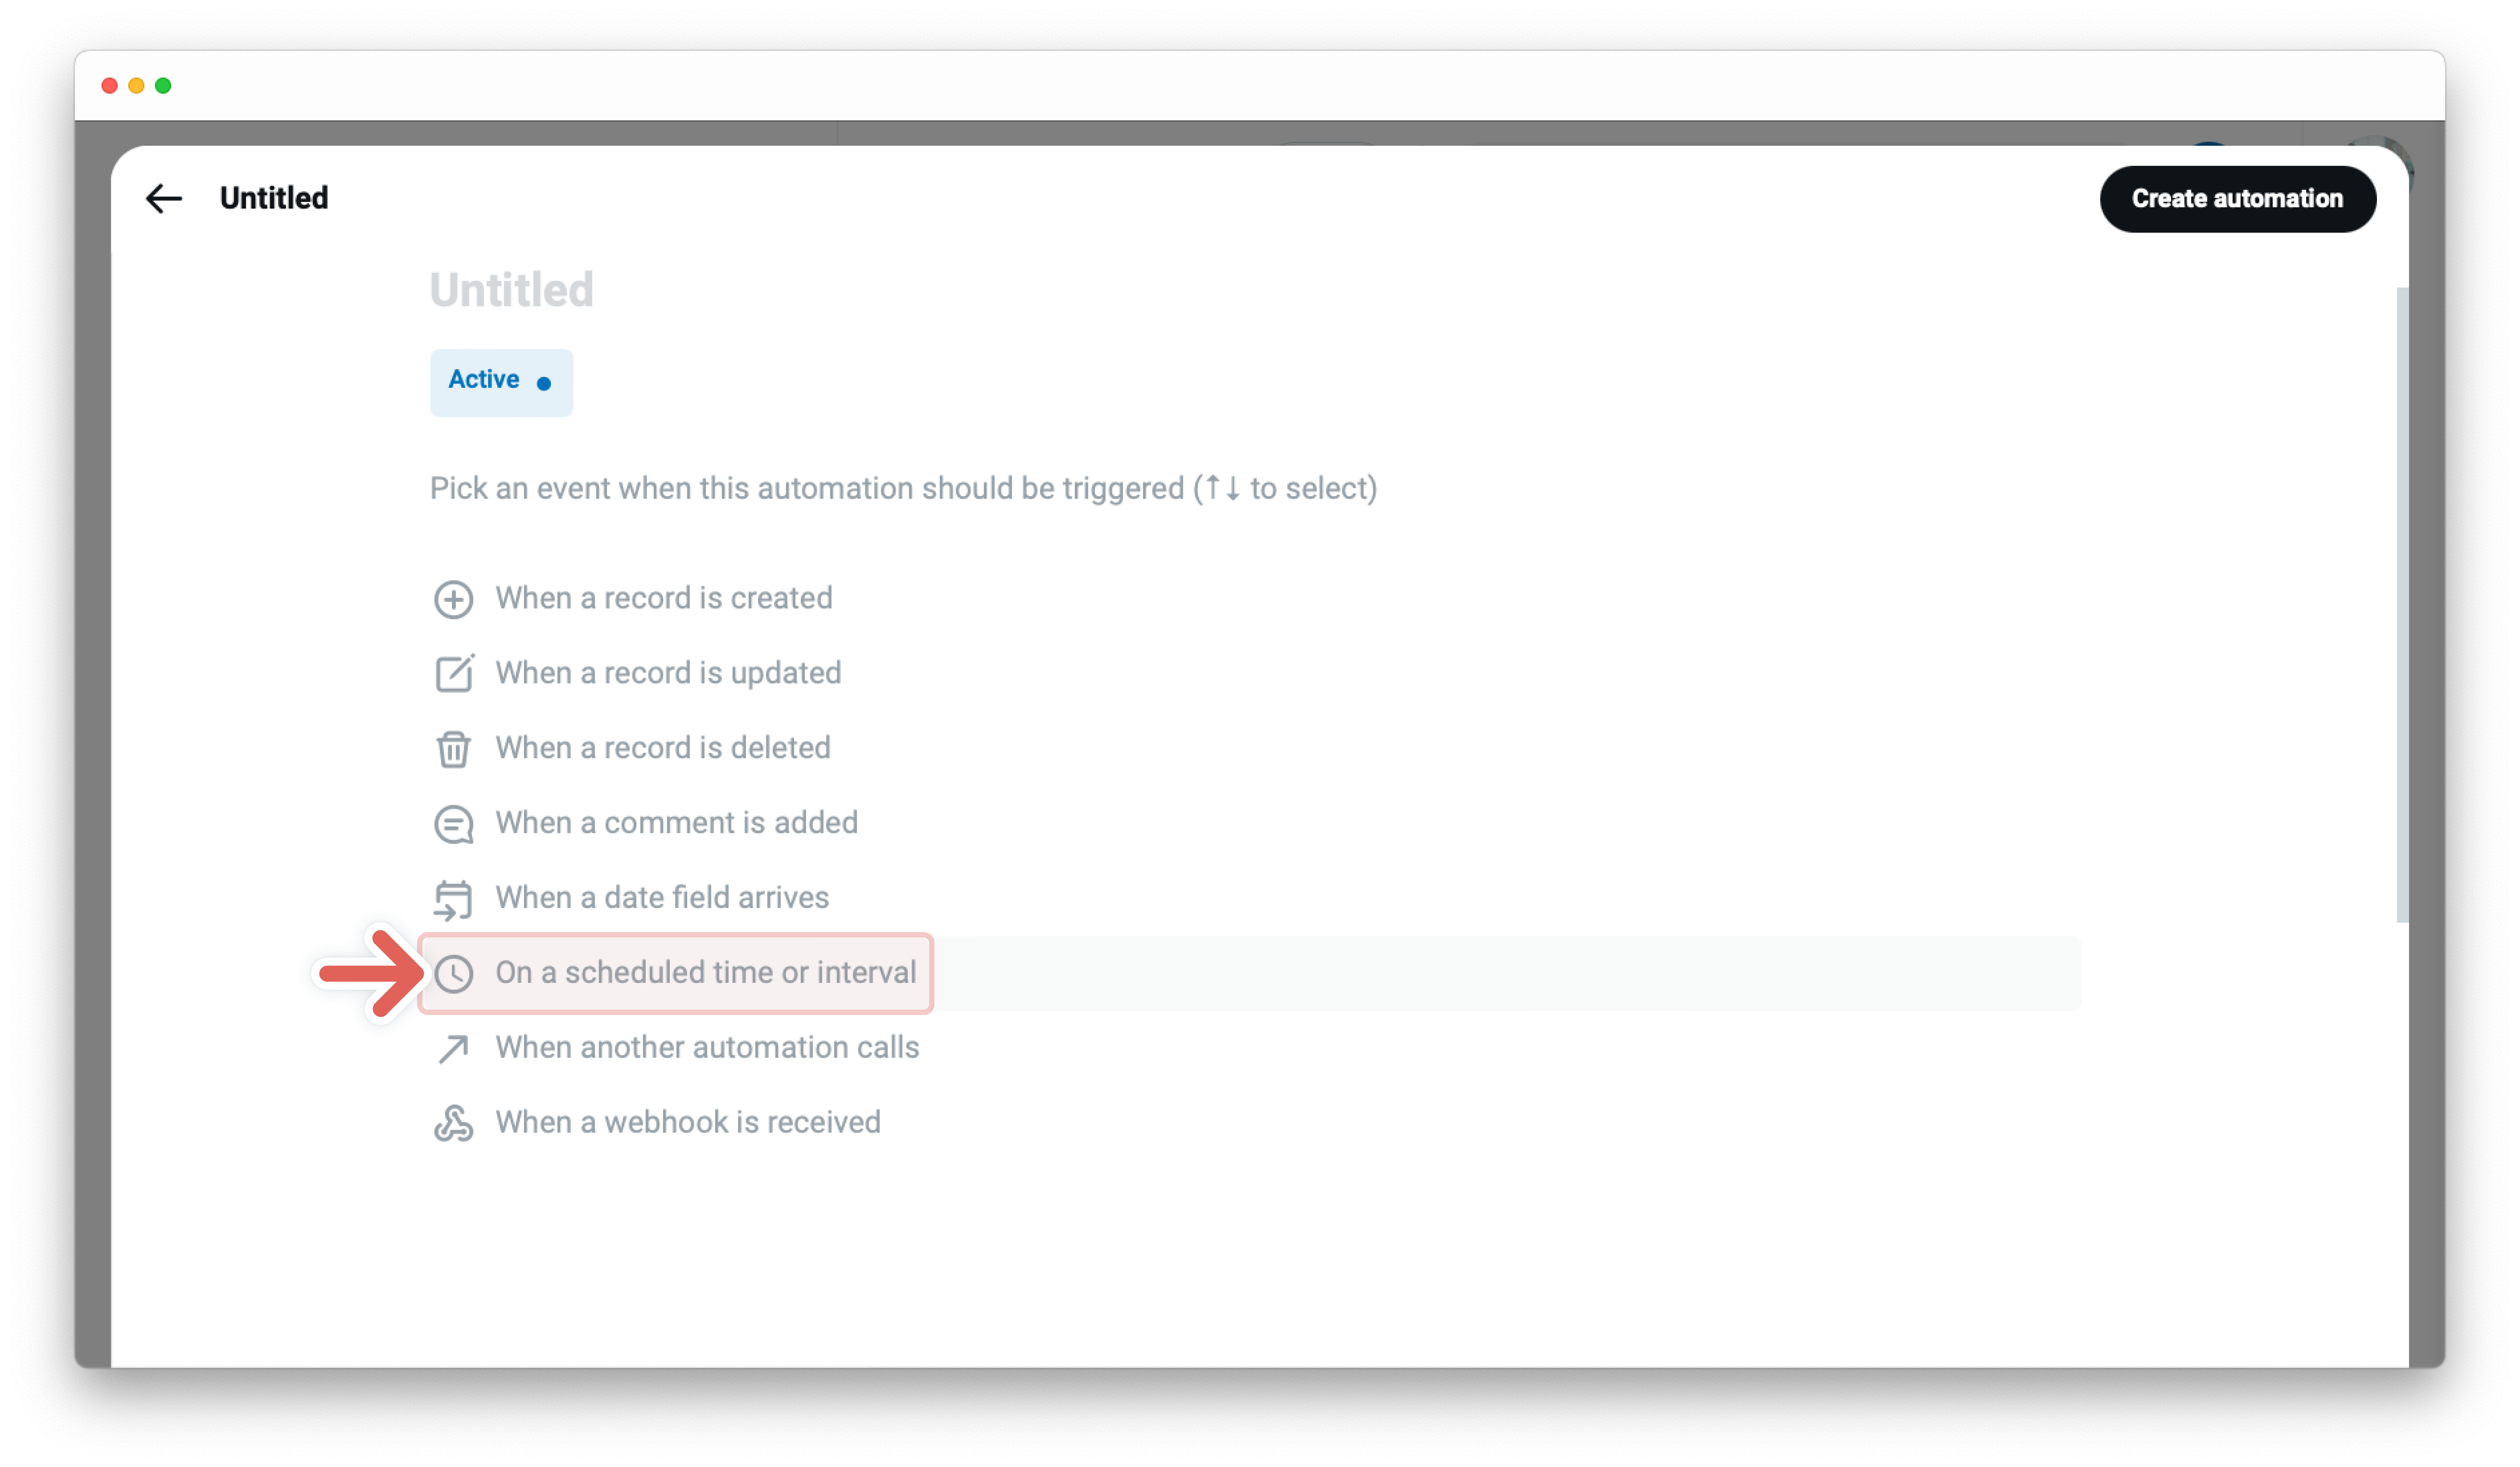
Overview
The event that starts an automation with the trigger “On schedule” is a specific time or interval. You can choose basic interval types to run your automation every month, week, day, hour, minute, or one time. For each of these interval types, you can define exactly when and with which repeating the automation should be triggered.
A simple use case
“When it’s Monday 08:00 am (Trigger) then create a new record to your task management app to set your weekly goals (Action).”
Create automation using the trigger “On schedule”
-
First automation block - Trigger - the “When this happens” automation statement
- Choose the trigger
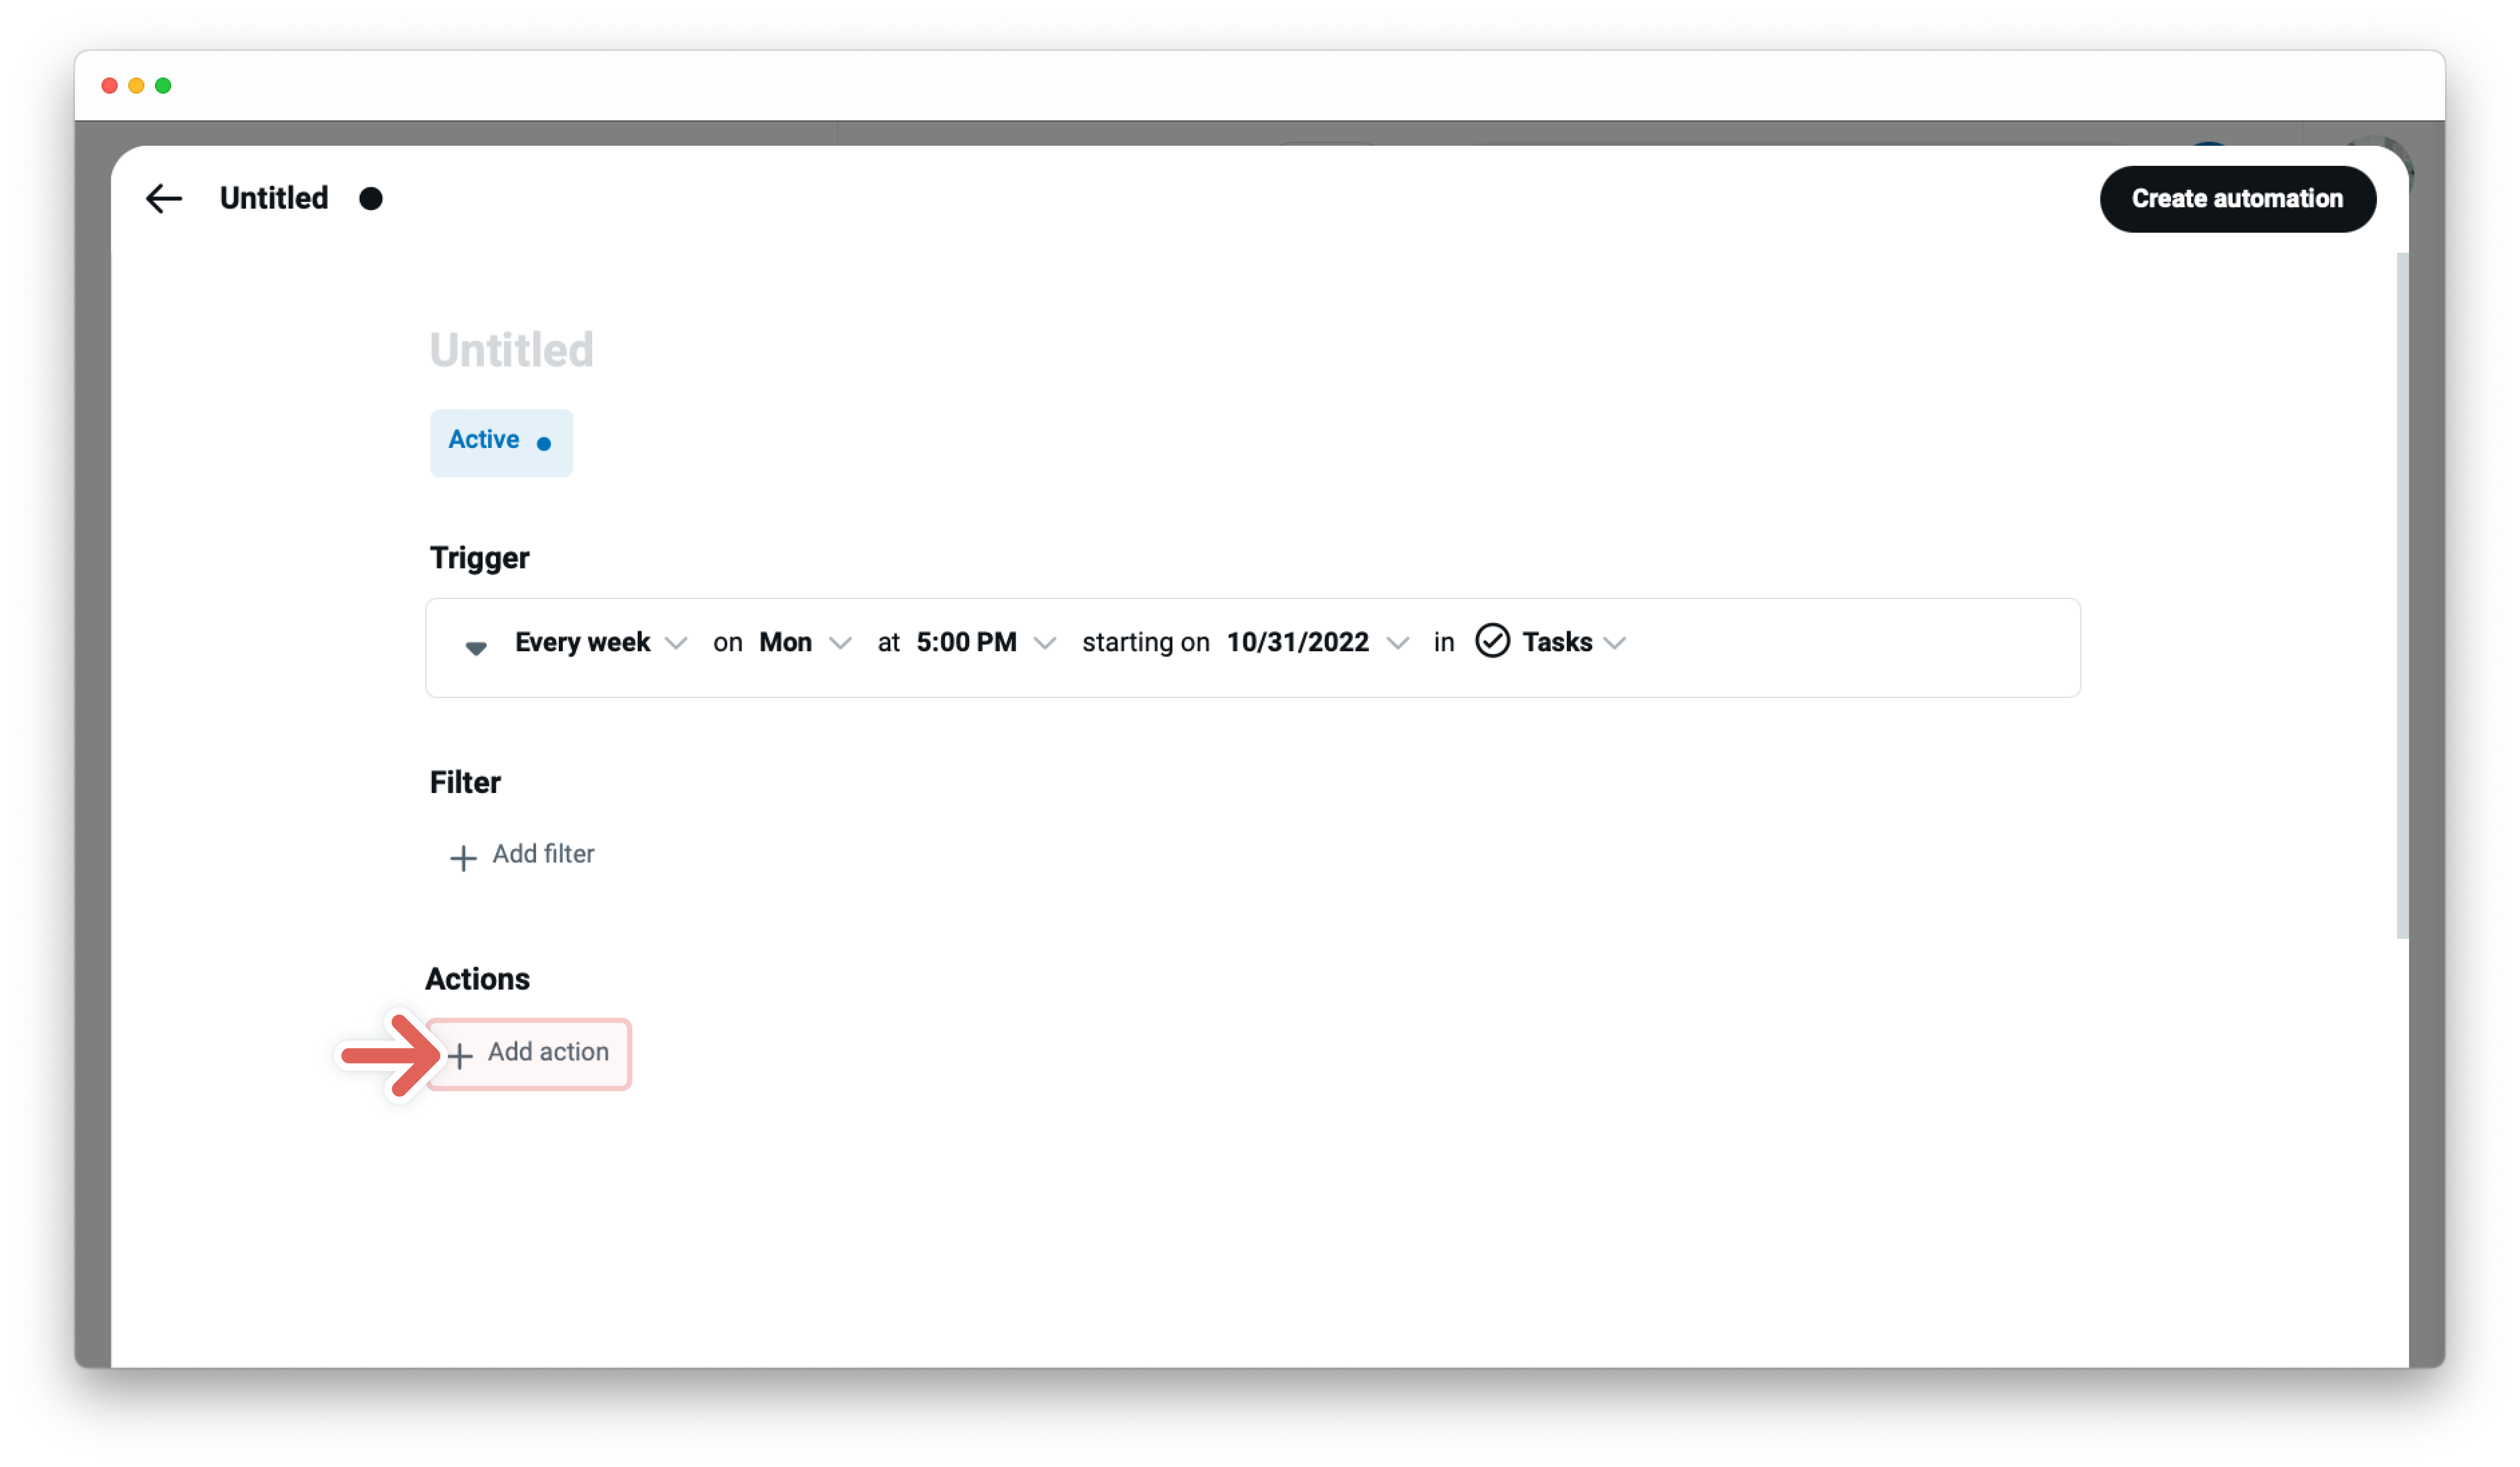
On a scheduled time or interval - Set and schedule the trigger by:
- Choosing an interval or choose one time
- Tap the dropdown menu next to
One time
- Tap the dropdown menu next to
- Selecting the starting date and time if you selected an interval. For one time select the date and time
- Select the app where the automation should be triggered at the fourth dropdown
- Choosing an interval or choose one time
- Choose the trigger
-
Second automation block - Filter - the “And if conditions are met” automation statement
- Set your filter to start actions only if certain conditions are met:
- A field to be evaluated, at the first dropdown menu
- An operator at the second dropdown menu, i.e., Contains, Does not contain, Is not, etc.
- A field value - enter the field value for the selected field from the first dropdown. Note that the operators e.g. “is empty” and “is not empty” do not require you to input a field value
- Set your filter to start actions only if certain conditions are met:
-
Third automation block - Action - the “Then do that” automation statement
- Click on
+ Add actionand choose between various actions - Set up your action depending on your selected action such as in the simple use case above the action
Create record - Click
+ Add field- every field type has its own row. Add as many as you like - Set up the action condition to create the new record:
- A field to be evaluated, at the first dropdown menu
- An operator at the second dropdown menu depends on the selected field type i.e., Set value, Set options, Set date, etc.
- A field value - enter the field value for the selected field from the first dropdown or use the @-menu to enter variables
- Click on
-
Click on
Create automationat the top right

Edit and manage trigger
The automation editor allows you to edit or manage triggers and holds all the important details about your specific automation. To open the editor - click the card with the title of your automation in the gallery of the automation center. From this point, you can choose between various options. Learn more about →
New to workflow automation by Tape? Here’s a summary of what you need to know about automation.
To enable any type of automation, you’ll need to set up a trigger and one or more actions. Some automations also use filters.
- A trigger is an event that starts an automation. The “When this happens” statement. For example, “When a status changes” Learn more about → 1
- Filters are optional and start actions only if certain conditions are met. The “And if conditions are met” statement. For example, "only if the status changes to done" Learn more about →
- An action is an event the automation performs automatically after it is triggered. The “Then do that” statement. For example, “then send an email to a customer” Learn more about →