A Trigger is one of the three parts of an automation and it is the first block in the automation editor.
To enable any type of automation, you’ll need to set up a trigger and one or more actions. Some automation also use filters.
- A trigger is an event that starts an automation. The “When this happens” statement. For example, “When a status changes”
- Filters are optional and start actions only if certain conditions are met. The “And if conditions are met” statement. For example, "only if the status changes to done" Learn more about →
- An action is an event the automation performs automatically after it is triggered. The “Then do that” statement. For example, “then send an email to a customer” Learn more about →
![]() Note: The following topic assumes you’re an admin or owner. Otherwise, you won’t see all these options.
Note: The following topic assumes you’re an admin or owner. Otherwise, you won’t see all these options.
Choose trigger by creating a new automation
-
Go to an app
-
Click on the
...menu next to the app name -
Tap on
Workflow automation -
Click either the
New automationbutton on the top right or click the+ Create new automationcard in the gallery -
Name the brand new automation with a title, that appeared with some options first. In order to further describe your automation, hover over the name and click on
Add description. -
First automation block - Trigger - the “When this happens” automation statement
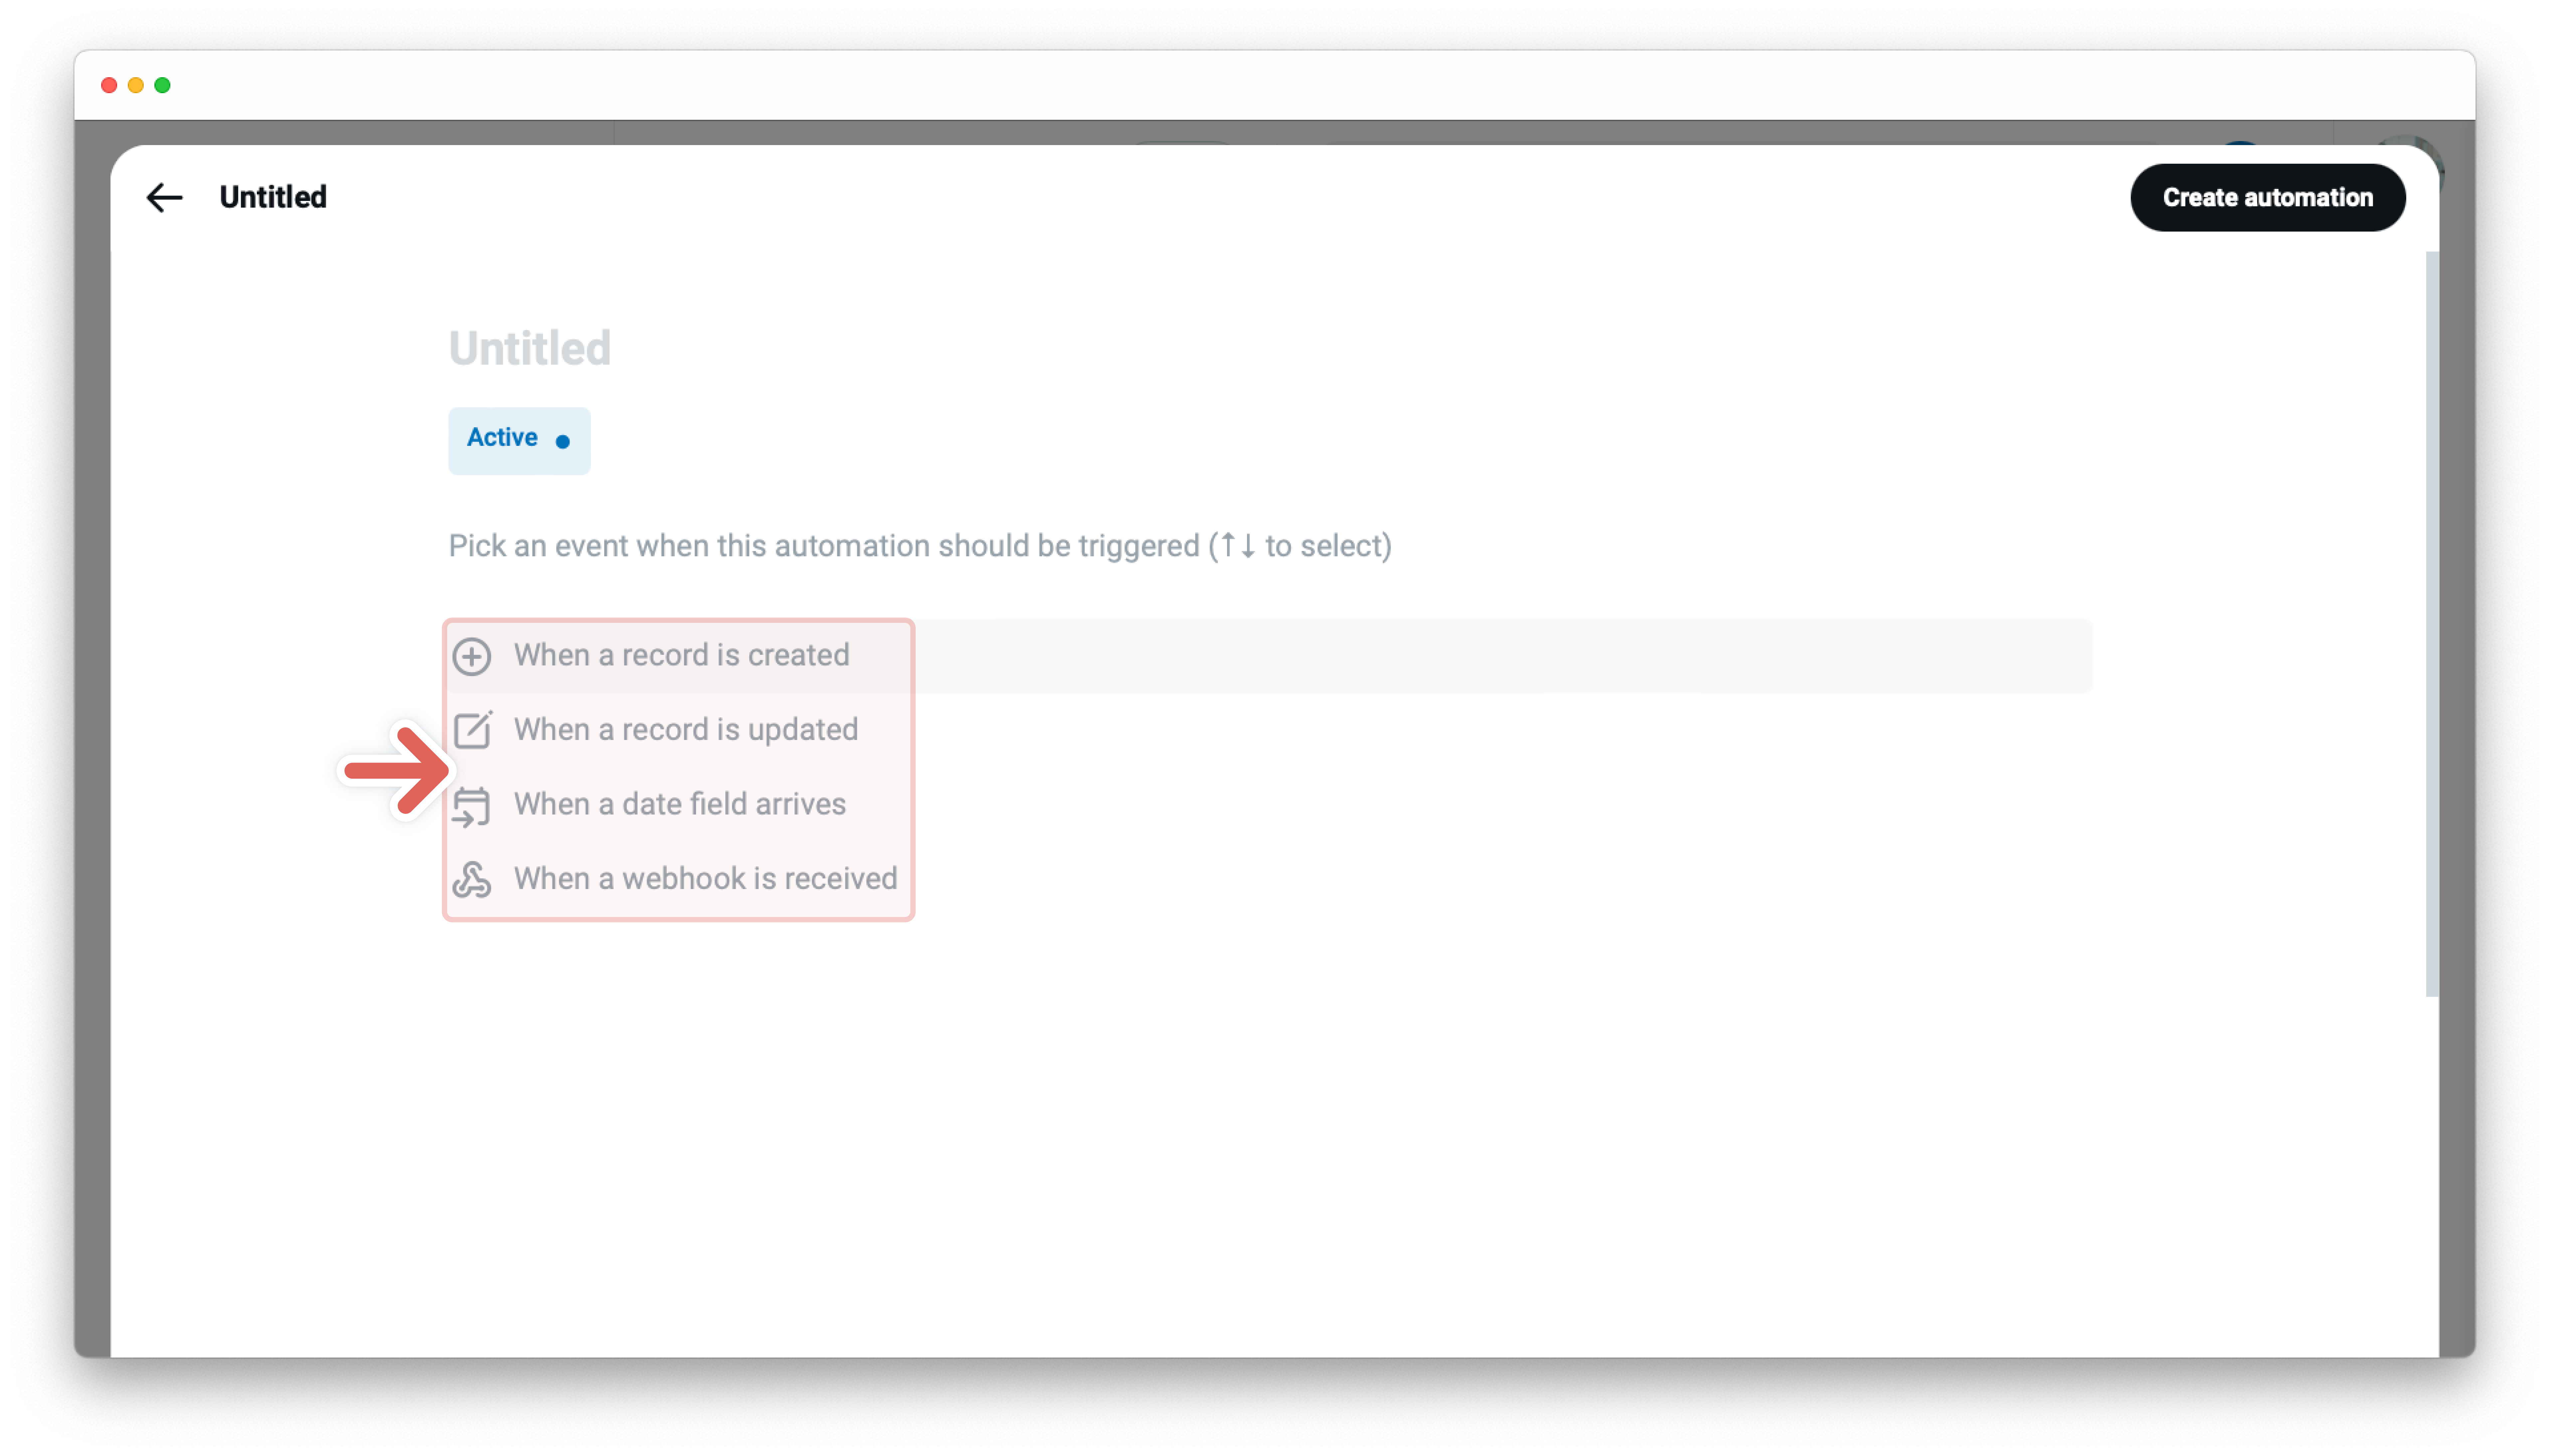
- Choose a trigger - the event when this automation should be triggered, for example
When a record is created - Set your trigger, for example, “When a record is created” by selecting the app where the automation should be triggered
- Second automation block - Filter (optional) - the “And if conditions are met” automation statement
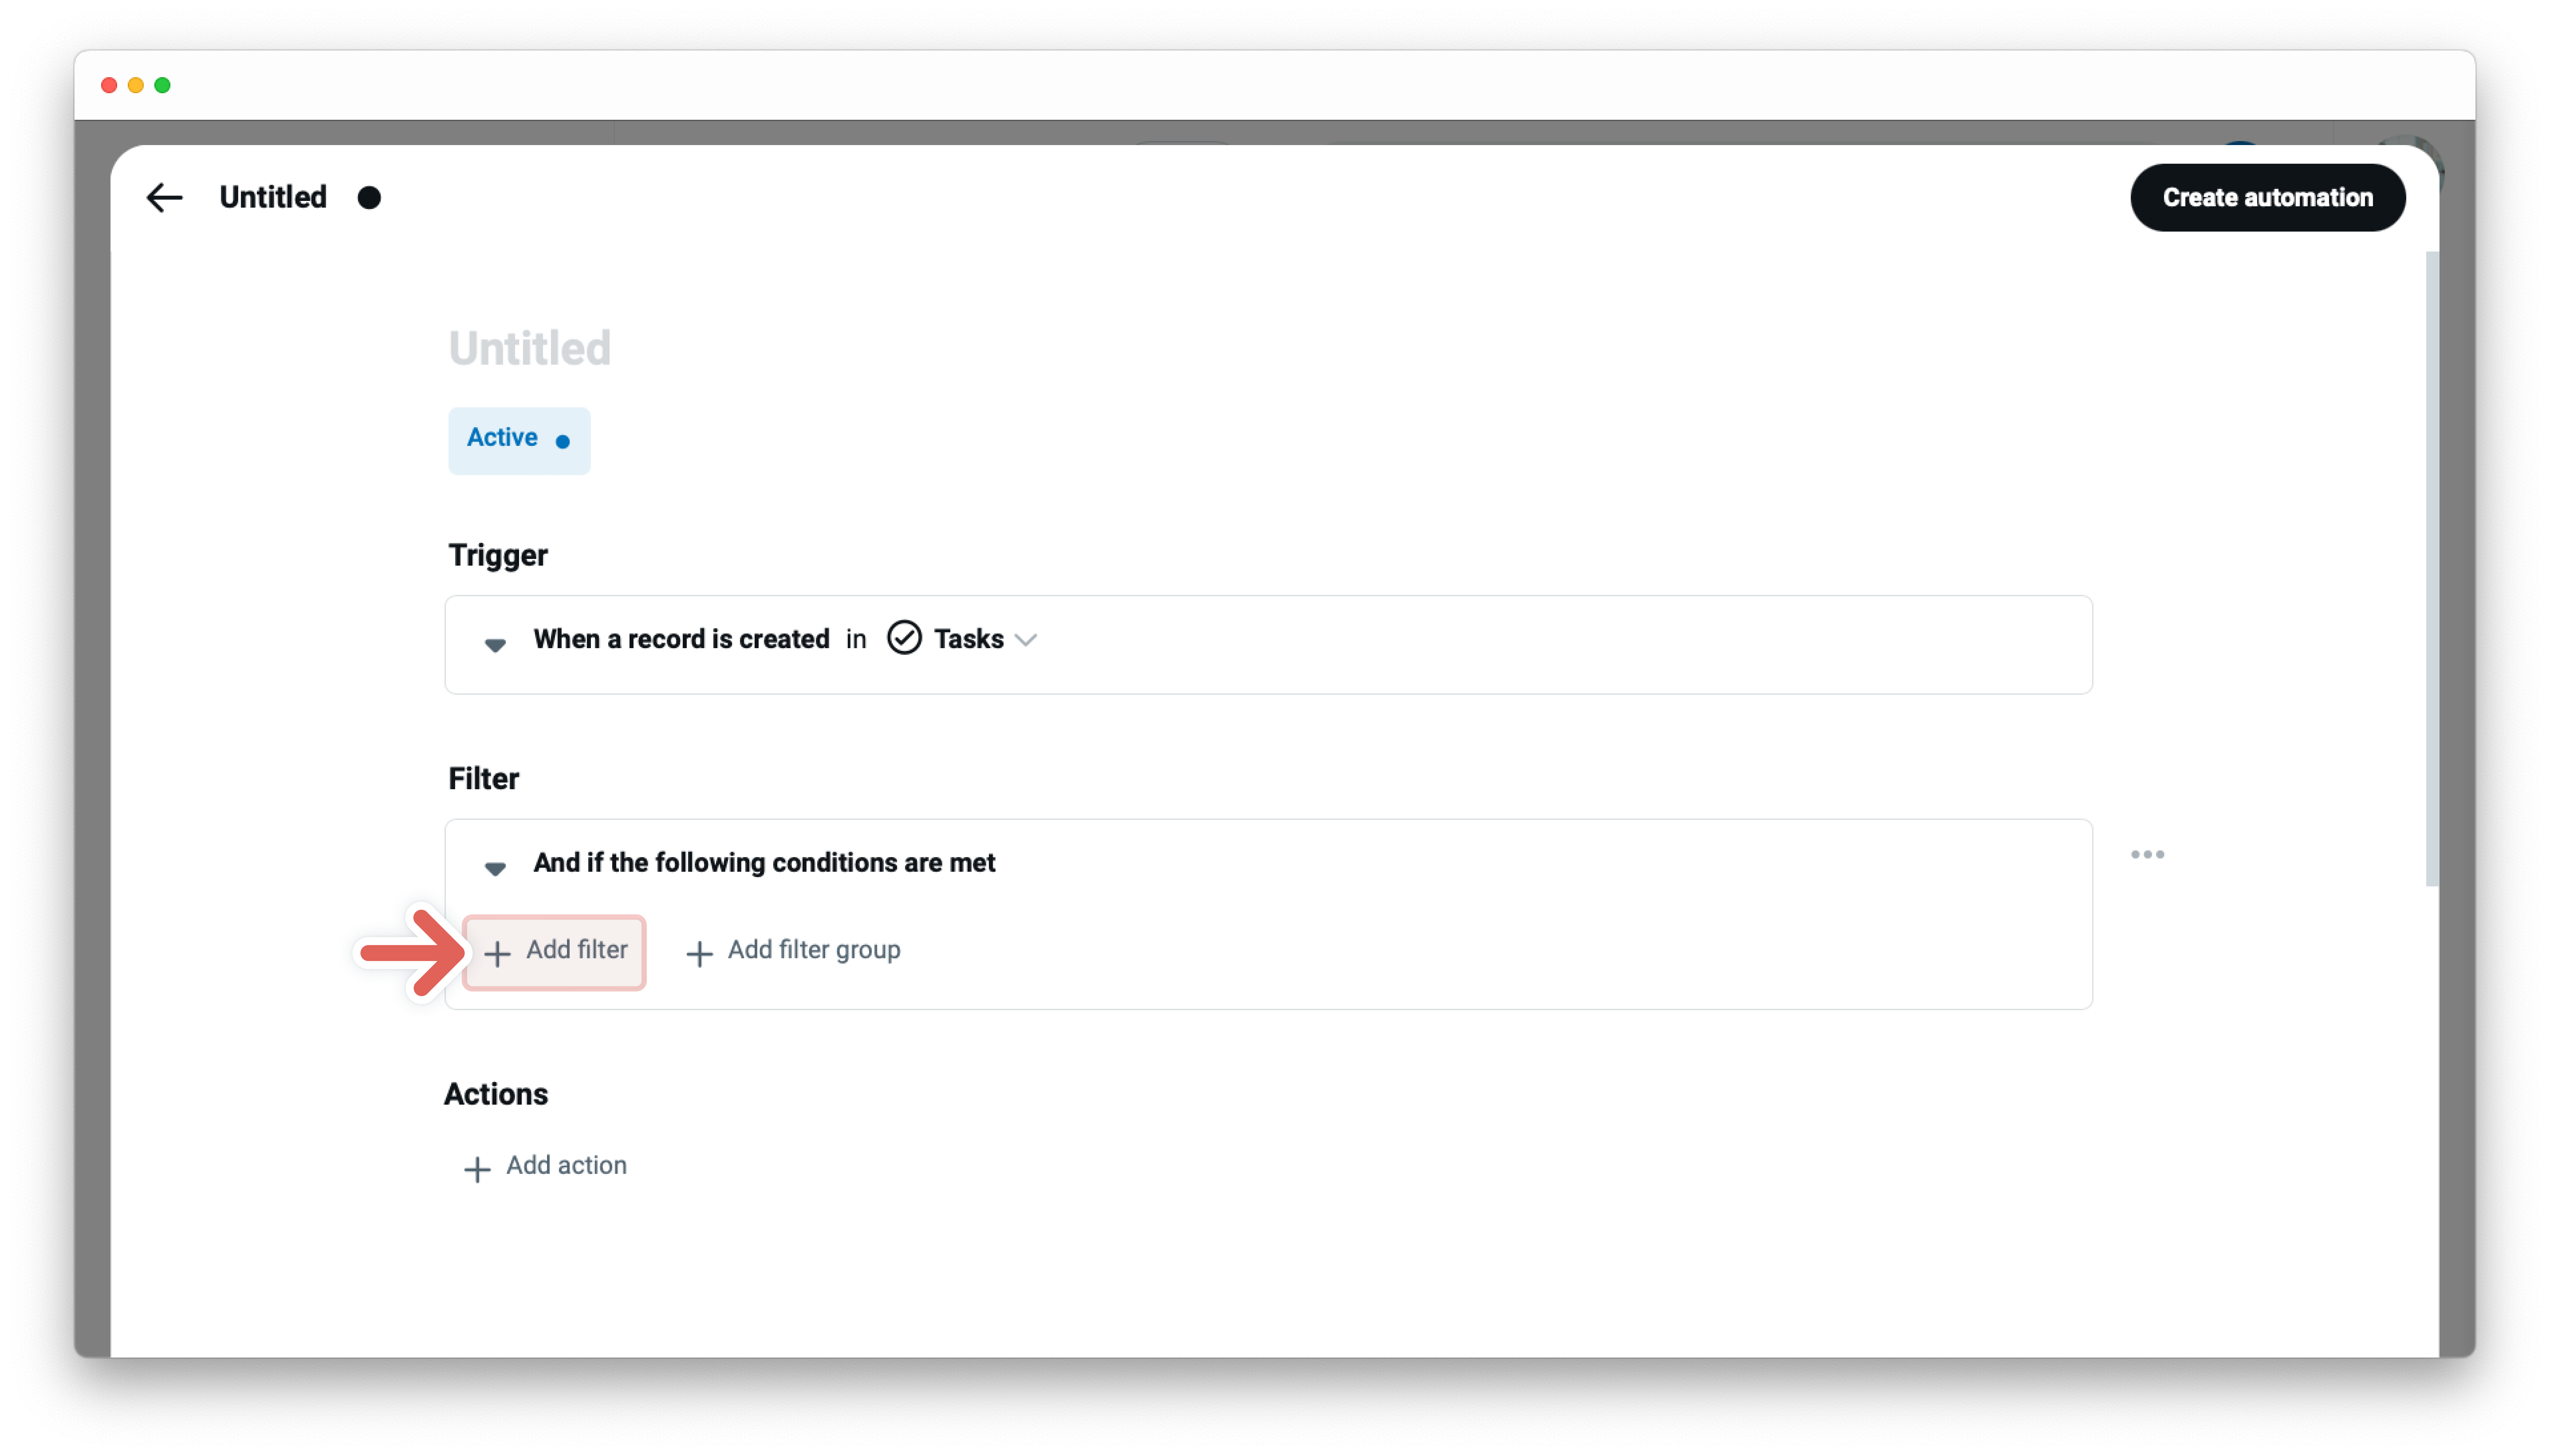
- Choose the existing filter or click
+ Add filterto add another filter - Set your filter to start actions only if certain conditions are met:
- A field to be evaluated, at the first dropdown menu
- An operator at the second dropdown menu, i.e., Contains, Does not contain, Is not, etc.
- A field value - enter the field value for the selected field from the first dropdown. Note that the operators e.g. “is empty” and “is not empty” do not require you to input a field value
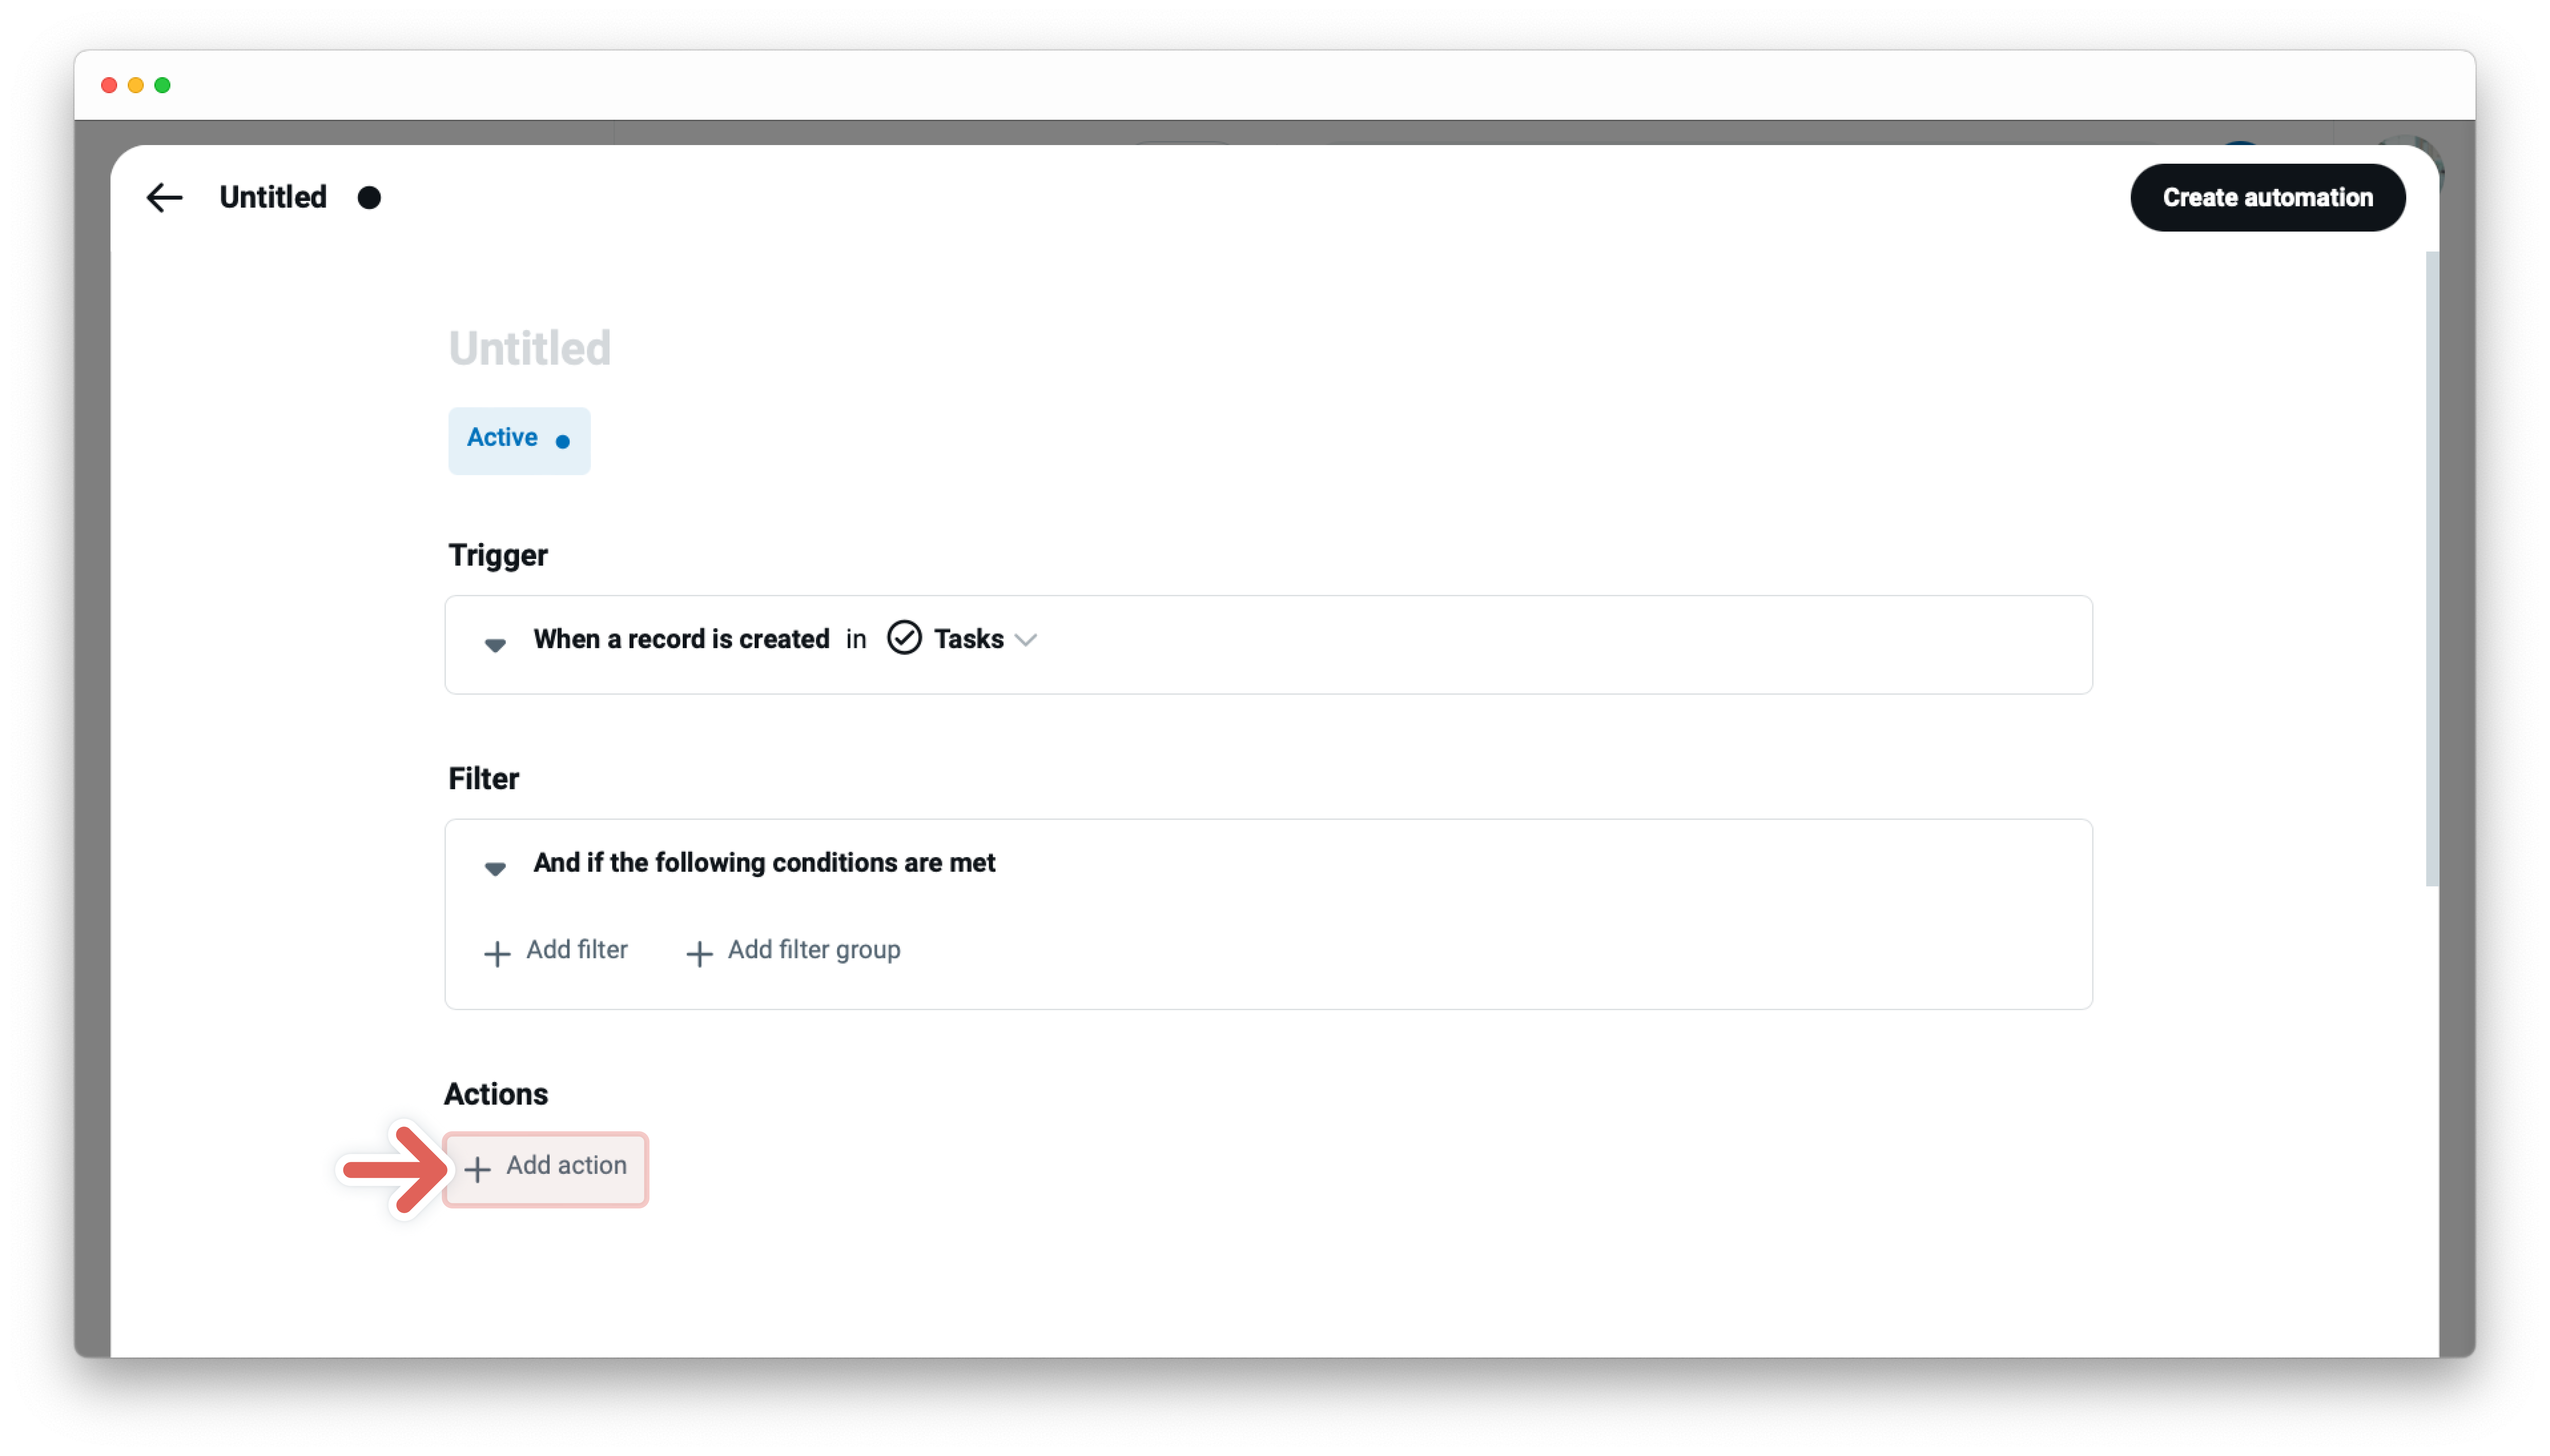
- Third automation block - Action - the “Then do that” automation statement
-
Click on
+ Add actionand choose between various actions for exampleUpdate record -
Click
+ Add field- every field type has its own row. Add as many as you like. -
Set up the action conditions to create the new record:
- A field to be evaluated, at the first dropdown menu
- An operator at the second dropdown menu depends on the selected field type i.e., Set value, Set options, Set date, etc.
- A field value - enter the field value for the selected field from the first dropdown
-
Click on
Create automationat the top right
![]() The automation will run automatically in the background to look for the trigger event and it will run the action steps every time the trigger event occurs.
The automation will run automatically in the background to look for the trigger event and it will run the action steps every time the trigger event occurs.
Edit and manage trigger
The automation editor allows you to edit or manage triggers and holds all the important details about your specific automation. To open the editor - click the card with the title of your automation at the gallery of the automation center. From this point, you can choose between various options.
Trigger settings
- Hover over the trigger block and click on the
...at the very right - Choose between the following settings:
-
Turn intoto choose a new trigger -
Removeto delete the entire trigger block
-
Trigger setup
Each trigger has its own setup that allows you to create the best automation possible. Click on the link for each trigger in the list below to get specific details.
As an example the setup for the trigger “When a record is created”:
- Select the specific app for the trigger:
- Go to the drop-down menu next to the app name
- Click on your desired app
Keyboard shortcuts
Tape´s automations are fully equipped with keyboard shortcuts, so you can do everything without ever touching the mouse. Check out more →
Save changes
Click the save change button on the top right or use the keyboard shortcut cmd/ctrl + S
Trigger types and status
 Released
-
When a record is created Check out more →
-
When a record is updated Check out more →
-
When a date field arrives Check out more→
-
When a webhook is received Check out more →
-
When a record is deleted Check out more →
-
When another automation calls Check out more →
-
On schedule Check out more →
-
Web link clicked Check out more →
-
Comment is added Check out more →
Check out how to create an automation →