We like to describe automation as a set of building blocks to turn your manual work into automated workflows, to save you time for more important tasks.
The heart of any automation boils down to a simple command:
-
WHEN
this happens -
THEN
automatically do that
Even the most complex automation can be broken down into this simple command.
In addition, you can add optional filters to start actions only if certain conditions are met.
Thus, the three parts of any automation are:
-
“When this happens” is called Trigger
-
“And if conditions are met” is called Filter
-
“Then do that” is called Action
Automation can be read much like a sentence:
“When this happens” + “and if conditions are met” → “then do that”
For example: "When a status of a task changes" + “and if the status changes to done” → “then send an email to a customer”
Workflow automation by Tape is different from other software in a few ways. And once you master these basics, you can pretty much build whatever you want.
Most importantly, don’t worry about not knowing everything you can do right away. We’ll discover it together.
![]() Note: The following topic assumes you’re an admin or owner. Otherwise, you won’t see all these options.
Note: The following topic assumes you’re an admin or owner. Otherwise, you won’t see all these options.
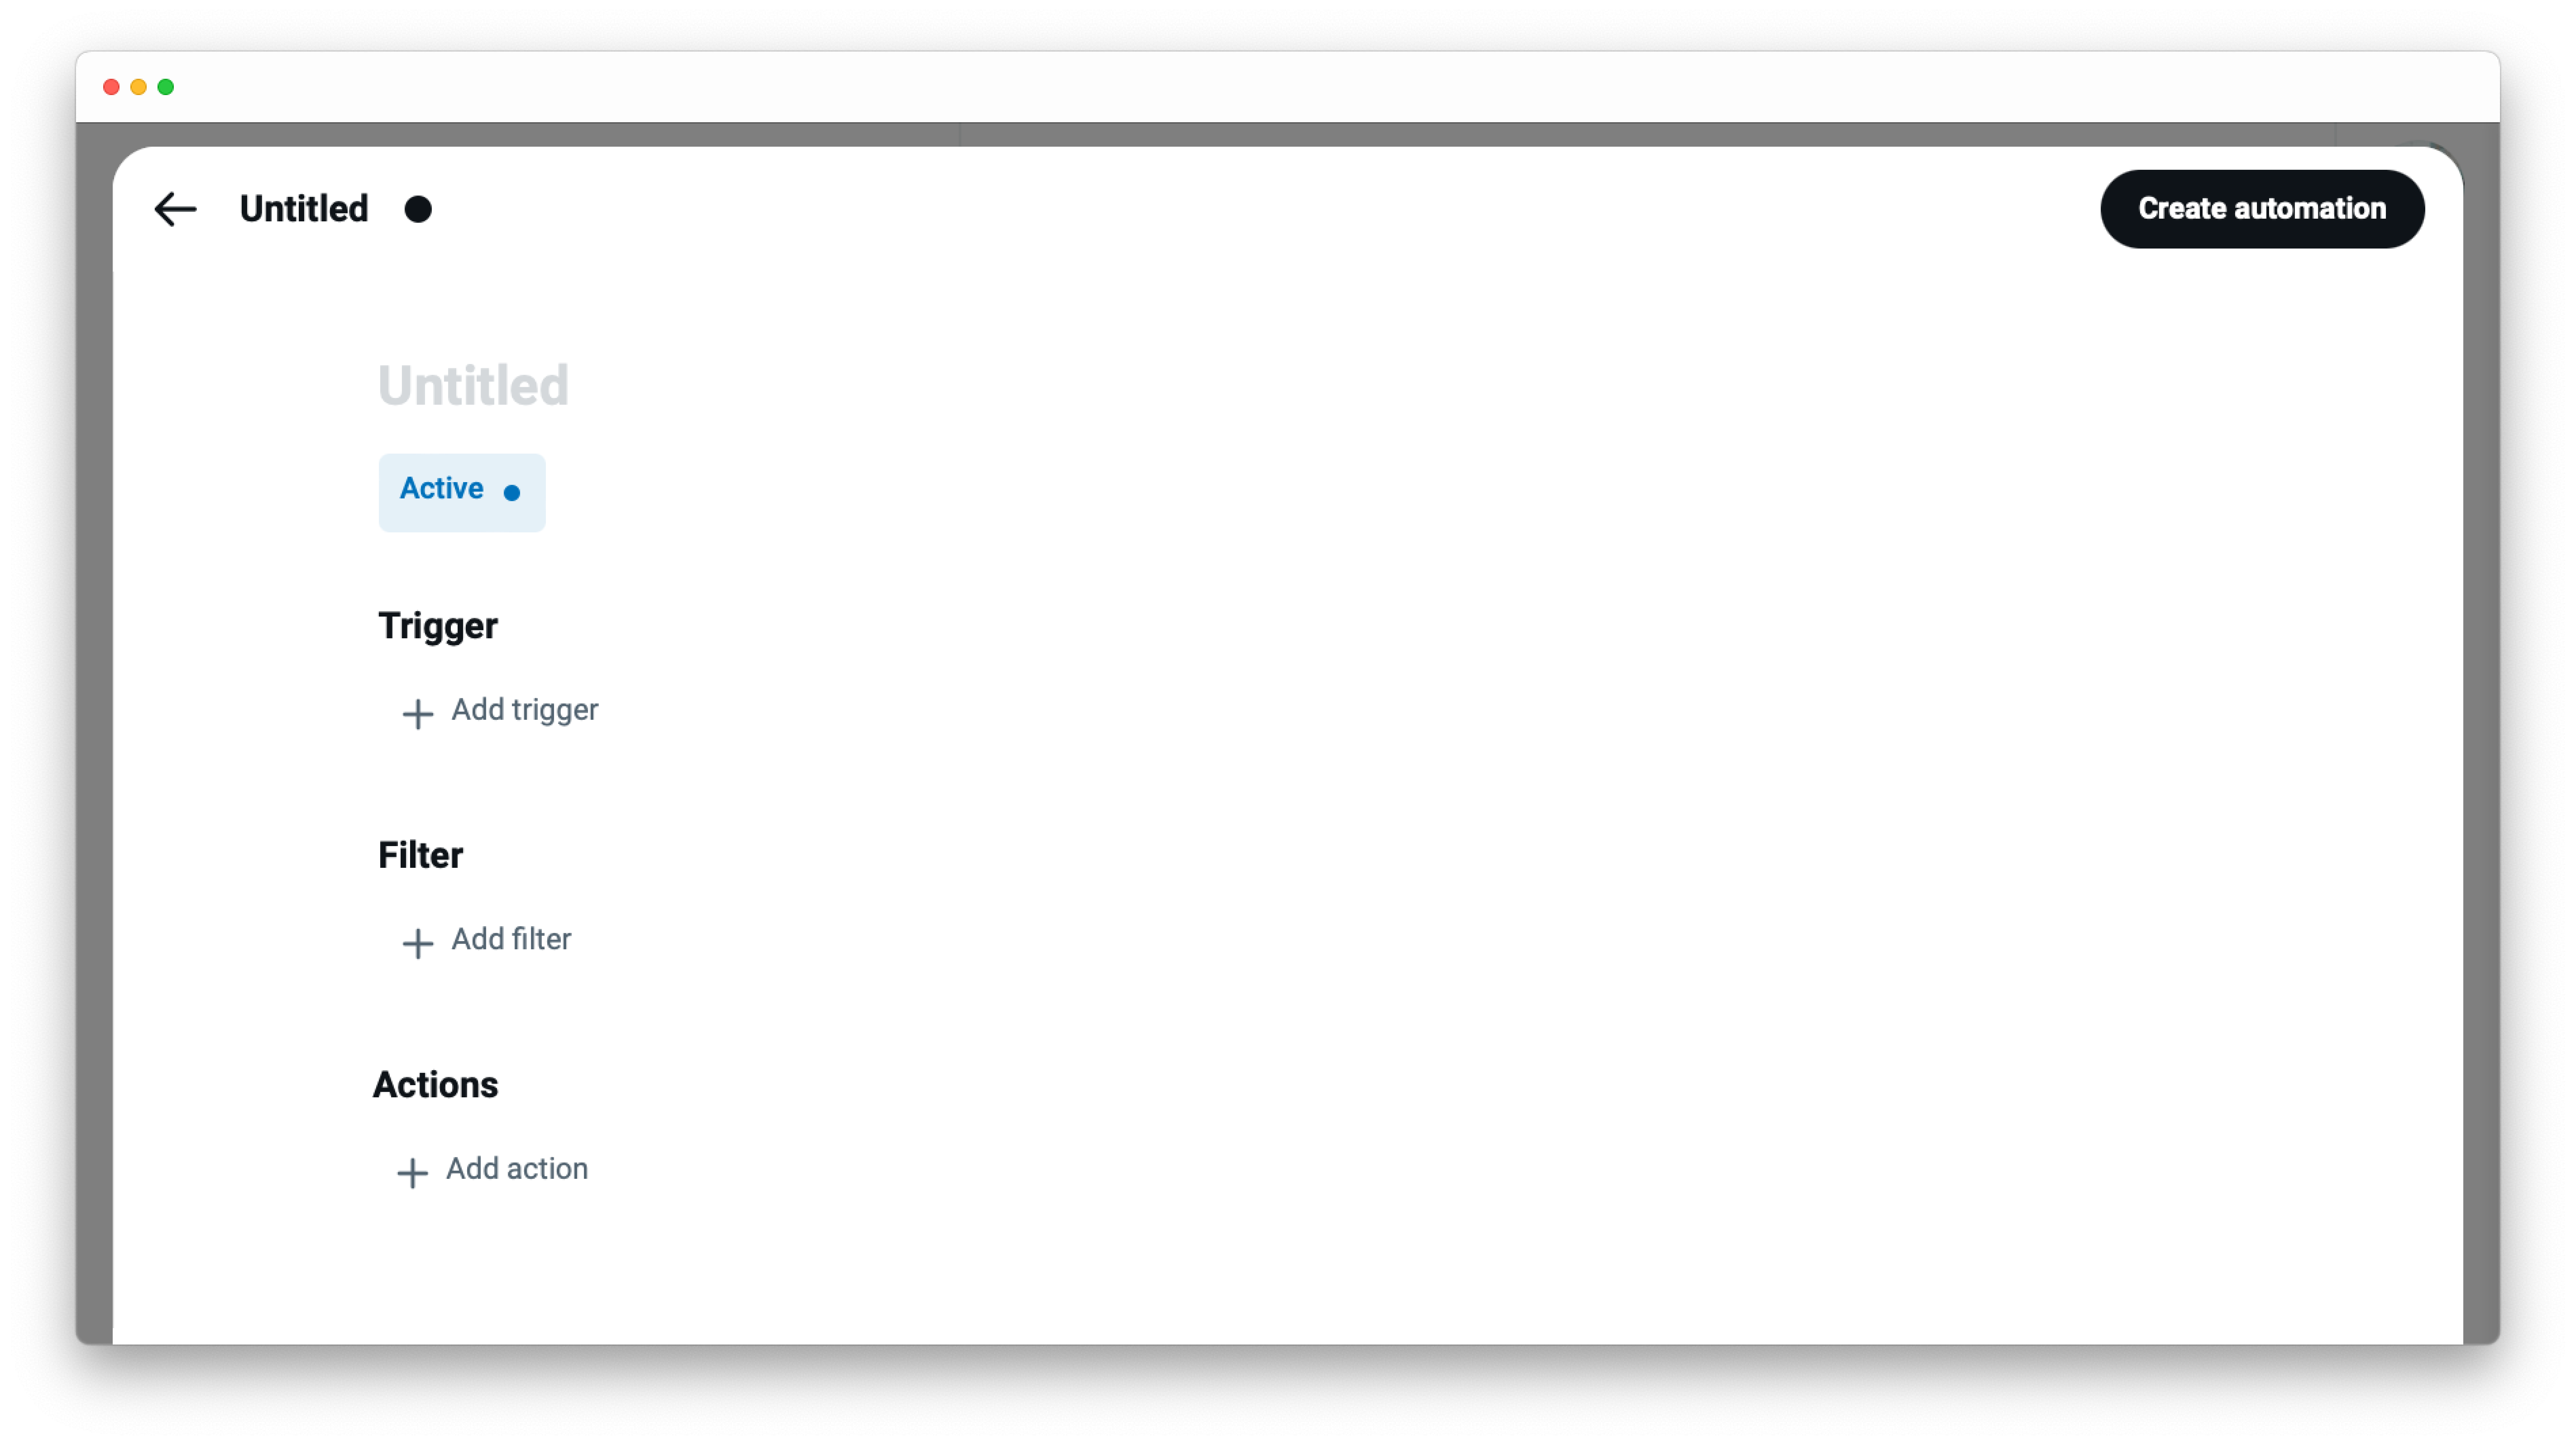
Automation editor: a tour
The automation editor allows you to create automations from scratch and holds all the important details about your specific automation.
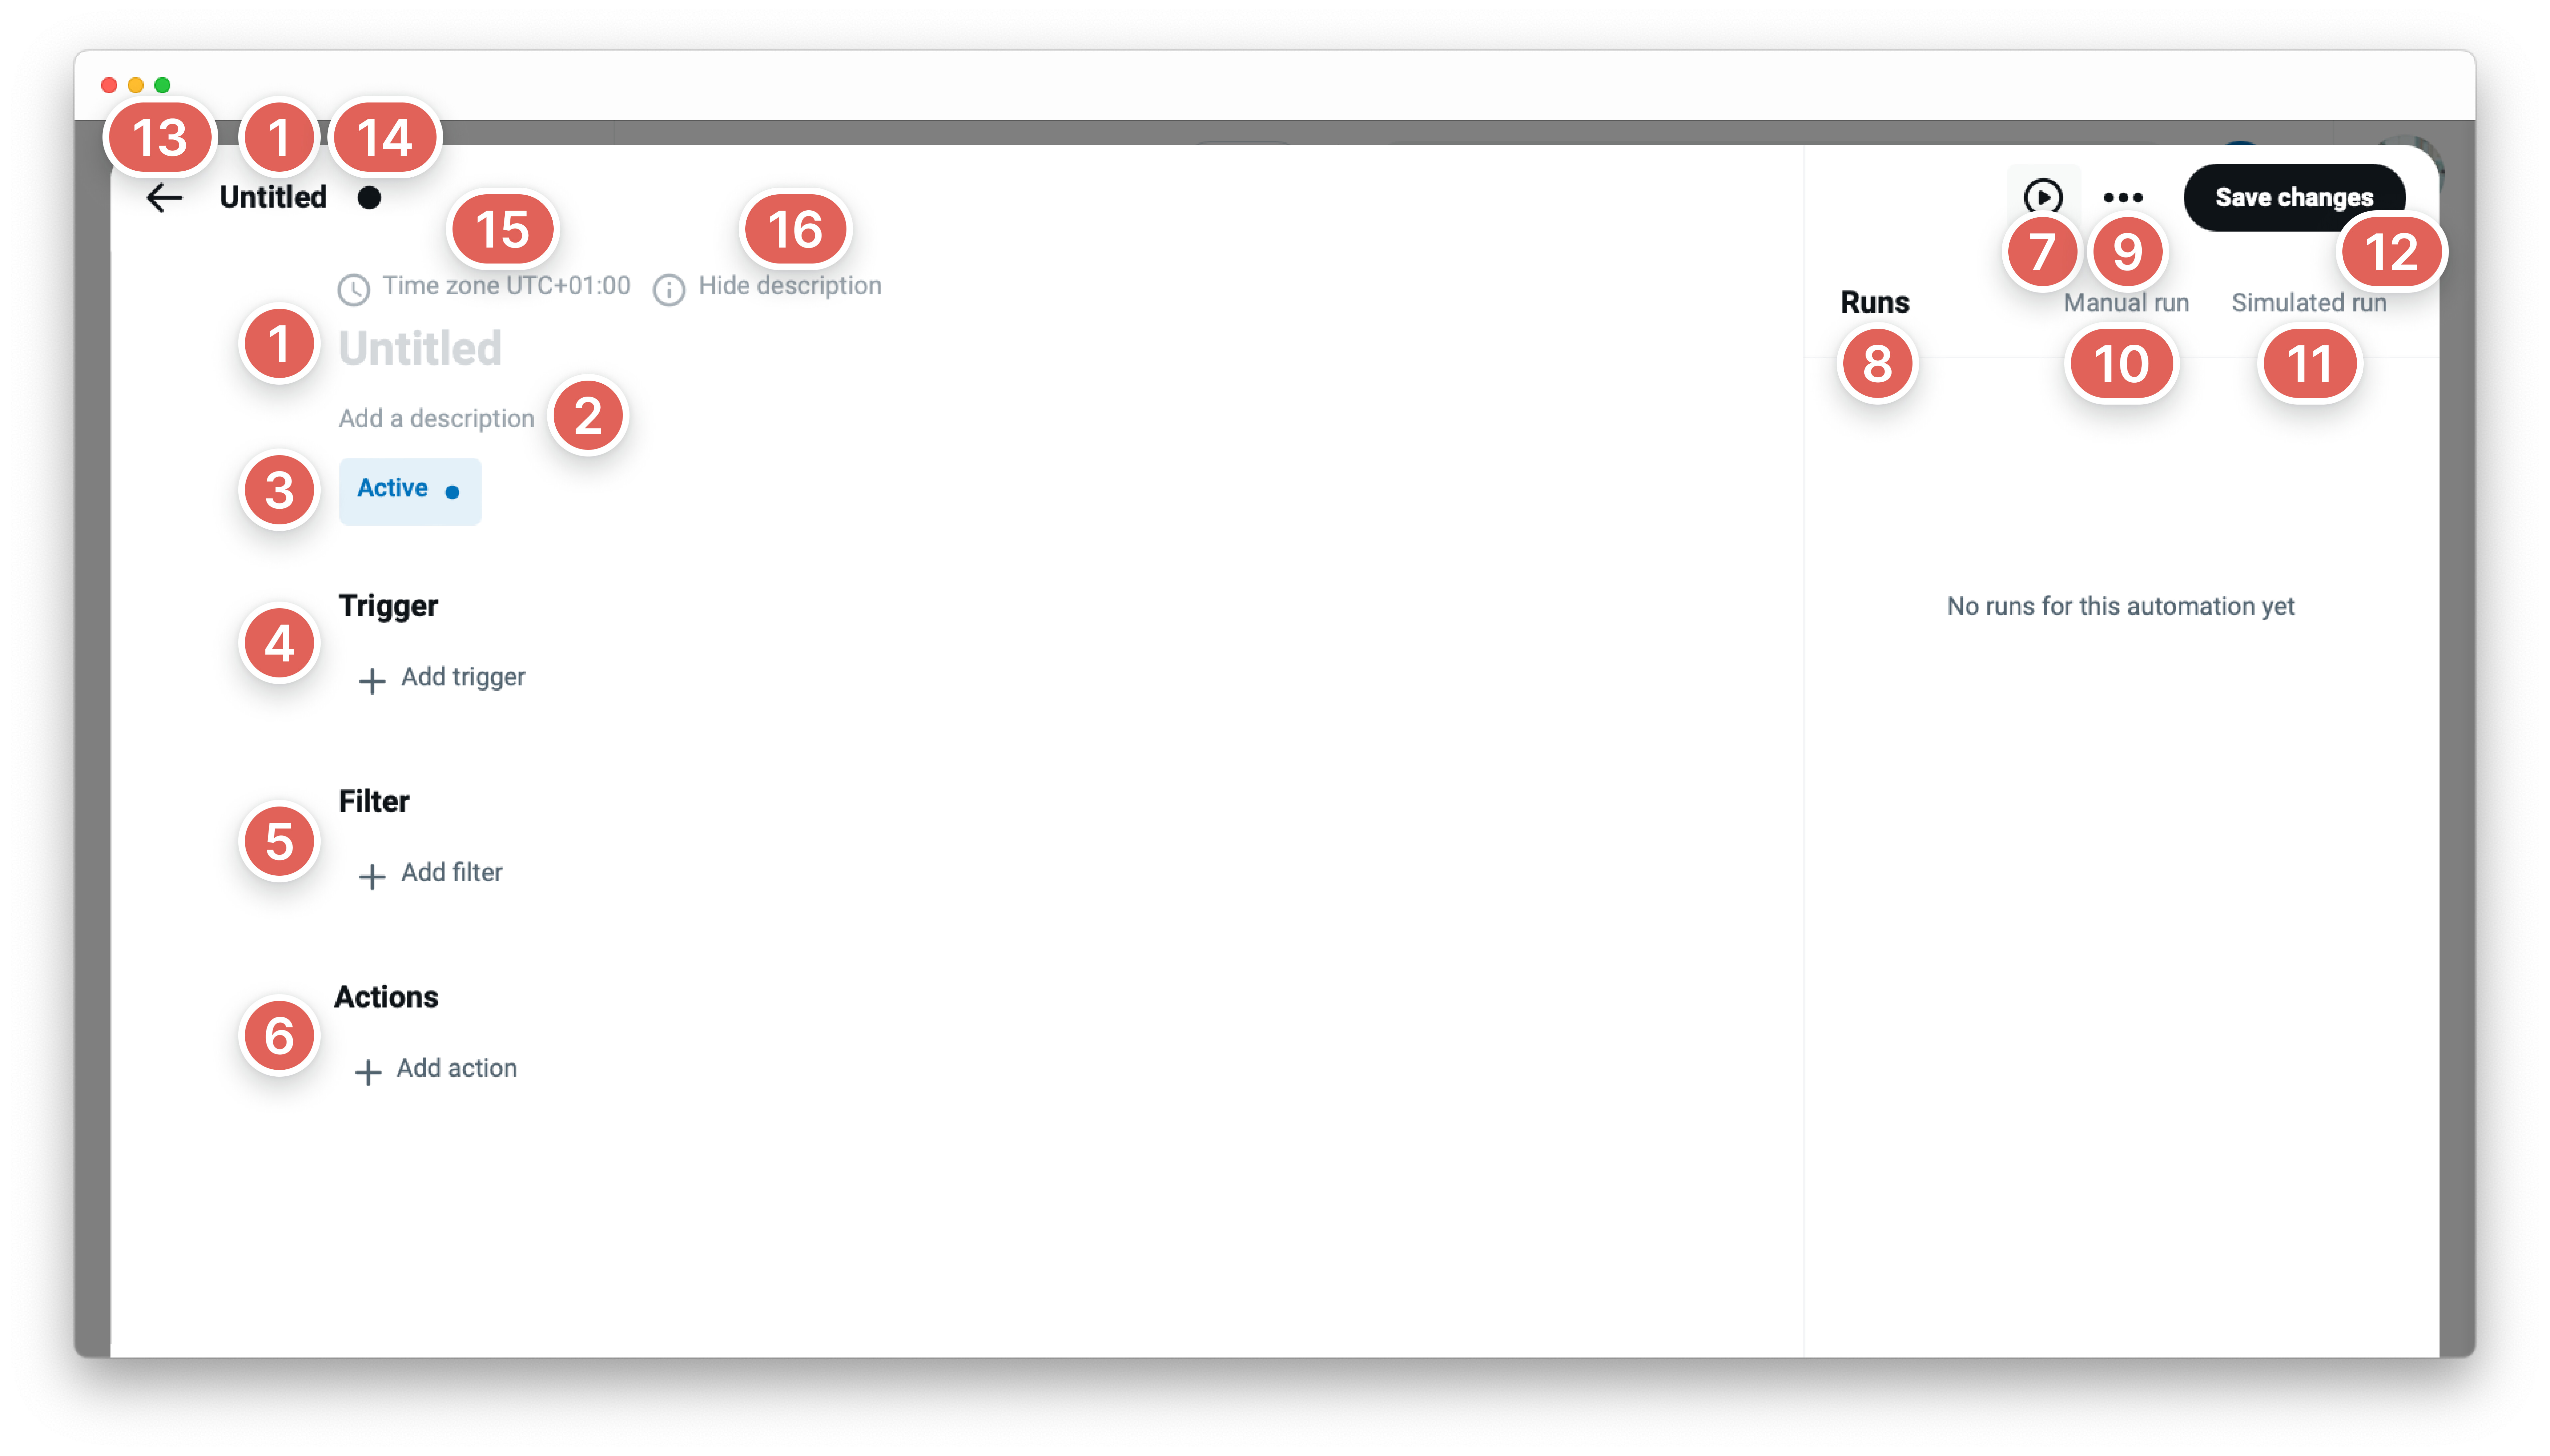
- Name of the automation
- Description
- Status of the automation
- Trigger - “When this happens”
- Filter - “And if the following conditions are met”
- Action - “Then do that”
- Open sidebar
- Run sidebar
- Automation menu
- Manual run
- Simulated run
- Create and save button
- Back to autmation center
- Note there are unsaved changes
- Change your Time Zone:
- Hide disciption
Creating a new automation
-
Go to an app
-
Click on the
...menu next to the app name -
Tap on
Workflow automation -
Click either the
New automationbutton on the top right or click the+ Create new automationcard in the gallery -
Name the brand new automation with a title, that appeared with some options first. In order to further describe your automation, hover over the name and click on
Add description. -
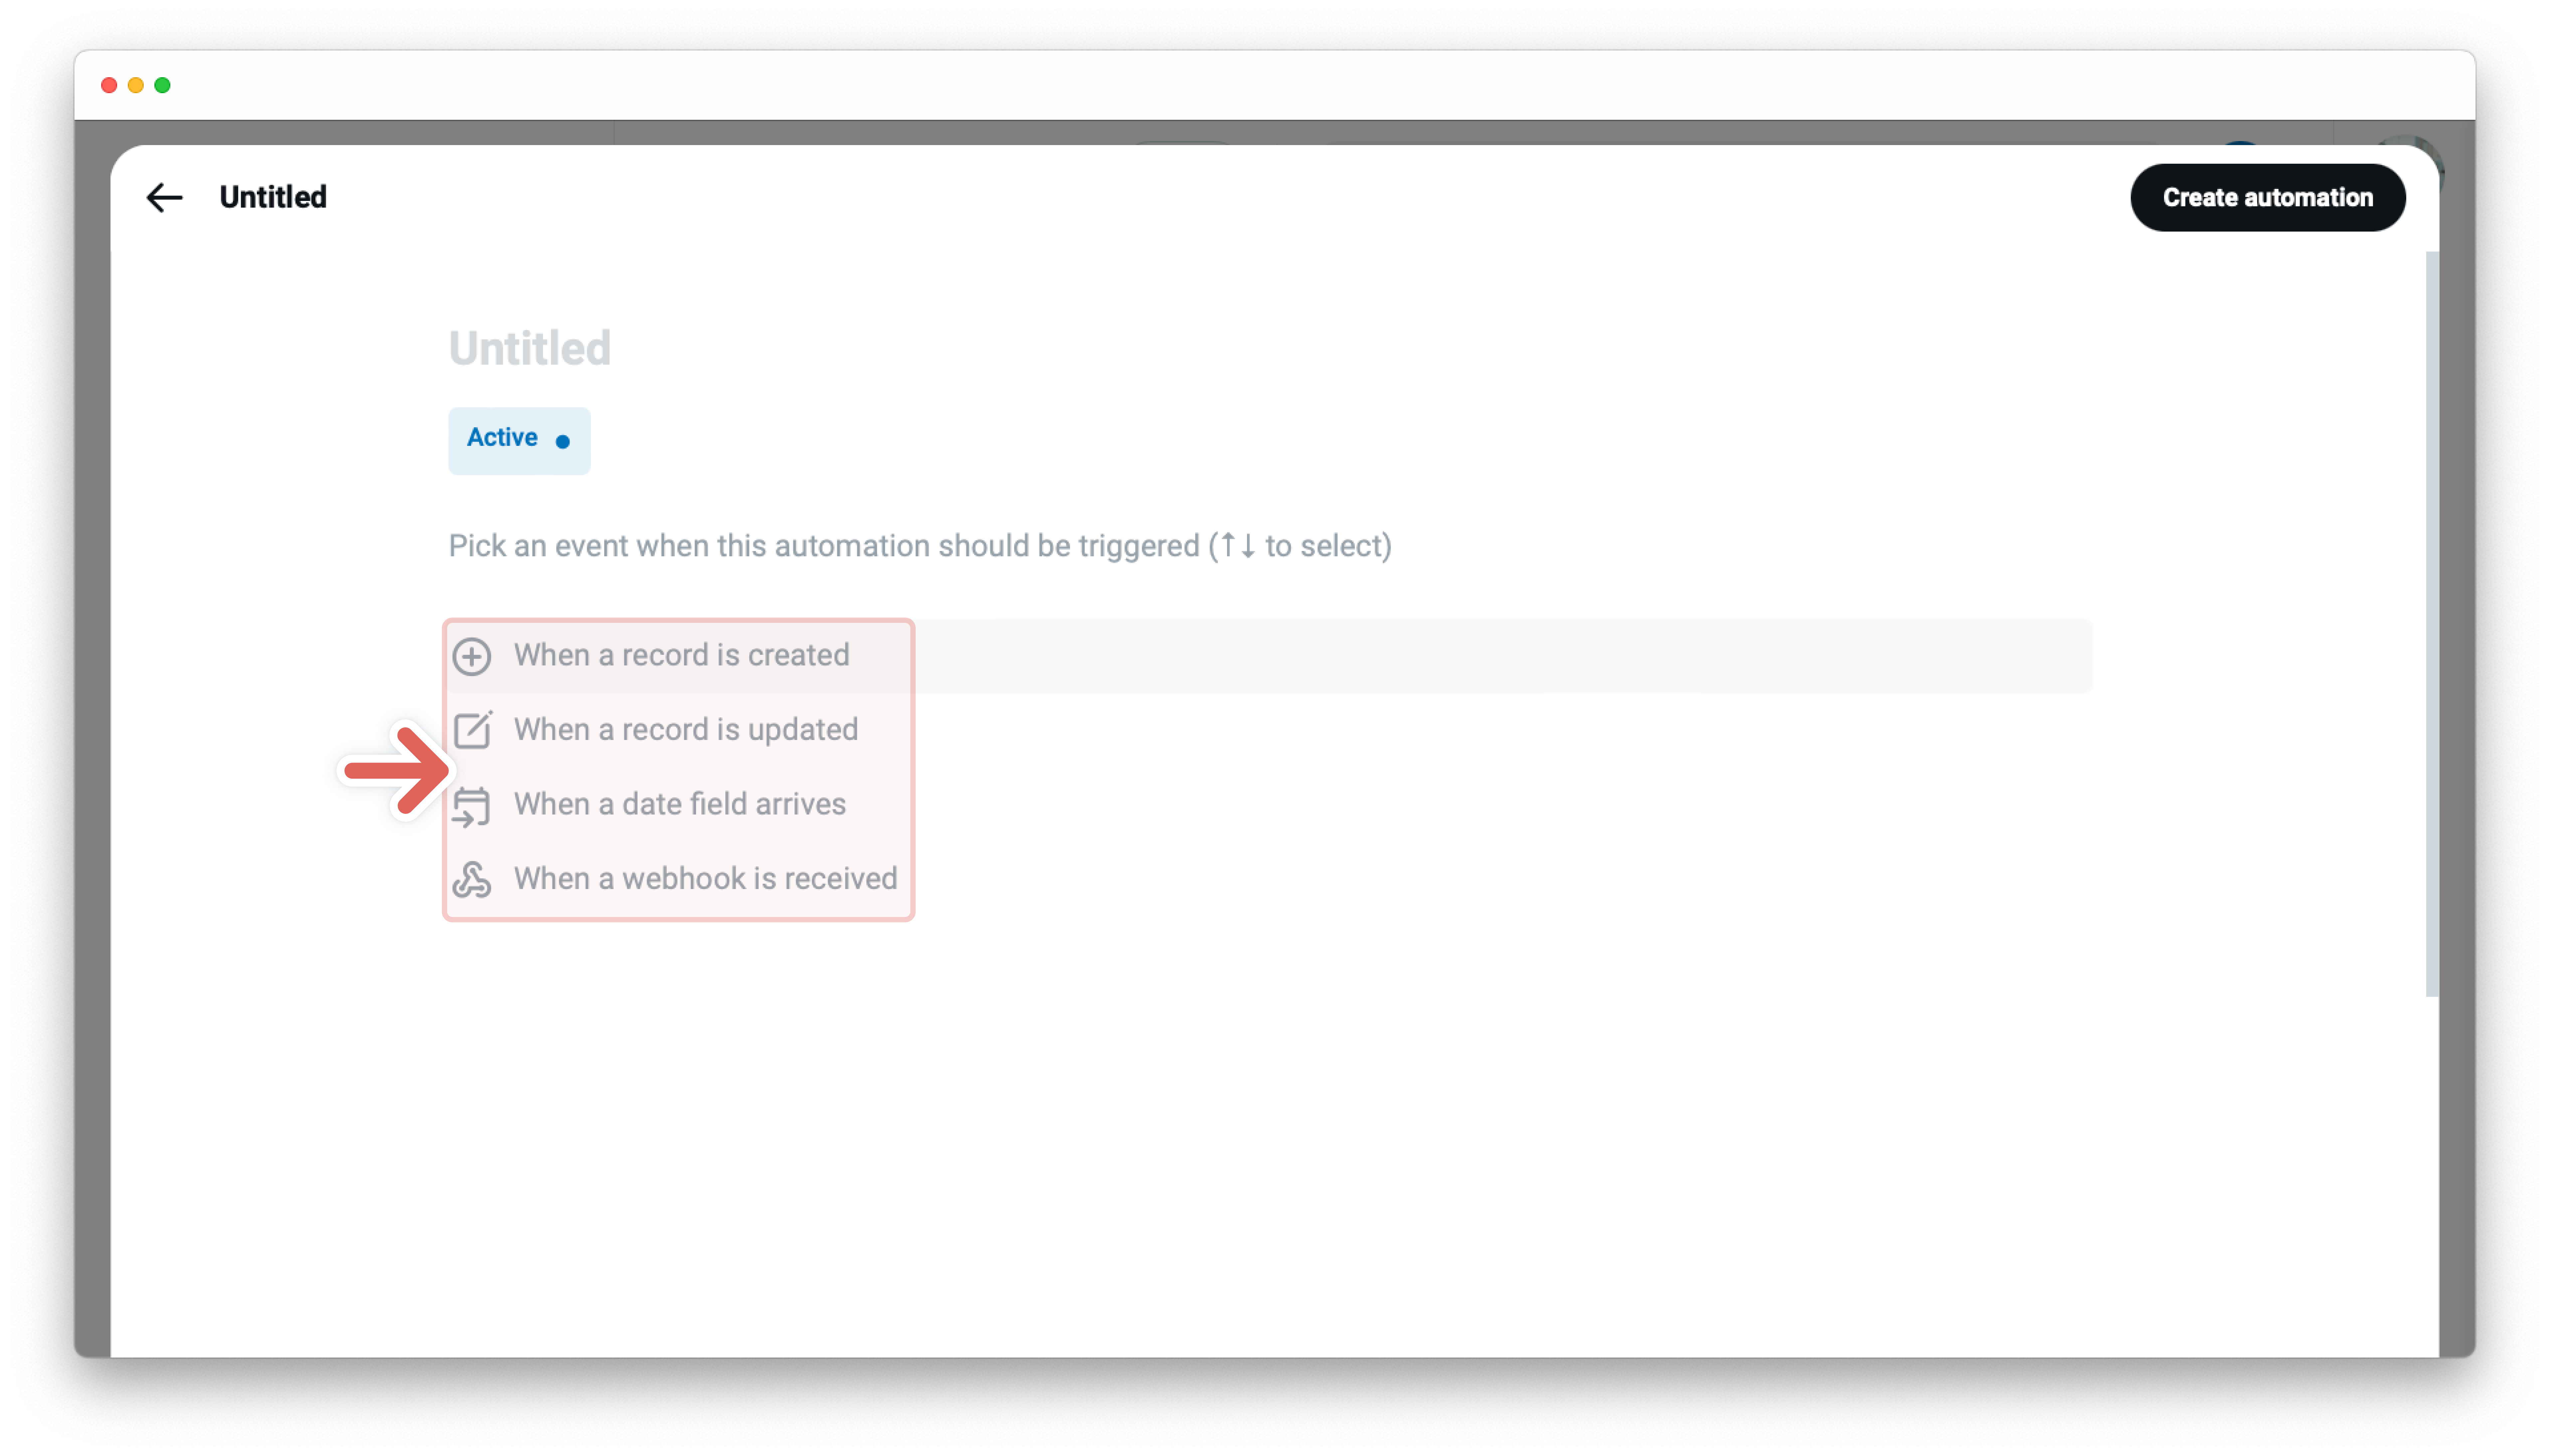
First automation block - Trigger - the “When this happens” automation statement
-
Choose a trigger - the event when this automation should be triggered, for example
When a record is created -
Set your trigger, for example, “When a record is created” by selecting the app where the automation should be triggered
-
Second automation block - Filter (optional) - the “And if conditions are met” automation statement
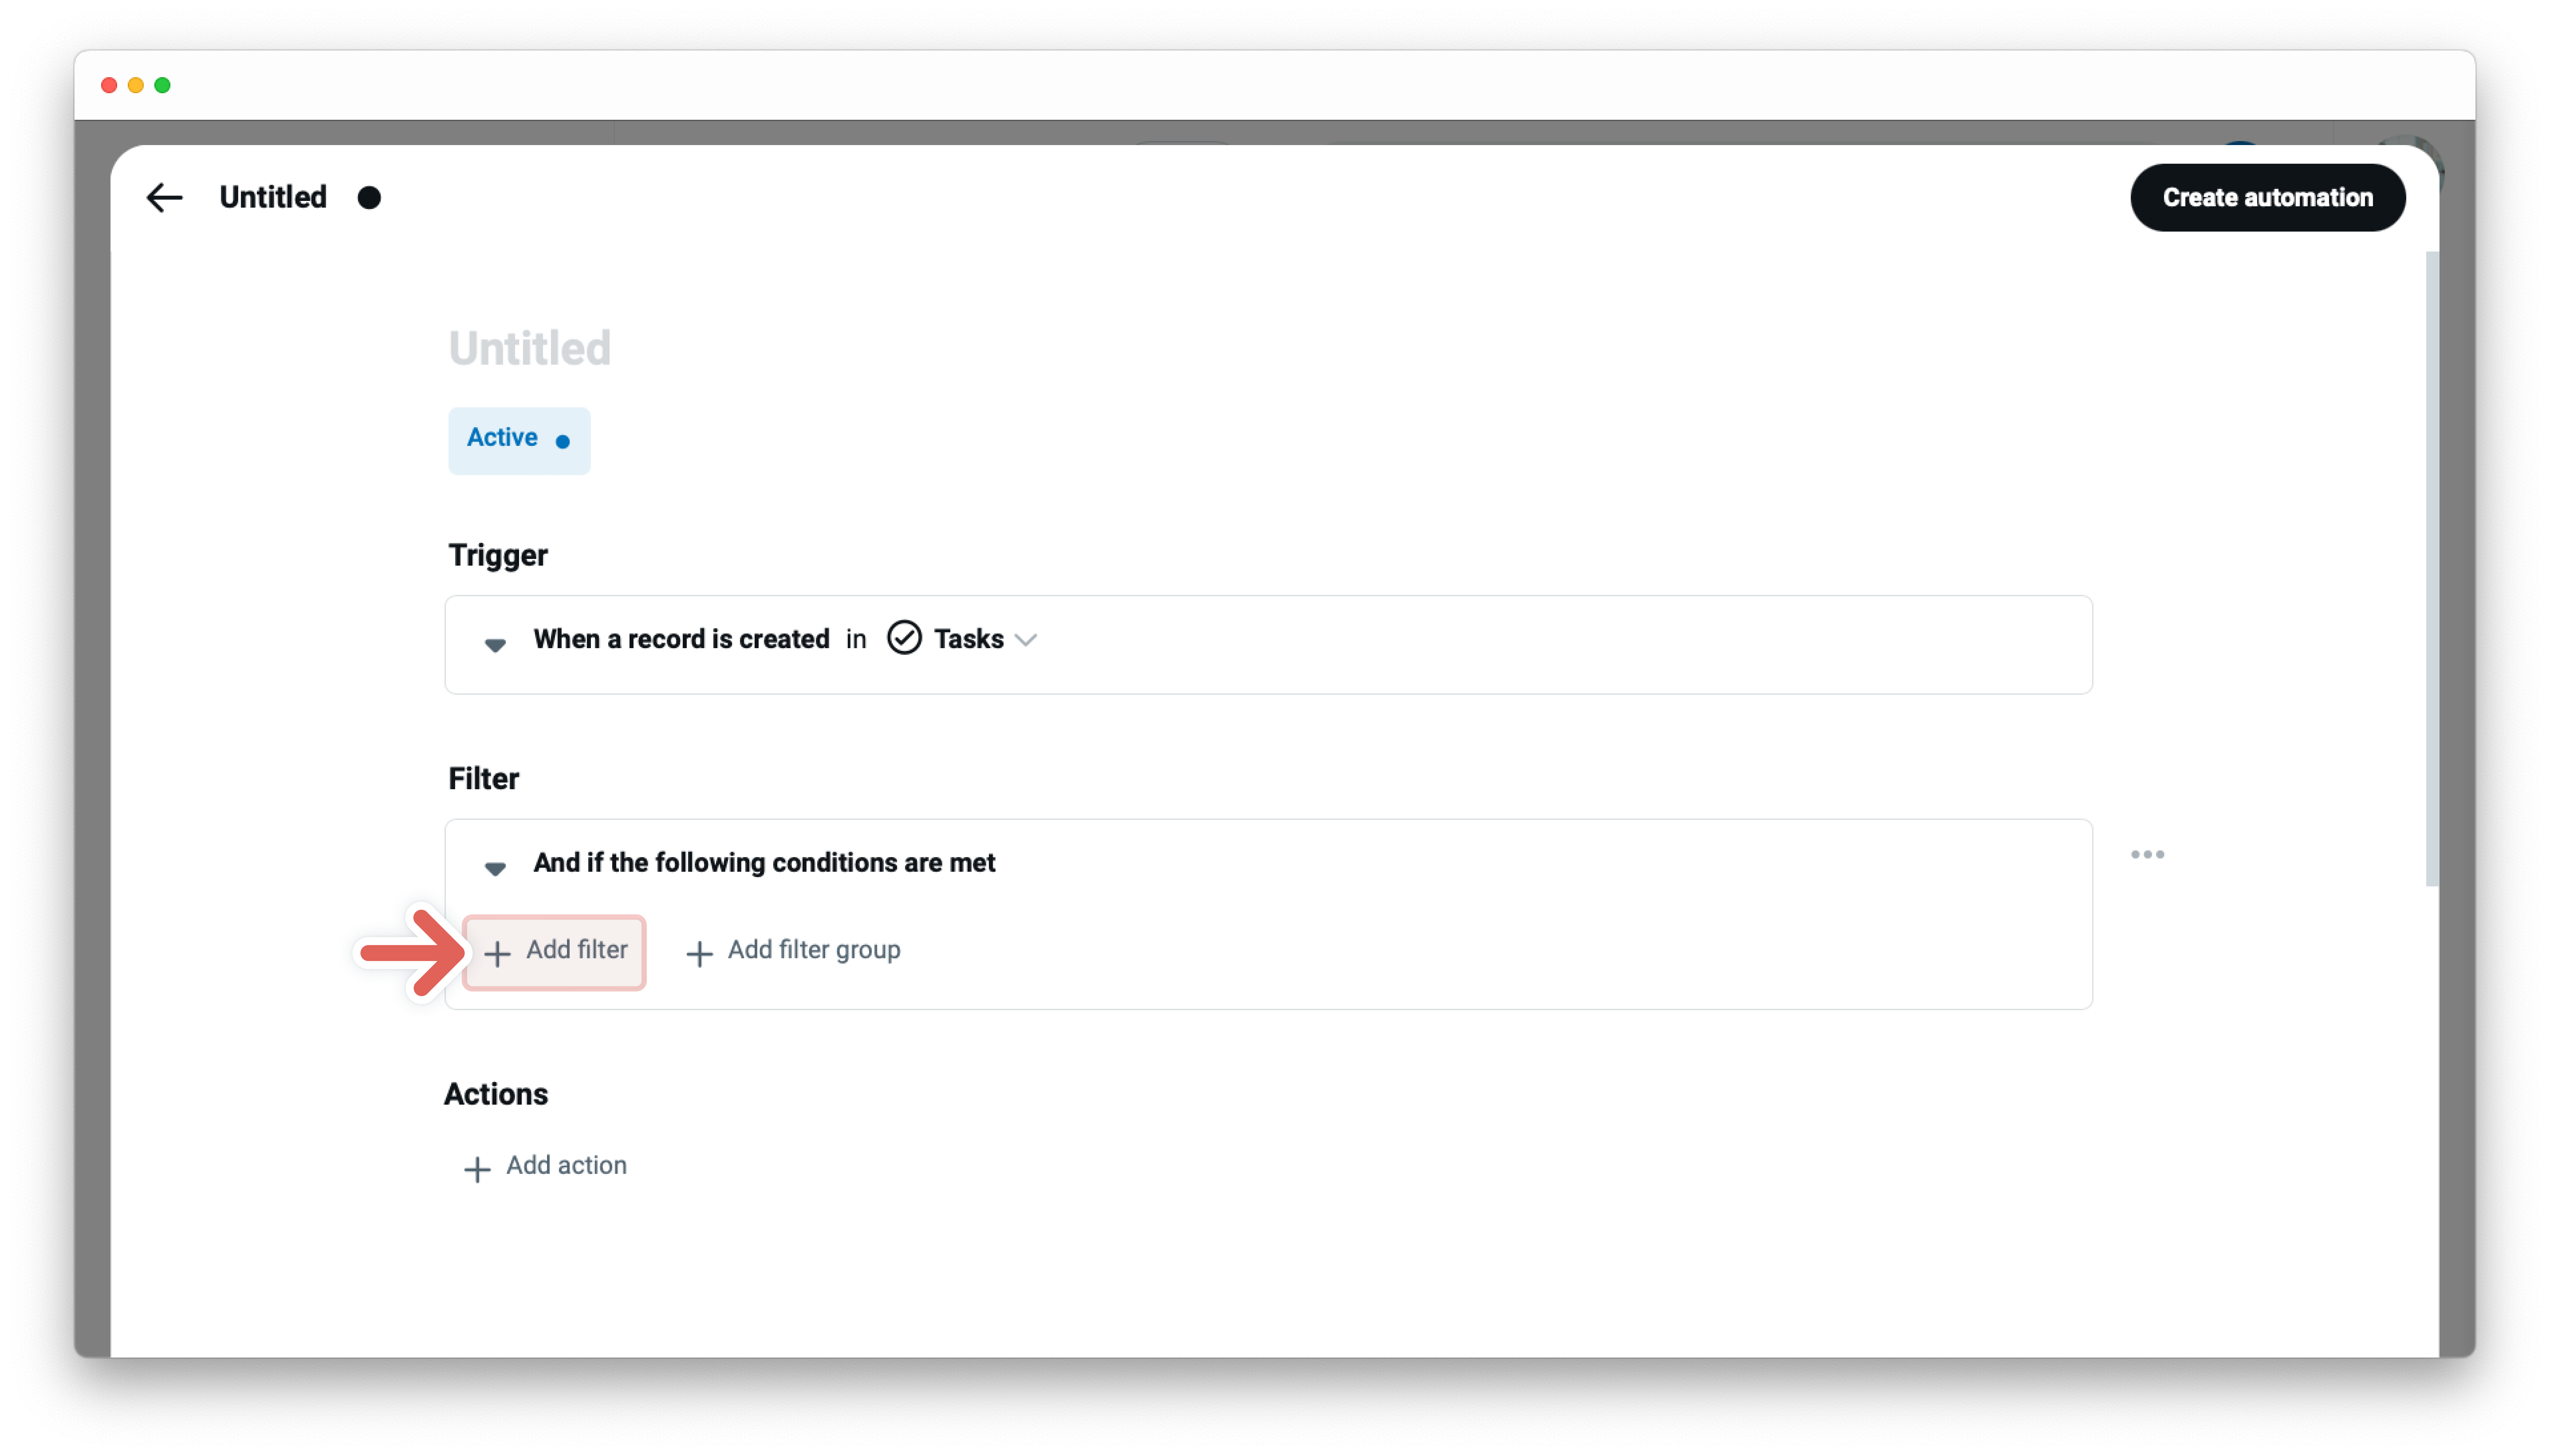
-
Choose the existing filter or click
+ Add filterto add another filter -
Set your filter to start actions only if certain conditions are met:
- A field to be evaluated, at the first dropdown menu
- An operator at the second dropdown menu, i.e., Contains, Does not contain, Is not, etc.
- A field value - enter the field value for the selected field from the first dropdown. Note that the operators e.g. “is empty” and “is not empty” do not require you to input a field value
-
Third automation block - Action - the “Then do that” automation statement
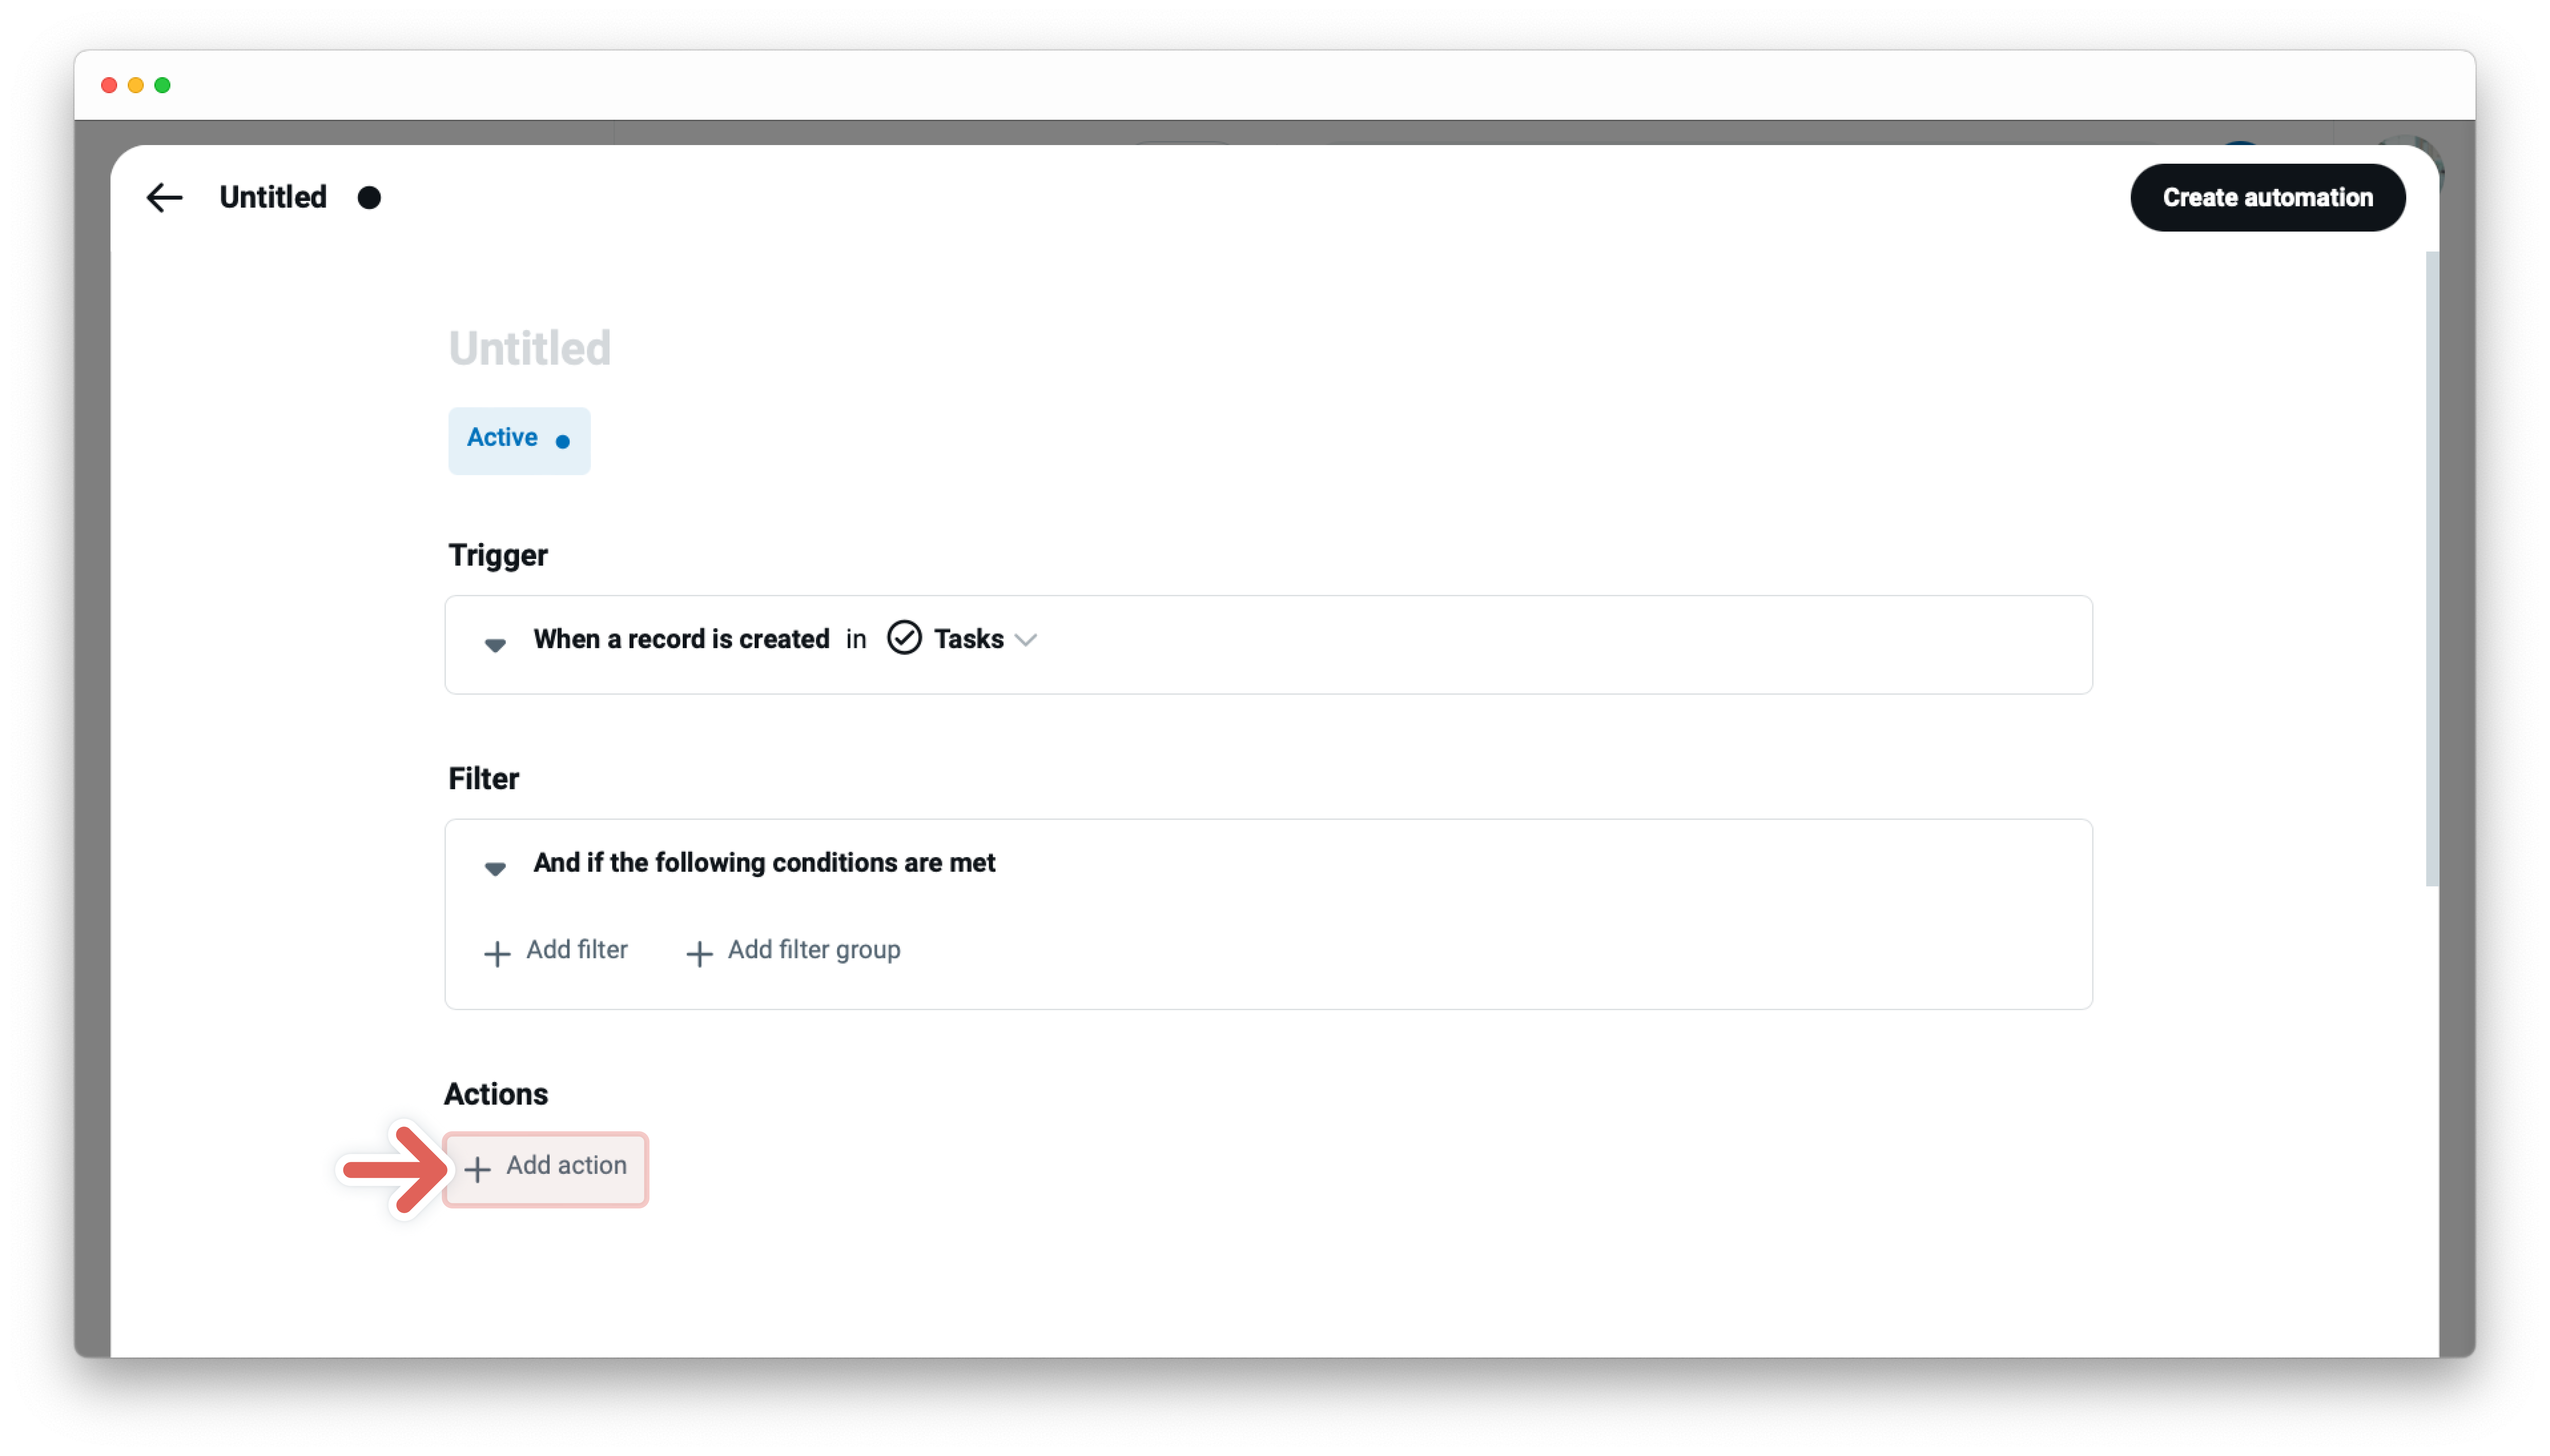
-
Click on
+ Add actionand choose between various actions for exampleUpdate record -
Click
+ Add field- every field type has its own row. Add as many as you like -
Set up the action condition to create the new record:
- A field to be evaluated, at the first dropdown menu
- An operator at the second dropdown menu depends on the selected field type i.e., Set value, Set options, Set date, etc.
- A field value - enter the field value for the selected field from the first dropdown
-
Click on
Create automationat the top right
![]() The automation will run automatically in the background to look for the trigger event and it will run the action steps every time the trigger event occurs.
The automation will run automatically in the background to look for the trigger event and it will run the action steps every time the trigger event occurs.
Edit and manage automation
The automation editor allows you to edit or manage automation and holds all the important details about your specific automation. To open the editor - click the card with the title of your automation at the gallery of the automation center. From this point, you can choose between various options.
Name and description
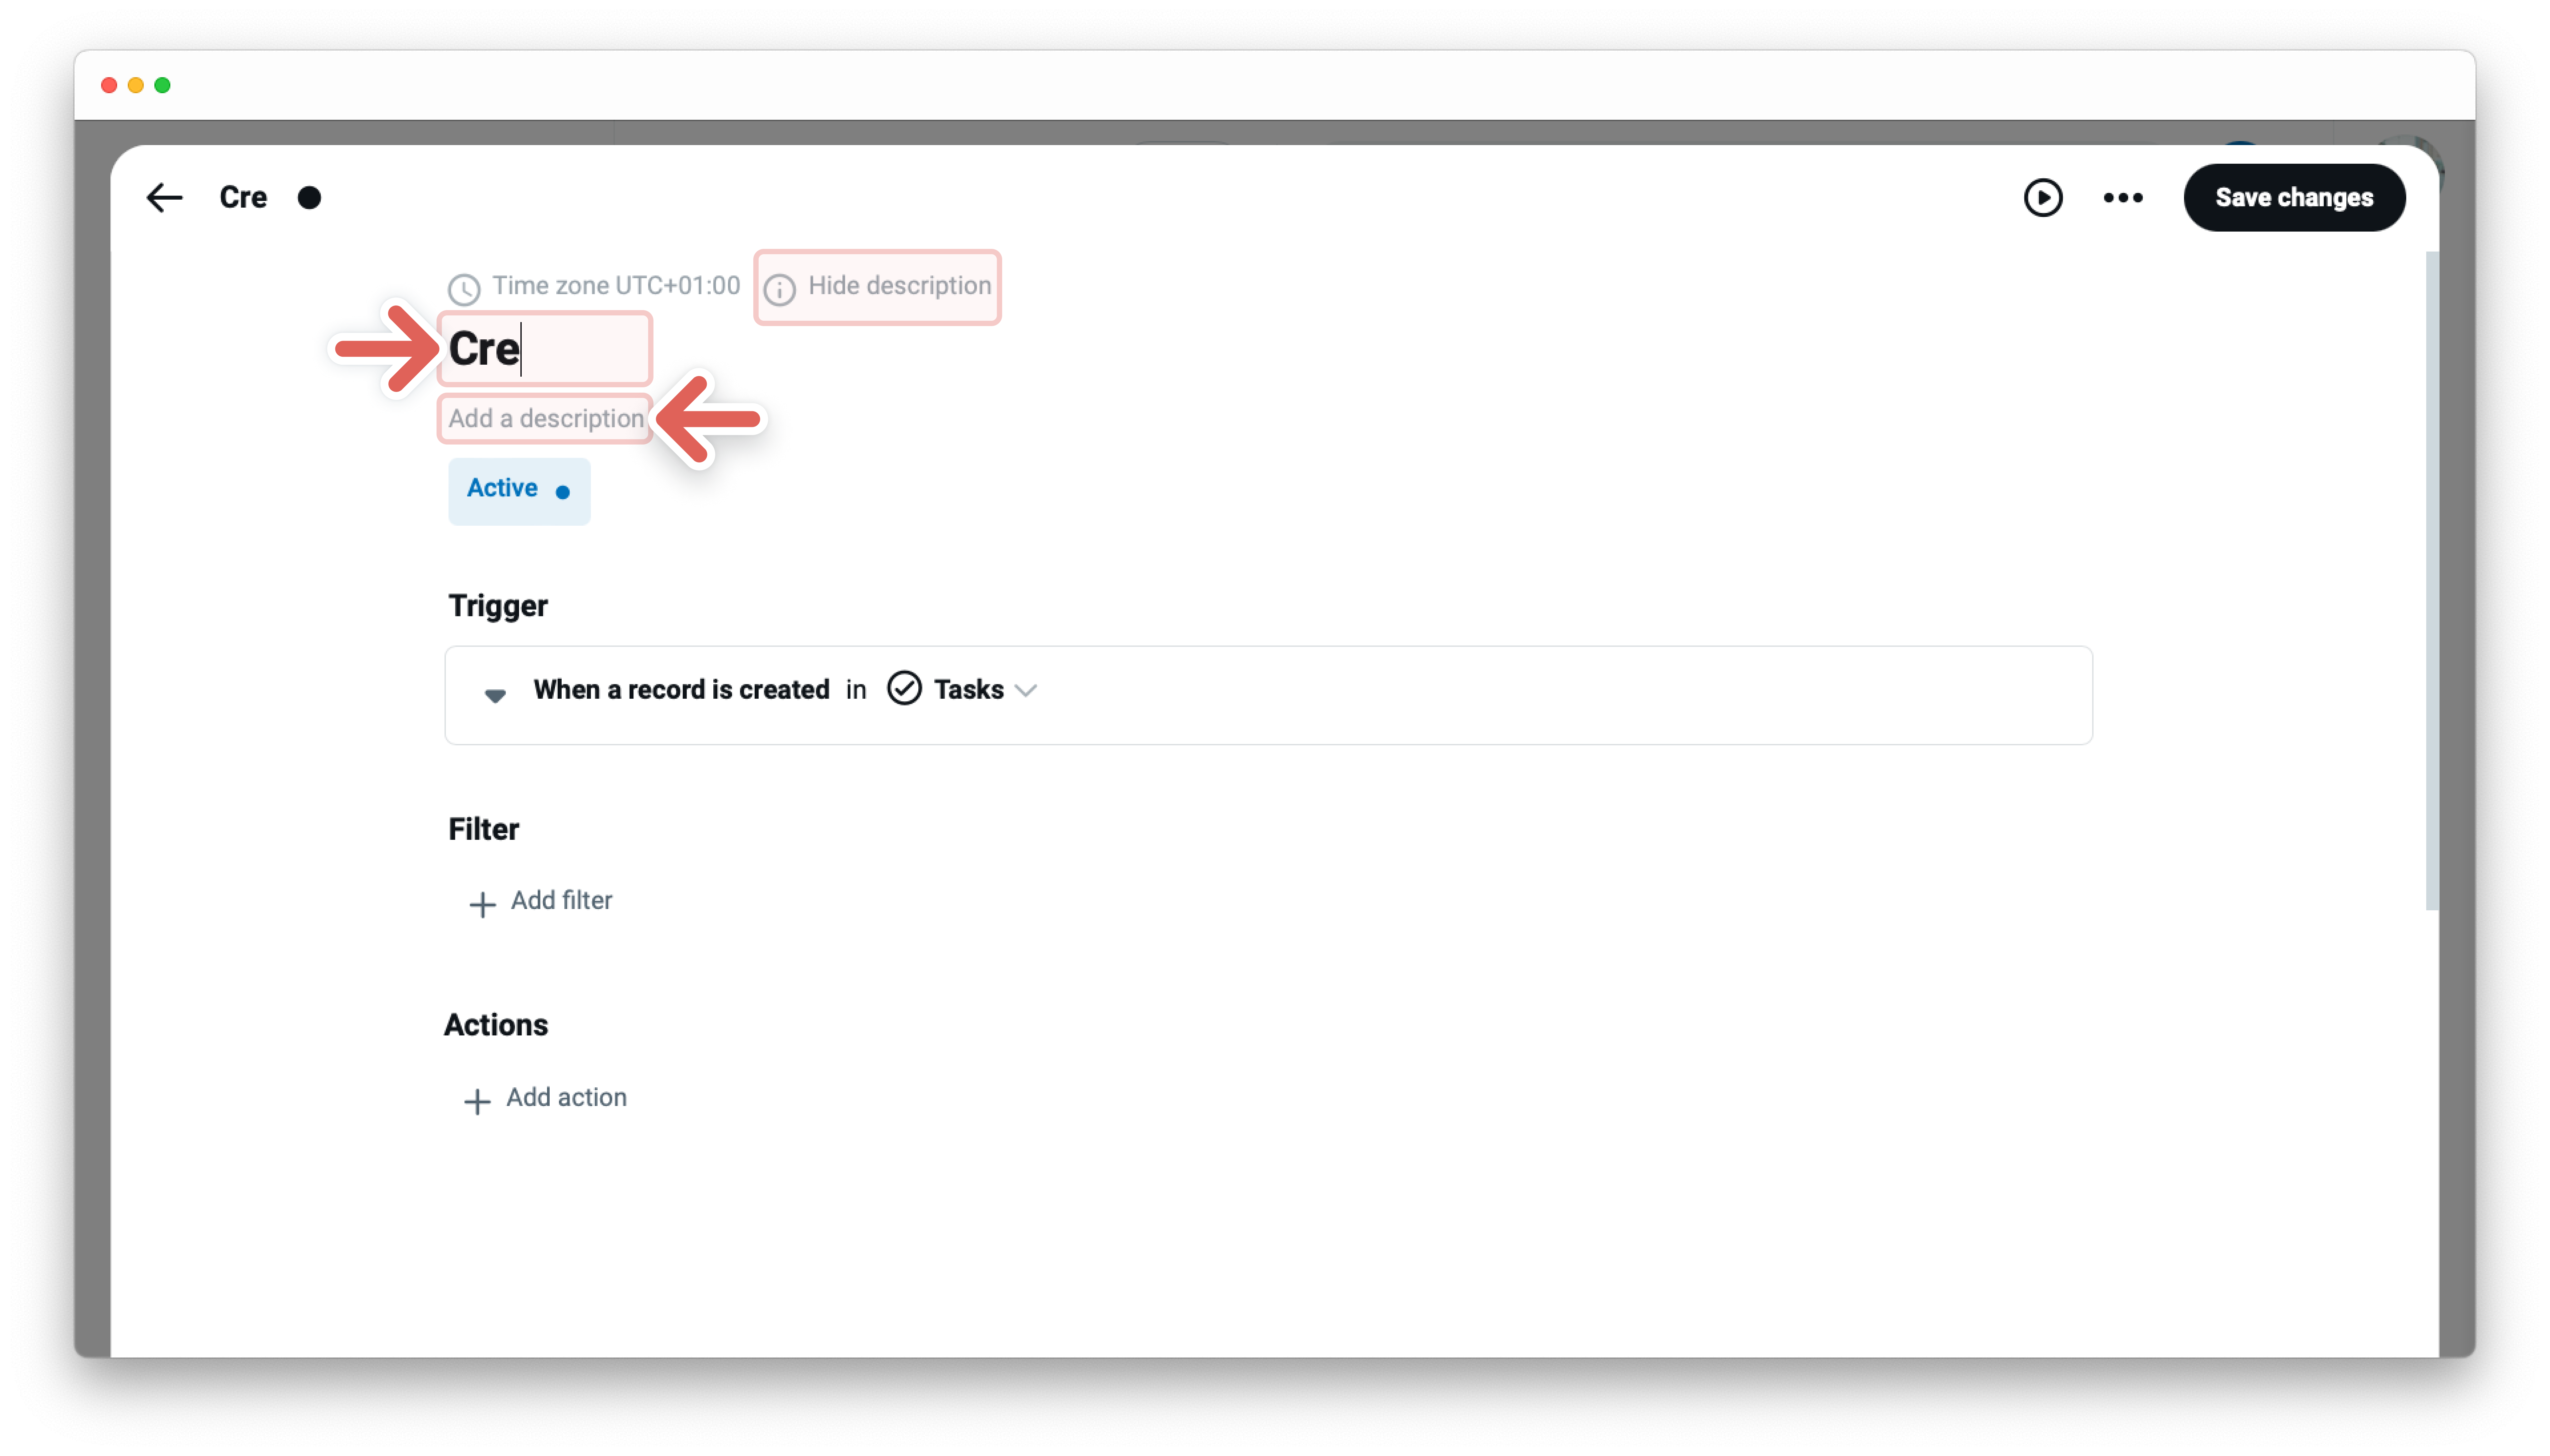
Click in the name or description of the automation and change it. If there is no description yet hover over the name and click Add description.
Status
Click on the light blue Active button to pause the automation or the light grey Paused button to activate it again.
The light red Broken button indicates that something is wrong with your automation. Check for quick troubleshooting if any fields in your filters or action blocks are marked red. Those should be corrected.
Trigger
The first block in the automation editor offers different settings and setup options. Learn more about the number of existing/the status of triggers and how to edit them →
Filters
The second block in the automation editor has various settings and setup options. Learn more about filters and how to edit them →
Actions
The third block in the automation editor has multiple options for setting and setup. Learn more about the number of existing/the status of actions and how to edit them →
Helpful info for editing
To save every change you can choose between one of these options:
- Click on the
Save changesbutton on the top right of your editor - Click the
...menu on the top right of your editor and selectSave - Use the keyboard shortcut:
cmd+s
To undo you can either:
- Click the
...menu on the top right of your editor and selectUndo - Use the keyboard shortcut:
cmd+z
To redo, there are two ways:
- Click the
...menu on the top right of your editor and selectRedo - Use the keyboard shortcut:
cmd+shift+z
Navigate
There are several ways to navigate.
From an executed automation in the record to the automation editor:
- Go to the activity stream of the record
- Click on the
⚡automation icon to open directly the correct automation in the automation editor
From an app to the automation editor:

- Go to an app
- Click on the
...menu next to the app name - Tap on
Workflow automation - Select an automation card in the gallery and click on it to open the automation editor
Learn more about automation center →
From the automation editor to records:

- Click
▶on the top right of your editor or use the shortcutcmd+Bto open run history - Select a run
- Hover over a record and click to enter the record
Learn more about run sidebar →
Types of runs
There are three kinds of runs:
- Regular run called run - a trigger is an event that starts automation - as described here
- Manual run - starts the automation by manual execution by a person and skips the trigger - check out more →
- Simulated run - advanced feature to check complex inputs - check out more →
Troubleshooting
The best place to start, when your automations are not performing correctly, is to view your automation runs. Typically, an error will show. Check out more →
Tooltips and useful keyboard shortcuts
Hover over various icons and other automation elements to get keyboard shortcuts, descriptions, or further insights.
Use keyboard shortcuts to speed up your work. Check out more →
Showcases
Once you have duplicated the showcases, you can customize the showcases as you like without wasting time rebuilding them. For a head start, please check out more →
New to workflow automation by Tape? Here’s a summary of what you need to know about automation.
To enable any type of automation, you’ll need to set up a trigger and one or more actions. Some automations also use filters.
- A trigger is an event that starts an automation. The “When this happens” statement. For example, “When a status changes” Learn more about →
- Filters are optional and start actions only if certain conditions are met. The “And if conditions are met” statement. For example, "only if the status changes to done" Learn more about →
- An action is an event the automation performs automatically after it is triggered. The “Then do that” statement. For example, “then send an email to a customer” Learn more about →