We just launched a new trigger for our supercharged workflow automation ![]()
![]() When a webhook is received
When a webhook is received ![]()
Another trigger to choose when setting up the automation event.
Overview
By using the “When a webhook is received” trigger you are taking advantage of the increasingly popular technology of webhooks. Webhooks allow Tape to communicate with other web applications (e.g. Shopify, Slack, Gmail, etc.) to get real-time information. Typically, webhooks send notifications when activities occur.
For example, running a Shopify online shop. Webhooks can notify you within Tape when a customer adds items to a shopping cart or pays for an order.
Tape’s webhooks can be set up without programming using variables. Optionally made even more powerful with the use of JavaScript for developers.
A simple use case
“When a customer pays for an order in your Shopify online shop (Trigger) then create a new record with the title of the customer’s name” (Action)"
Create automation using the trigger “When a webhook is received”
-
First automation block - Trigger - the “When this happens” automation statement
- Choose the trigger
When a webhook is received - Click on the
Copybutton next to the from Tape created unique, custom URL - Save this URL to another web application and specify the information you want being sent to Tape e.g. customer pay for an order. Details see in related documentation e.g. Shopify Webhooks · Shopify Help Center
- Most web applications have the ability to test your webhook, to make sure that the information you want is being sent to the correct URL in Tape. If not, create in the web application the webhook activity that sends information to Tape.
- Check the incoming data in Tape by clicking the
Refreshbutton at the end of the trigger block. Now the incoming data are updated in the field above the refresh button.
- Choose the trigger
-
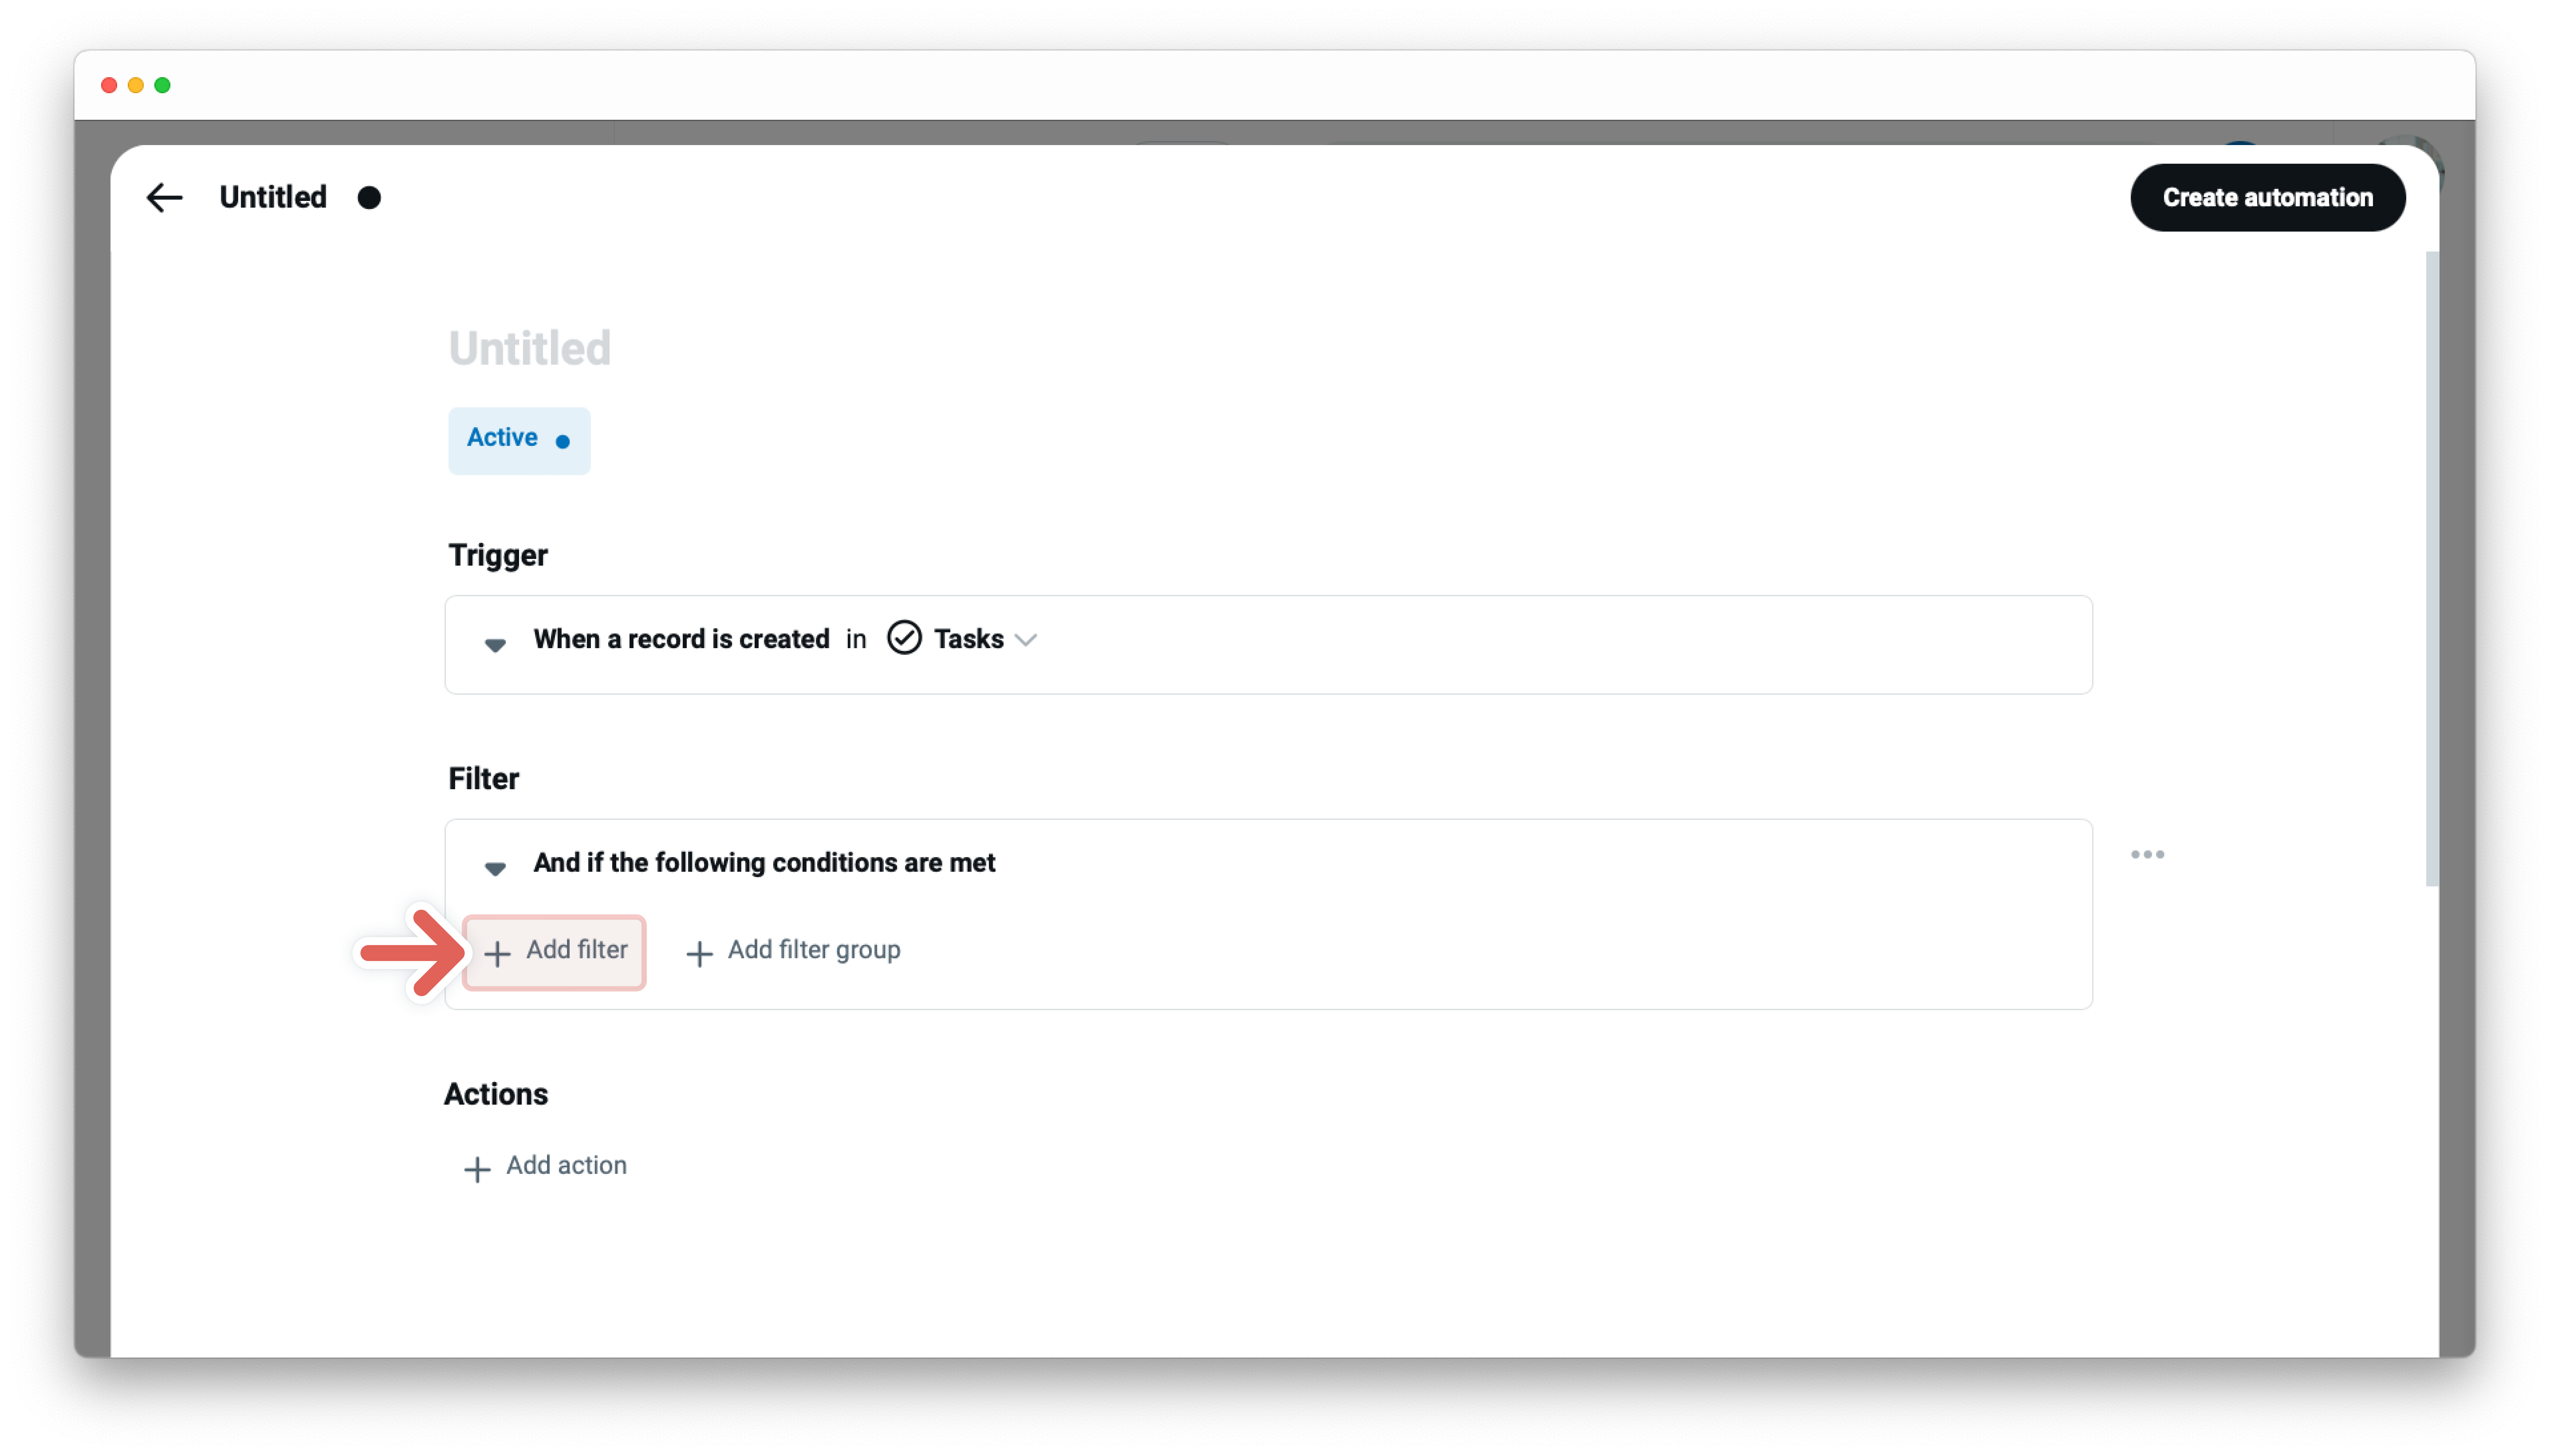
Second automation block - Filter - the “And if conditions are met” automation statement
- Set your filter conditions to start actions only if certain conditions are met:
- Currently, filters at webhooks can only be used with code, visual filters will follow
- Set your filter conditions to start actions only if certain conditions are met:
-
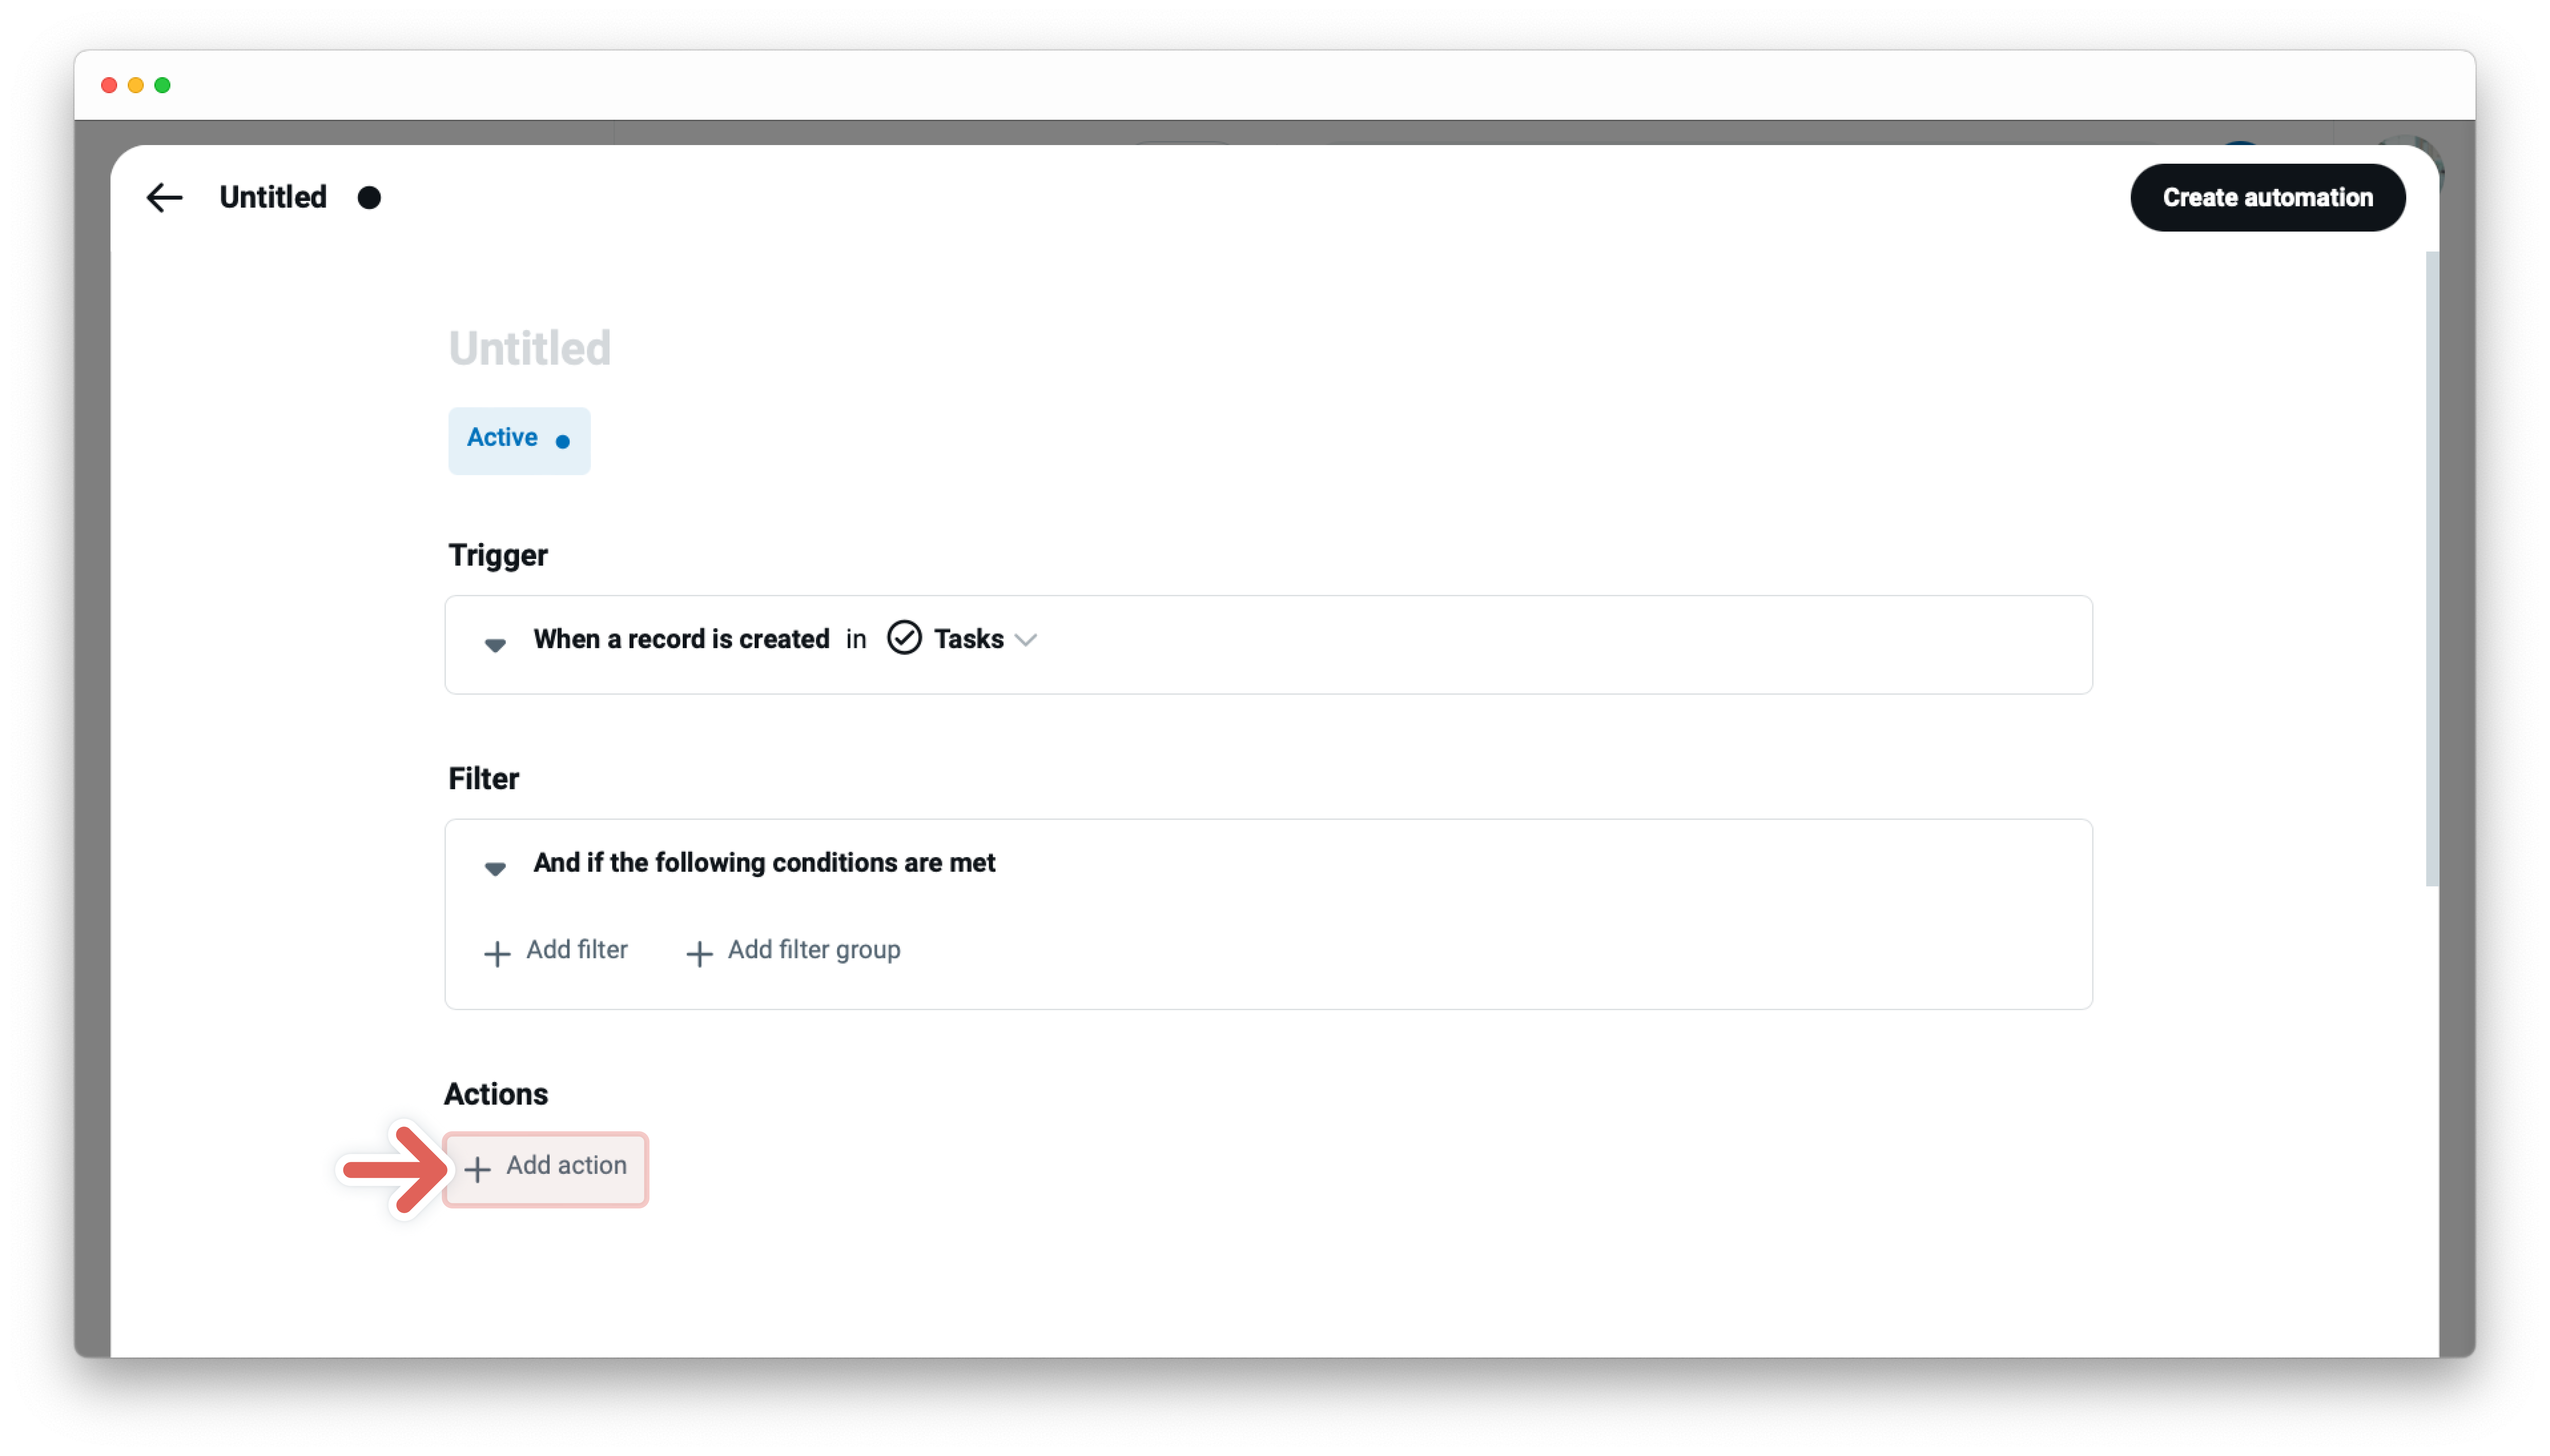
Third automation block - Action - the “Then do that” automation statement
-
Click on
+ Add actionand choose between various actions -
Set up your action depending on your selected action such as in the simple use case above the action
Create new record -
Click
+ Add field- every field type has its own row. Add as many as you like.- A field to be evaluated, at the first dropdown menu
- An operator at the second dropdown menu e.g. Set value
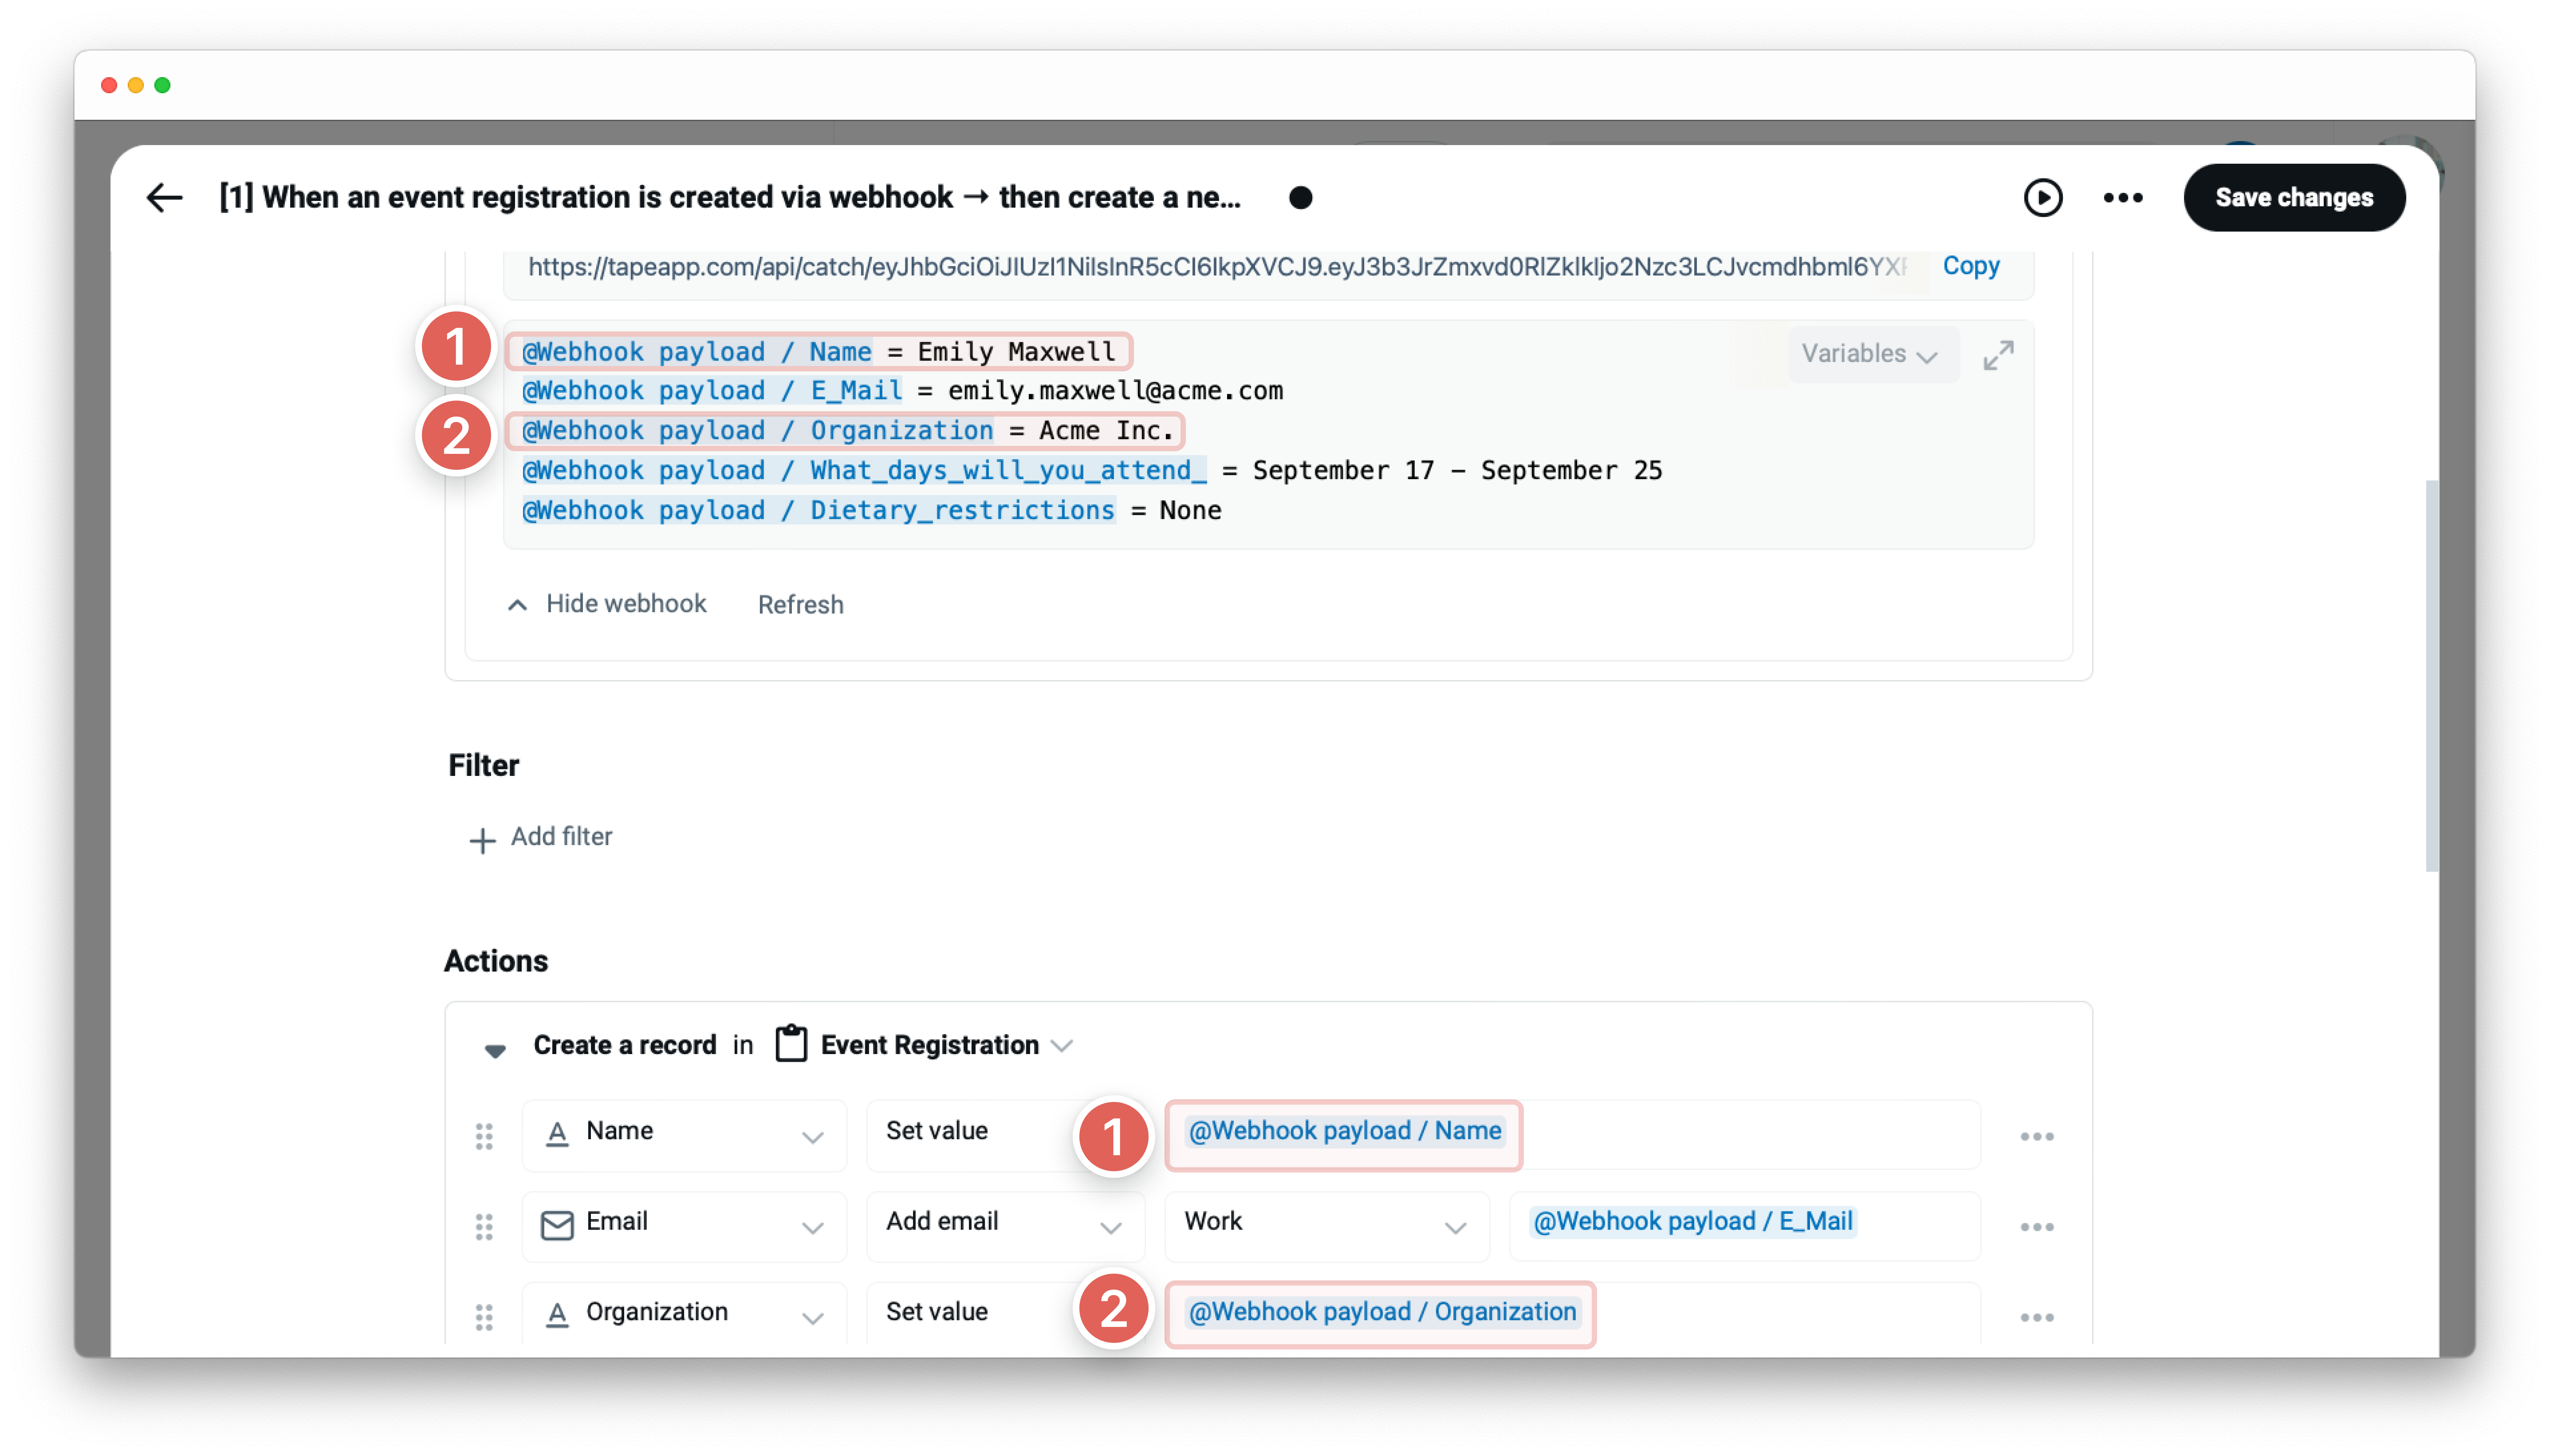
- A field value - enter the field value for the selected field from the first dropdown, to use variables type the @symbol
 Note: Tape provides the incoming information at the trigger with variables that you can better work with it. Variables are placeholders that are replaced with values when your automation runs. Each incoming information is always structured in the same way, they start with a variable marked with the @symbol and the blue font color and behind the relevant value in black font color. Make sure the dropdown box
 Variablesis selected when you hover over the information at the trigger. For developers to use JavaScript change it toPayload
-
Click on
Create automationat the top right
-

Nice to know
Incoming data is always sent to tape via a webhook. Use the action “Send a HTTP request” for outgoing data.
Edit and manage trigger
The automation editor allows you to edit or manage triggers and holds all the important details about your specific automation. To open the editor - click the card with the title of your automation at the gallery of the automation center. From this point, you can choose between various options. Learn more about →
New to workflow automation by Tape? Here’s a summary of what you need to know about automation.
To enable any type of automation, you’ll need to set up a trigger and one or more actions. Some automations also use filters.
- A trigger is an event that starts an automation. The “When this happens” statement. For example, “When a status changes” Learn more about →
- Filters are optional and start actions only if certain conditions are met. The “And if conditions are met” statement. For example, "only if the status changes to done" Learn more about →
- An action is an event the automation performs automatically after it is triggered. The “Then do that” statement. For example, “then send an email to a customer” Learn more about →